
Just when I thought I had all the issues discovered, another one happens.
Battery Woes
I’ve been testing various things with the Archimedes A3010 (which I have been calling “Archie”) and noticed a problem. When it is switched off for over half an hour the CMOS settings get lost. But I have an RTC battery in, what gives?
I thought this was a little weird as if it was a battery problem I would have expected to fail in seconds to a couple of minutes. I therefore dug out the schematic to see what is up.
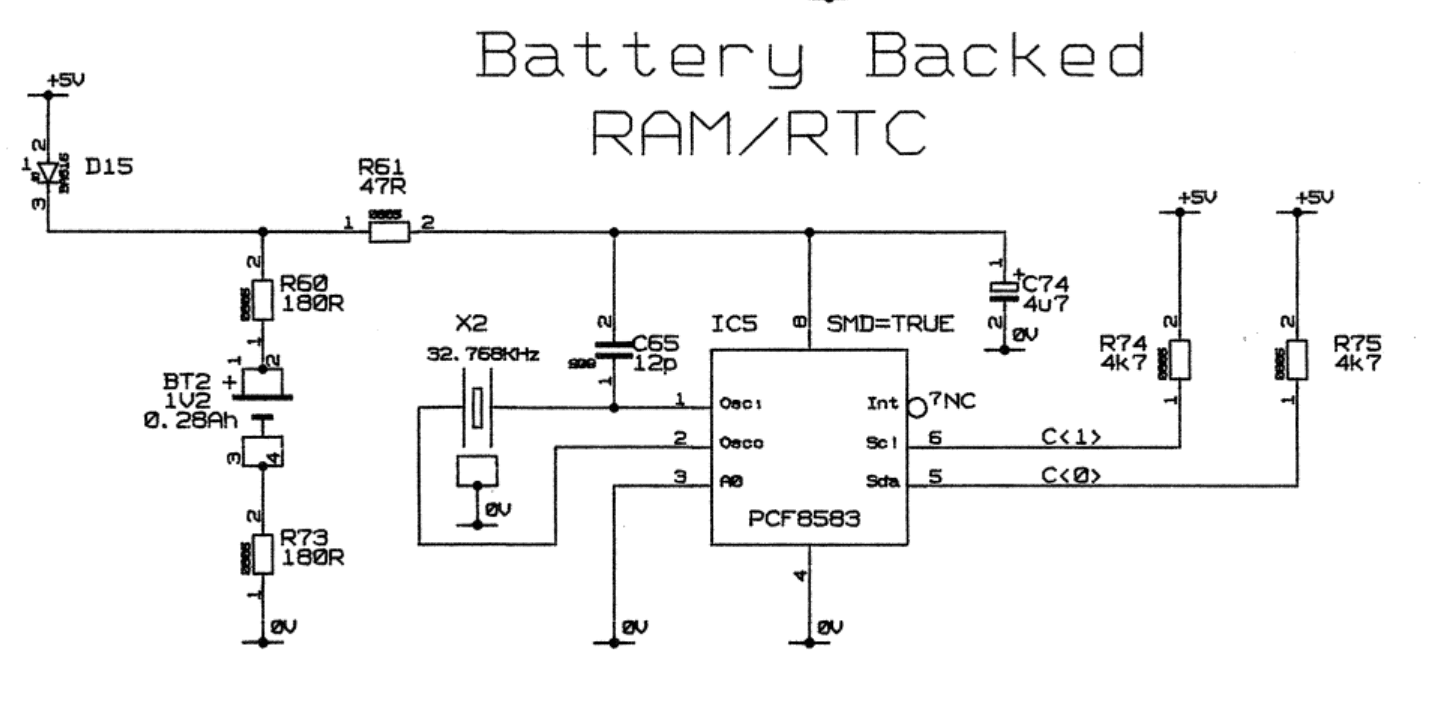
Checking the voltage at C74 a short time after I powered it off I got a reading of 0.5v and decreasing. This tells me two things:
- C74 has been keeping the chip running for that half an hour or so.
- The battery isn’t connected properly.
Probing around with the multimeter I found that R60 wasn’t actually connected to the battery. Another trace eaten by battery damage that I missed during my previous passes at repairing it. So, time to remove the battery module and repair it.
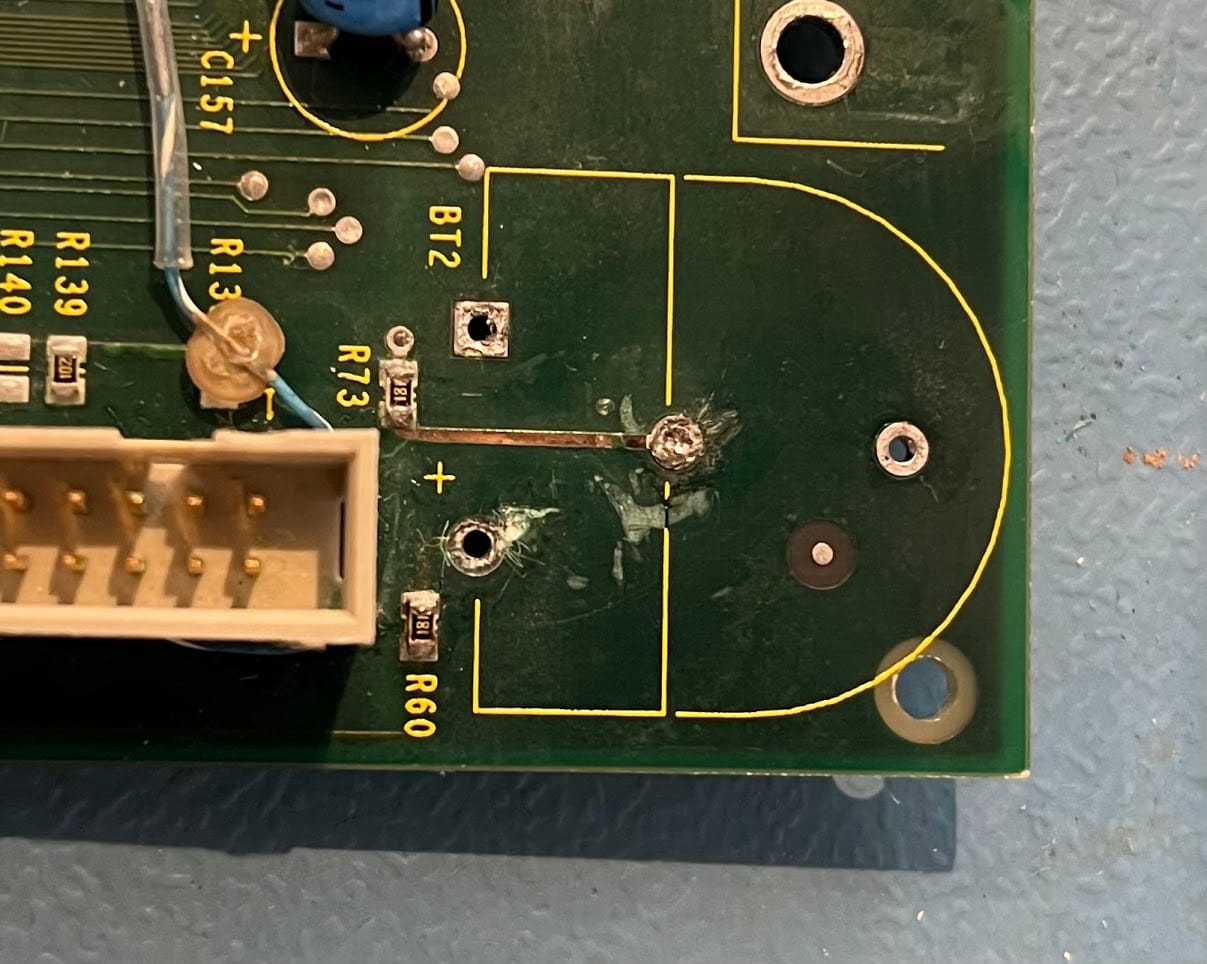
The fix was to add a tiny patch wire between R60 and the nearest hole to replace the damaged trace.
I have modified a version of my Amiga battery mod to fit by basically trimming the edge of the battery PCB a little so that it fits snug against the floppy drive connector.
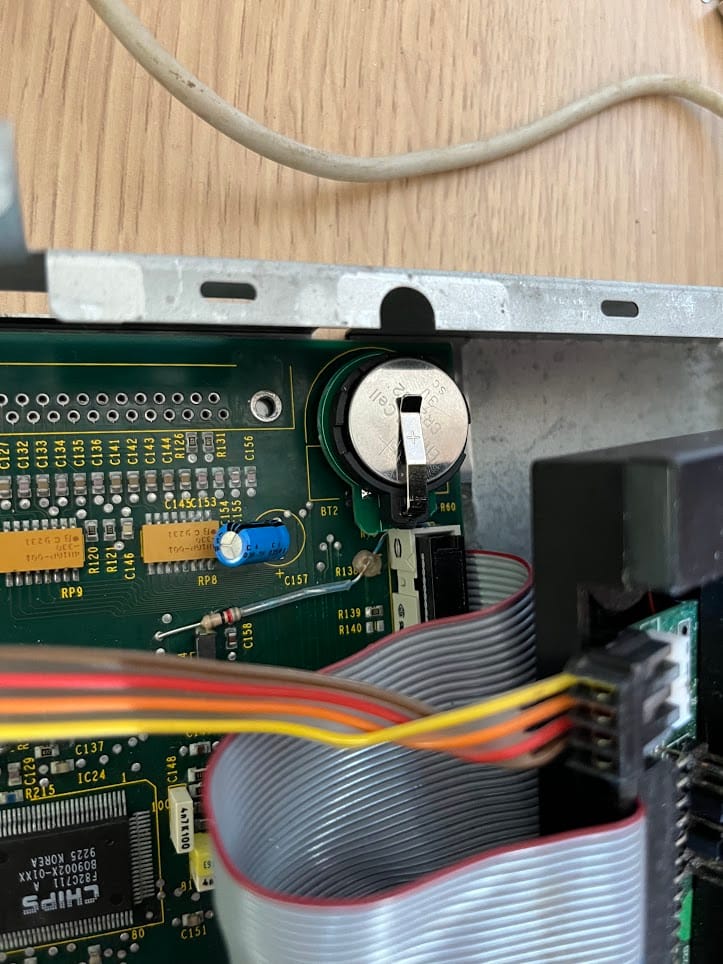
Once installed I tested this again at C74 and got a perfect 3V reading. The battery board protection circuit is designed to not have the same dropout as a diode based solution. If you want to build the battery mod yourself I made the design freely available here.
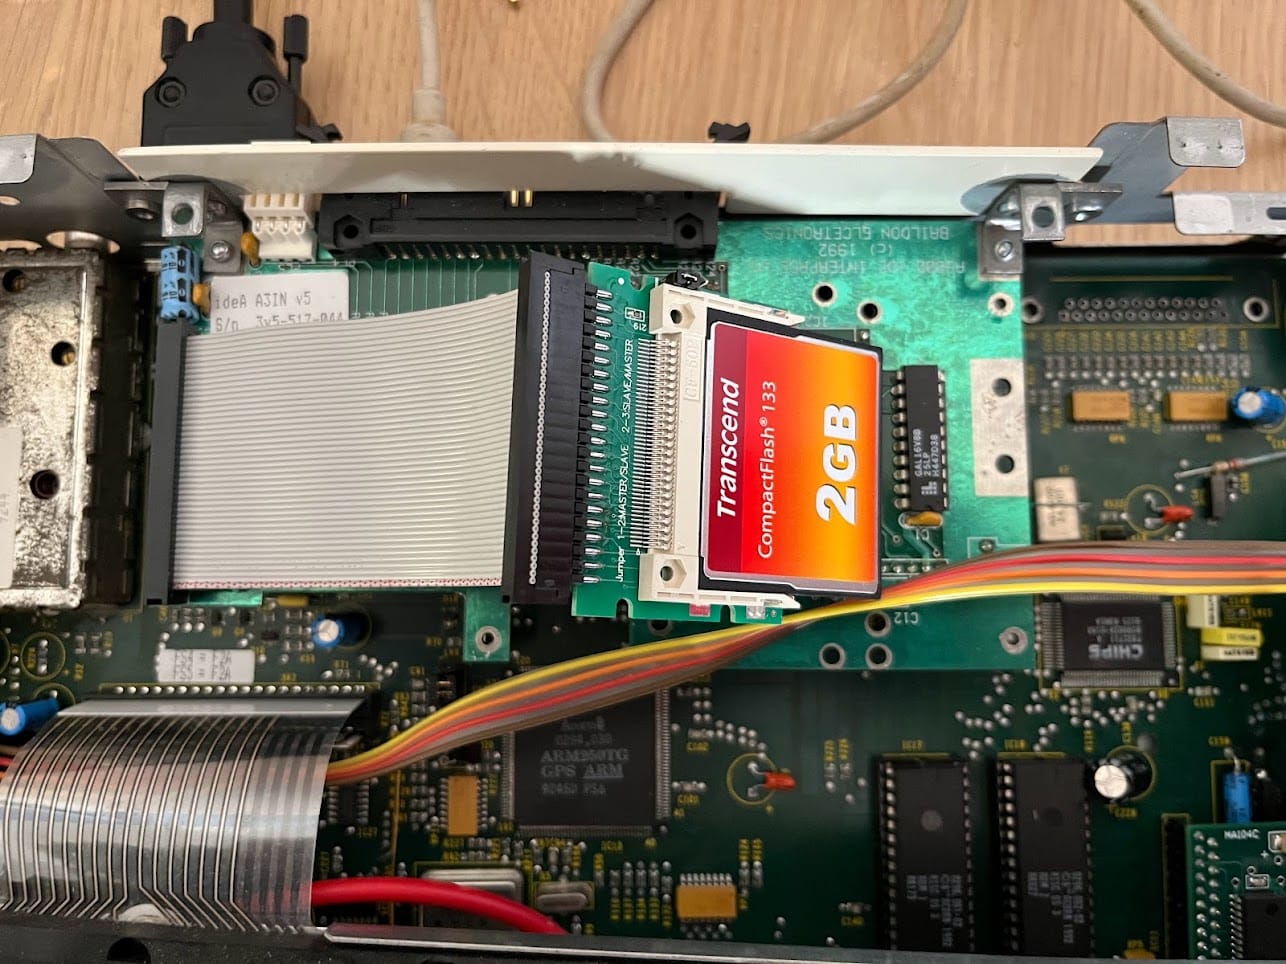
Hard Drive
Of course one upgrade that is very nice to have is a hard drive. The A3020 came with an interface for this, but the A3010 was a more cost-reduced version for home users and did not come with one. There are two ways of adding it. The first is to modify the motherboard to add the missing circuit and connector. I was not keen on this solution. The second is a “Podule”.
“Podules” are expansion modules for the Archimedes you can add interfaces such as midi using this, and indeed, IDE. A quick scan on eBay and I found a 1992 Balidon IDE interface for an Archimedes A3000. I took a gamble that it would work on the A3010 too as I knew the interface was the same. These addons have a ROM on them so just plugging them in adds everything needed to the OS for the drive to work (apart from formatting, we’ll get to that). I happened to have a spare 2GB CF card and IDE interface for it lying around in my Amiga spares, that hooked up nicely.

As for formatting, there is usually a tool on a floppy disk for this. I didn’t have this and could not find it online easily. Instead I used an alternative option. A Raspberry Pi.
RISC OS, the OS in the Archimedes, is available for Raspberry Pi! Granted it is a much newer version, but it is compatible. And this has a tool called “!HForm” to partition / format drives. So this was my rig:
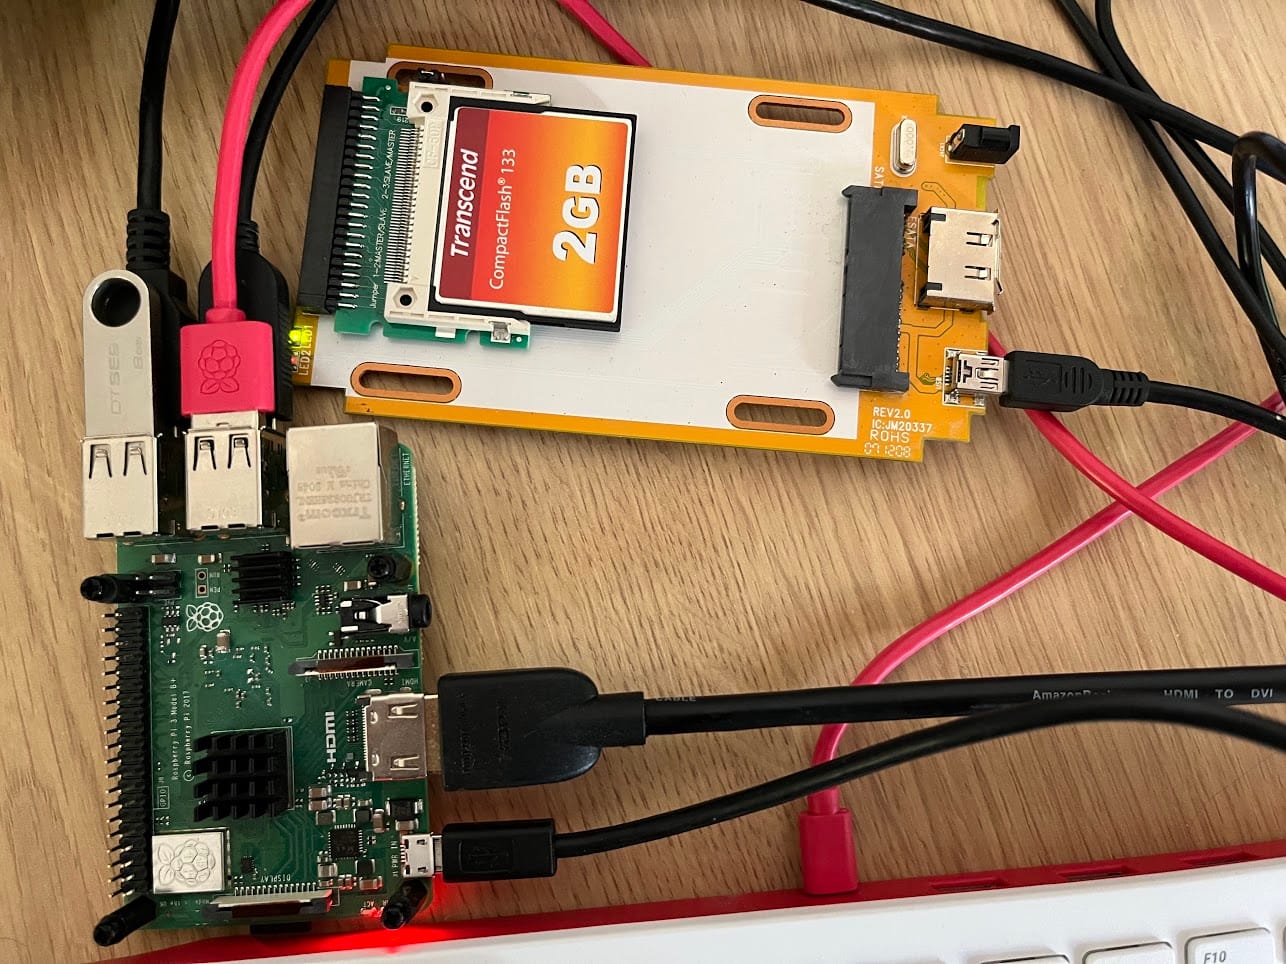

Whilst I have a 2GB CF card here, RISC OS 3.11 can only support 512MB drives. So when running “!HForm” I set it like this (not my screenshot):

The only difference is I selected ‘S’ at the beginning and drive ‘4’ due to the way I had it connected. I also copied ADFFS over which allows archived floppy disks to be loaded from the hard drive and the game “Magic Pockets” as this is one of my favourite Amiga games. The Pi’s RISC OS supports FAT32 USB sticks so copying things over was relatively easy. I did, however, need to change the file type on the Magic Pockets disk image to “Floppy” for it to work.
Once I plugged the CF card back into the A3010 it was immediately visible:
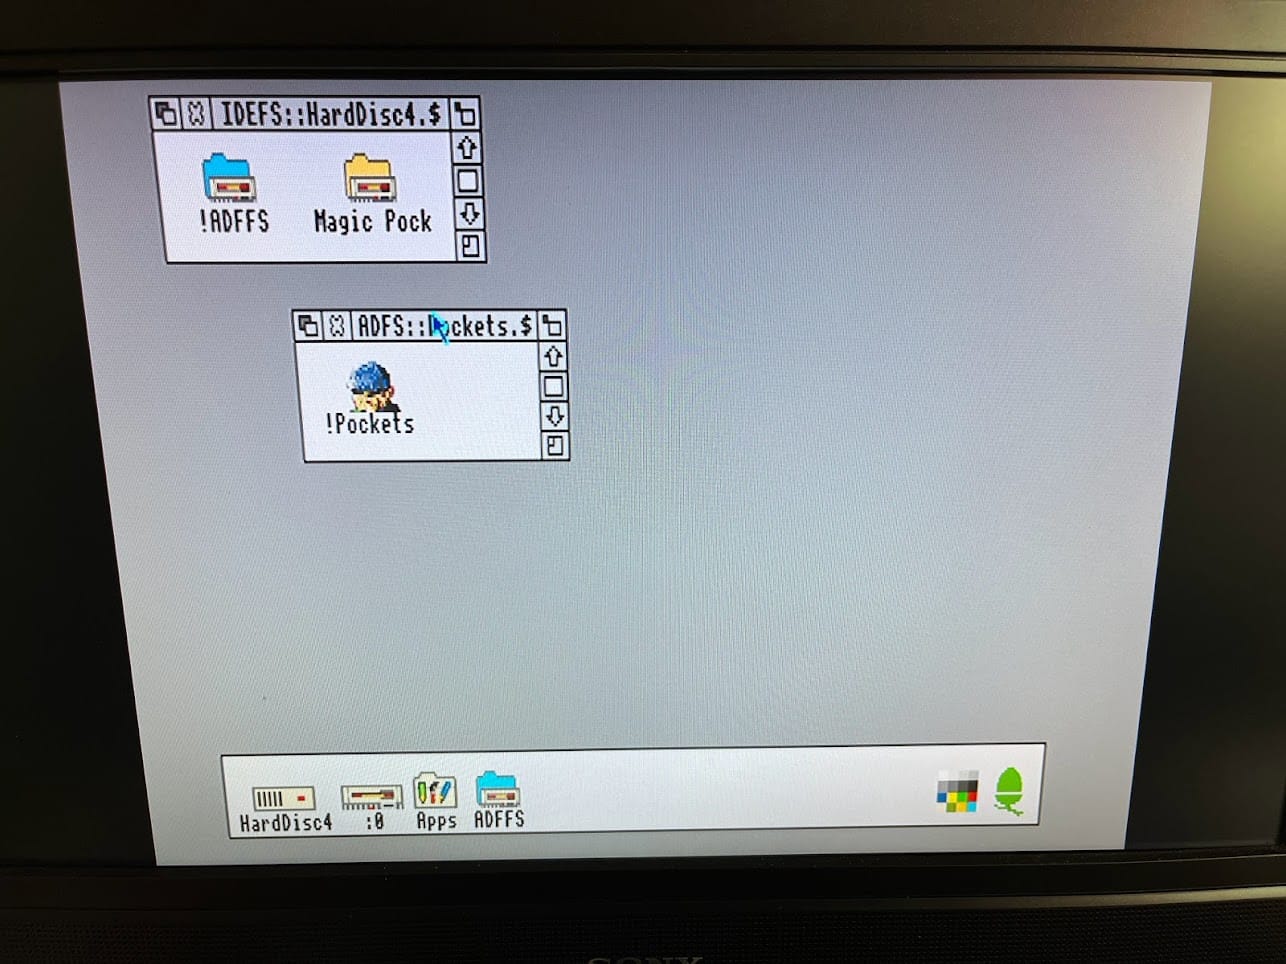
And Magic Pockets loads! Of course I can’t hear anything until I repair the audio jack and/or the speaker, but it seems to run quite smoothly!

Next up, replacing the removed damaged ports and speaker. Hopefully all that will be needed after that is a general clean.
Leave a Reply