

At the end of my last post I showed that my Australian C64 unfortunately was not in the best of health. After a bit of work there has been some progress so here is the update.
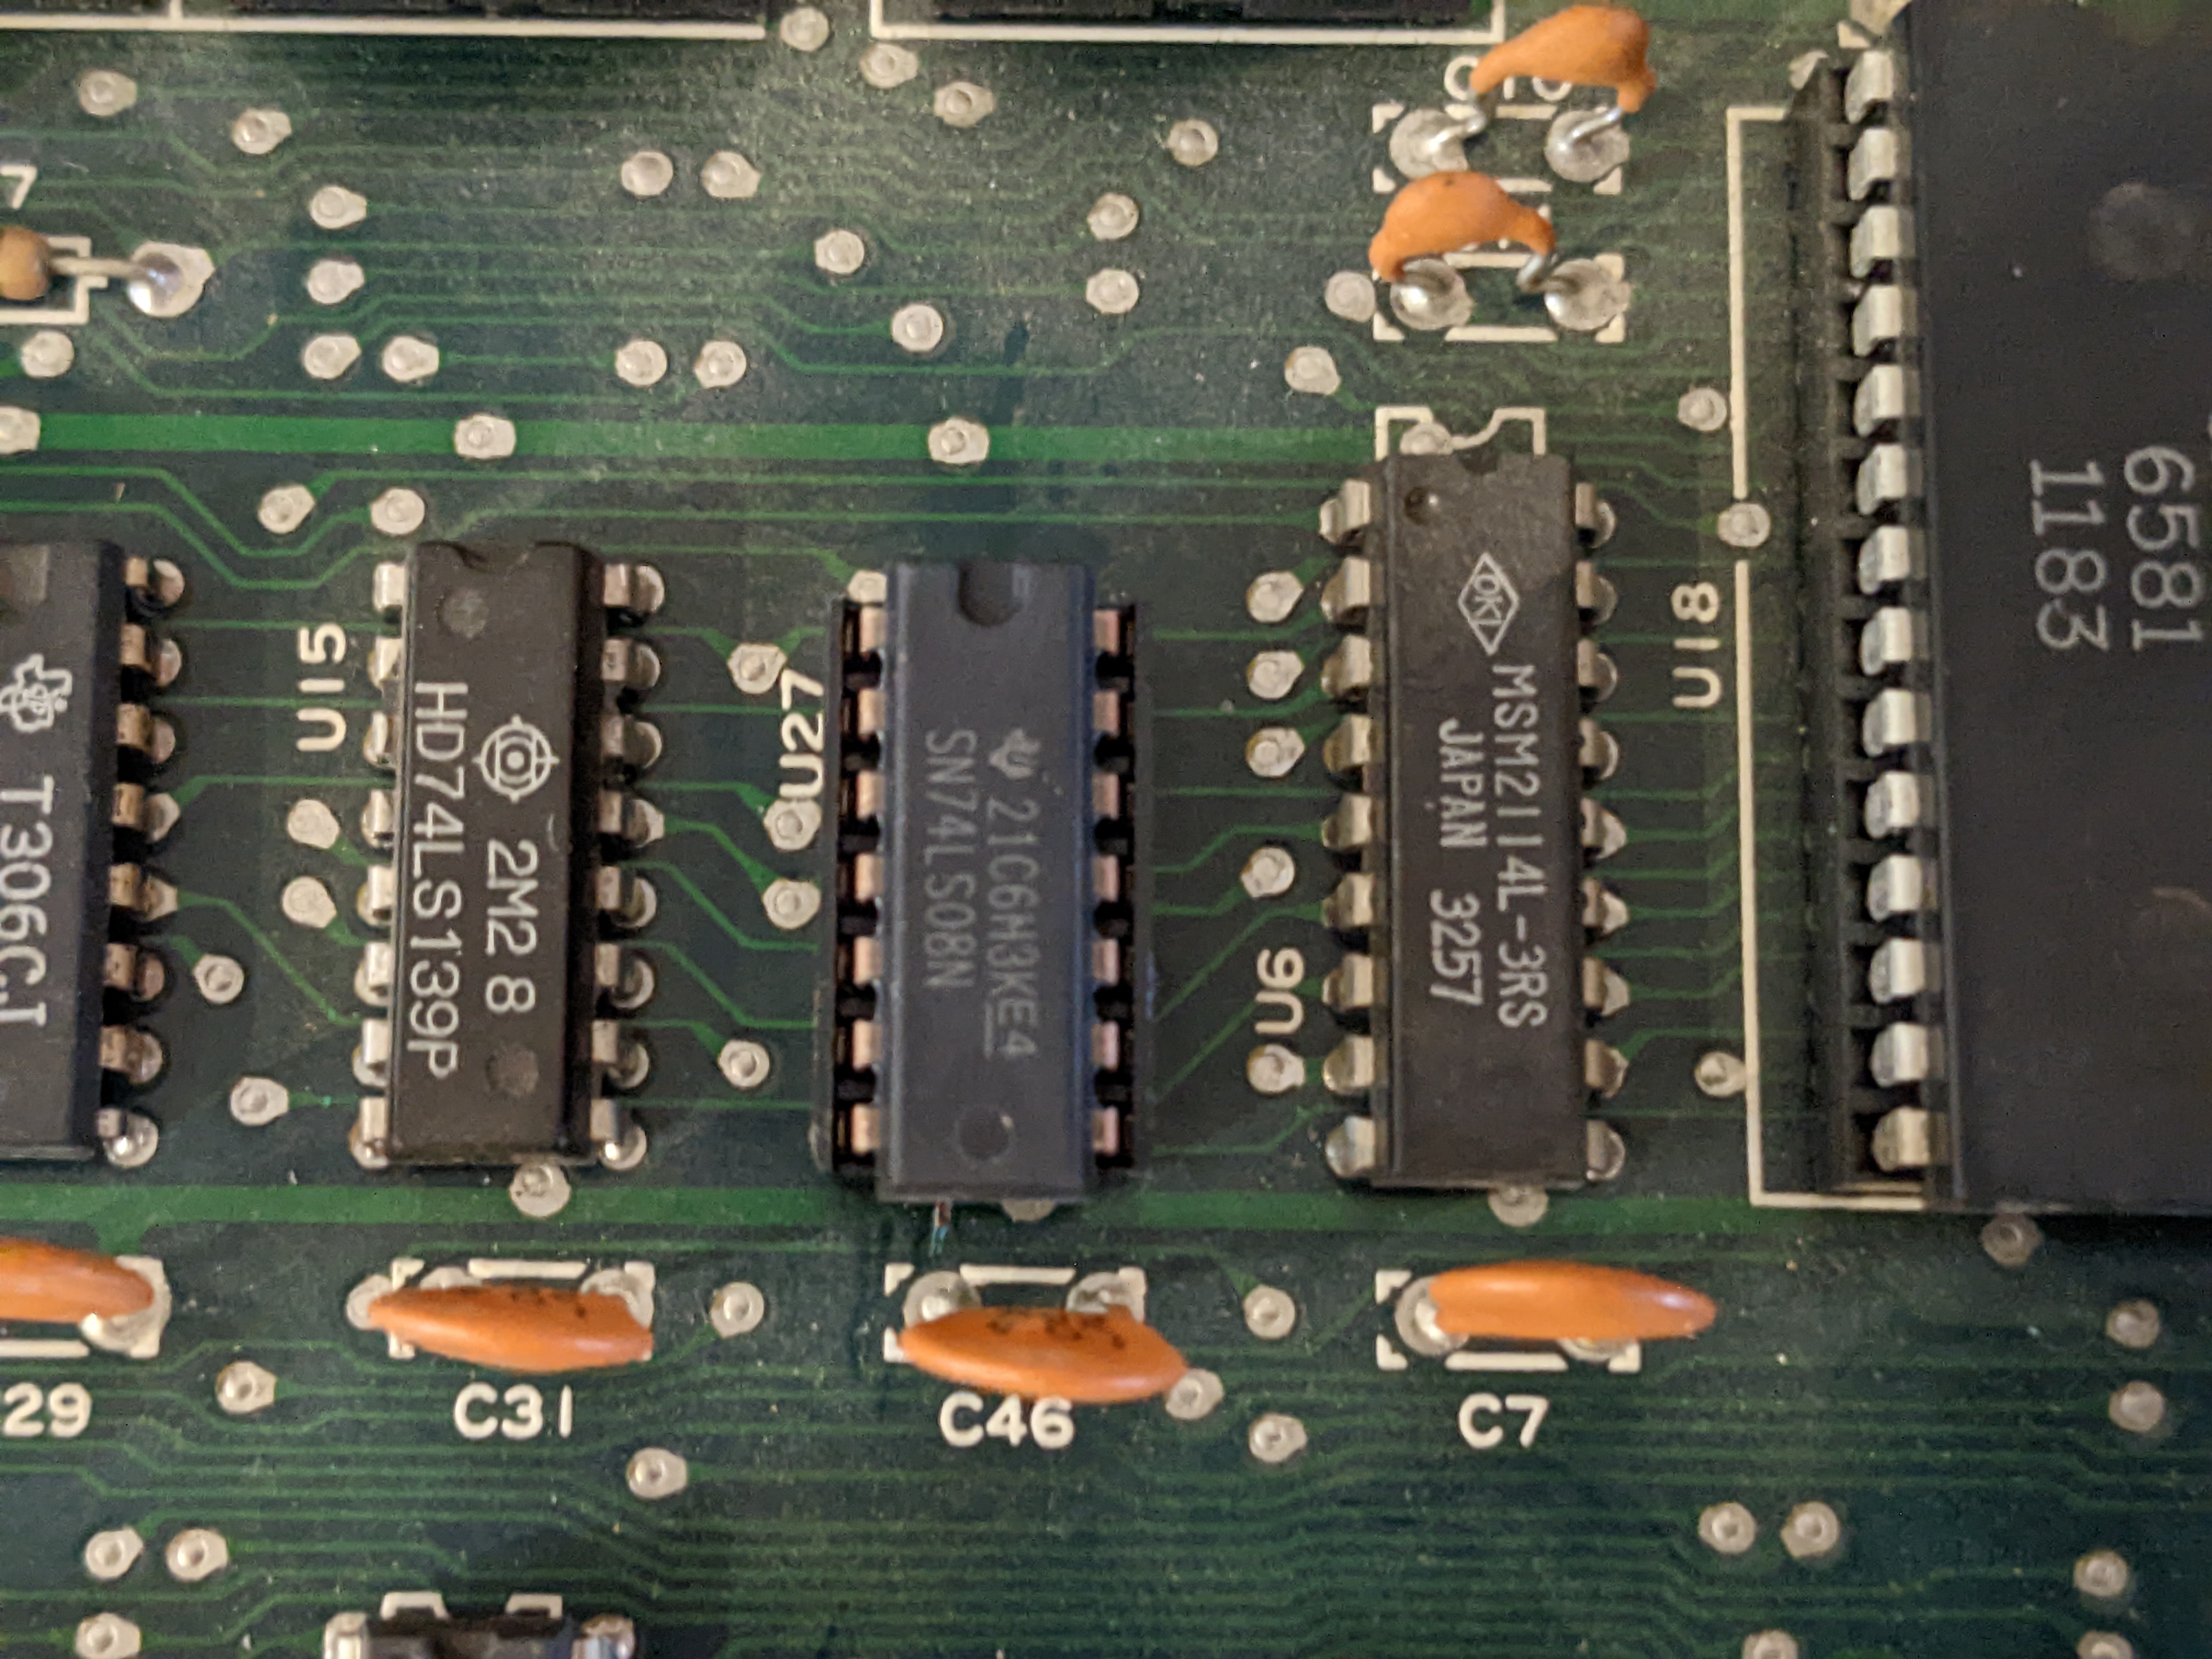
There is an awesome site called The Pictorial C64 Fault Guide which visually shows you what common faults with the C64 look like on the display. One potential issue that can cause the screen I was observing is a failure of U27 which is a bog standard AND gate IC. I figured it was an easy step to just replace this chip, putting a socket in its place. I didn’t have any 74LS08 DIP chips in my workshop so I ordered some. At the same time I ordered a diagnostics cartridge that had multiple modes to boot into different diagnostic tests.

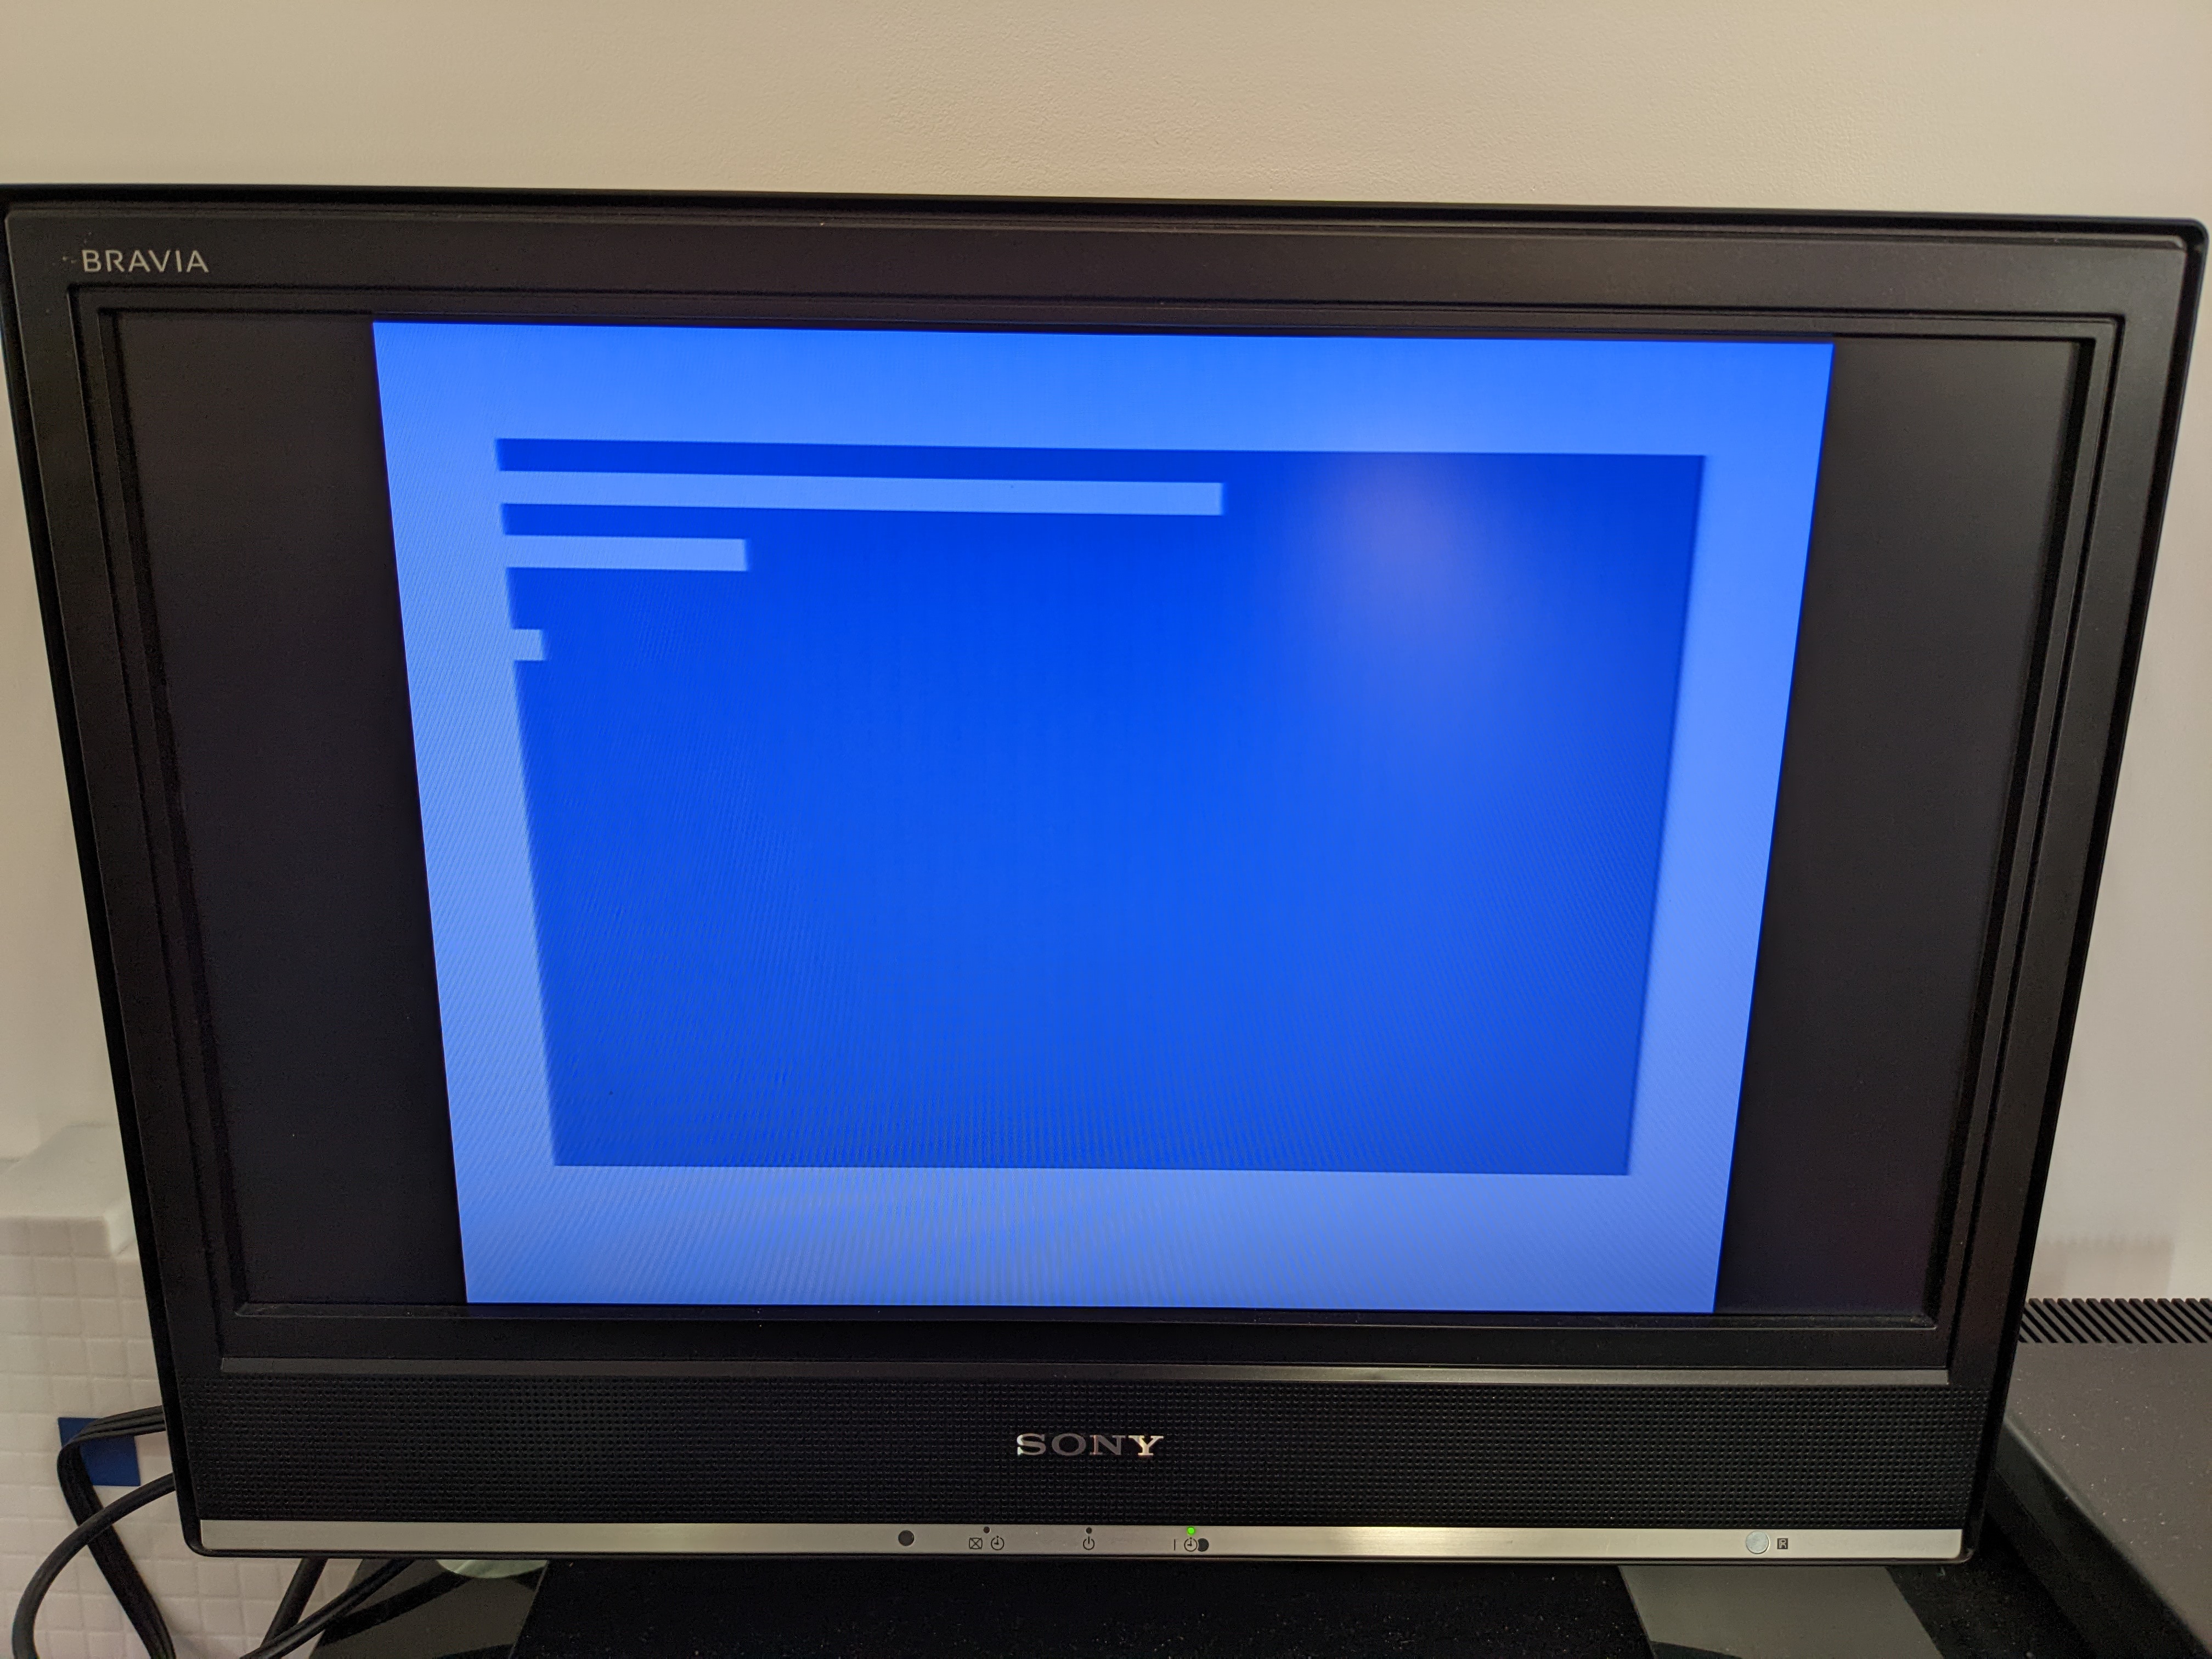
Once the new 74LS08 was installed I turned on the machine and … well something different happened at least.
The diagnostics cartridge has something called a “dead test” ROM, so I figured I’ll try that next.
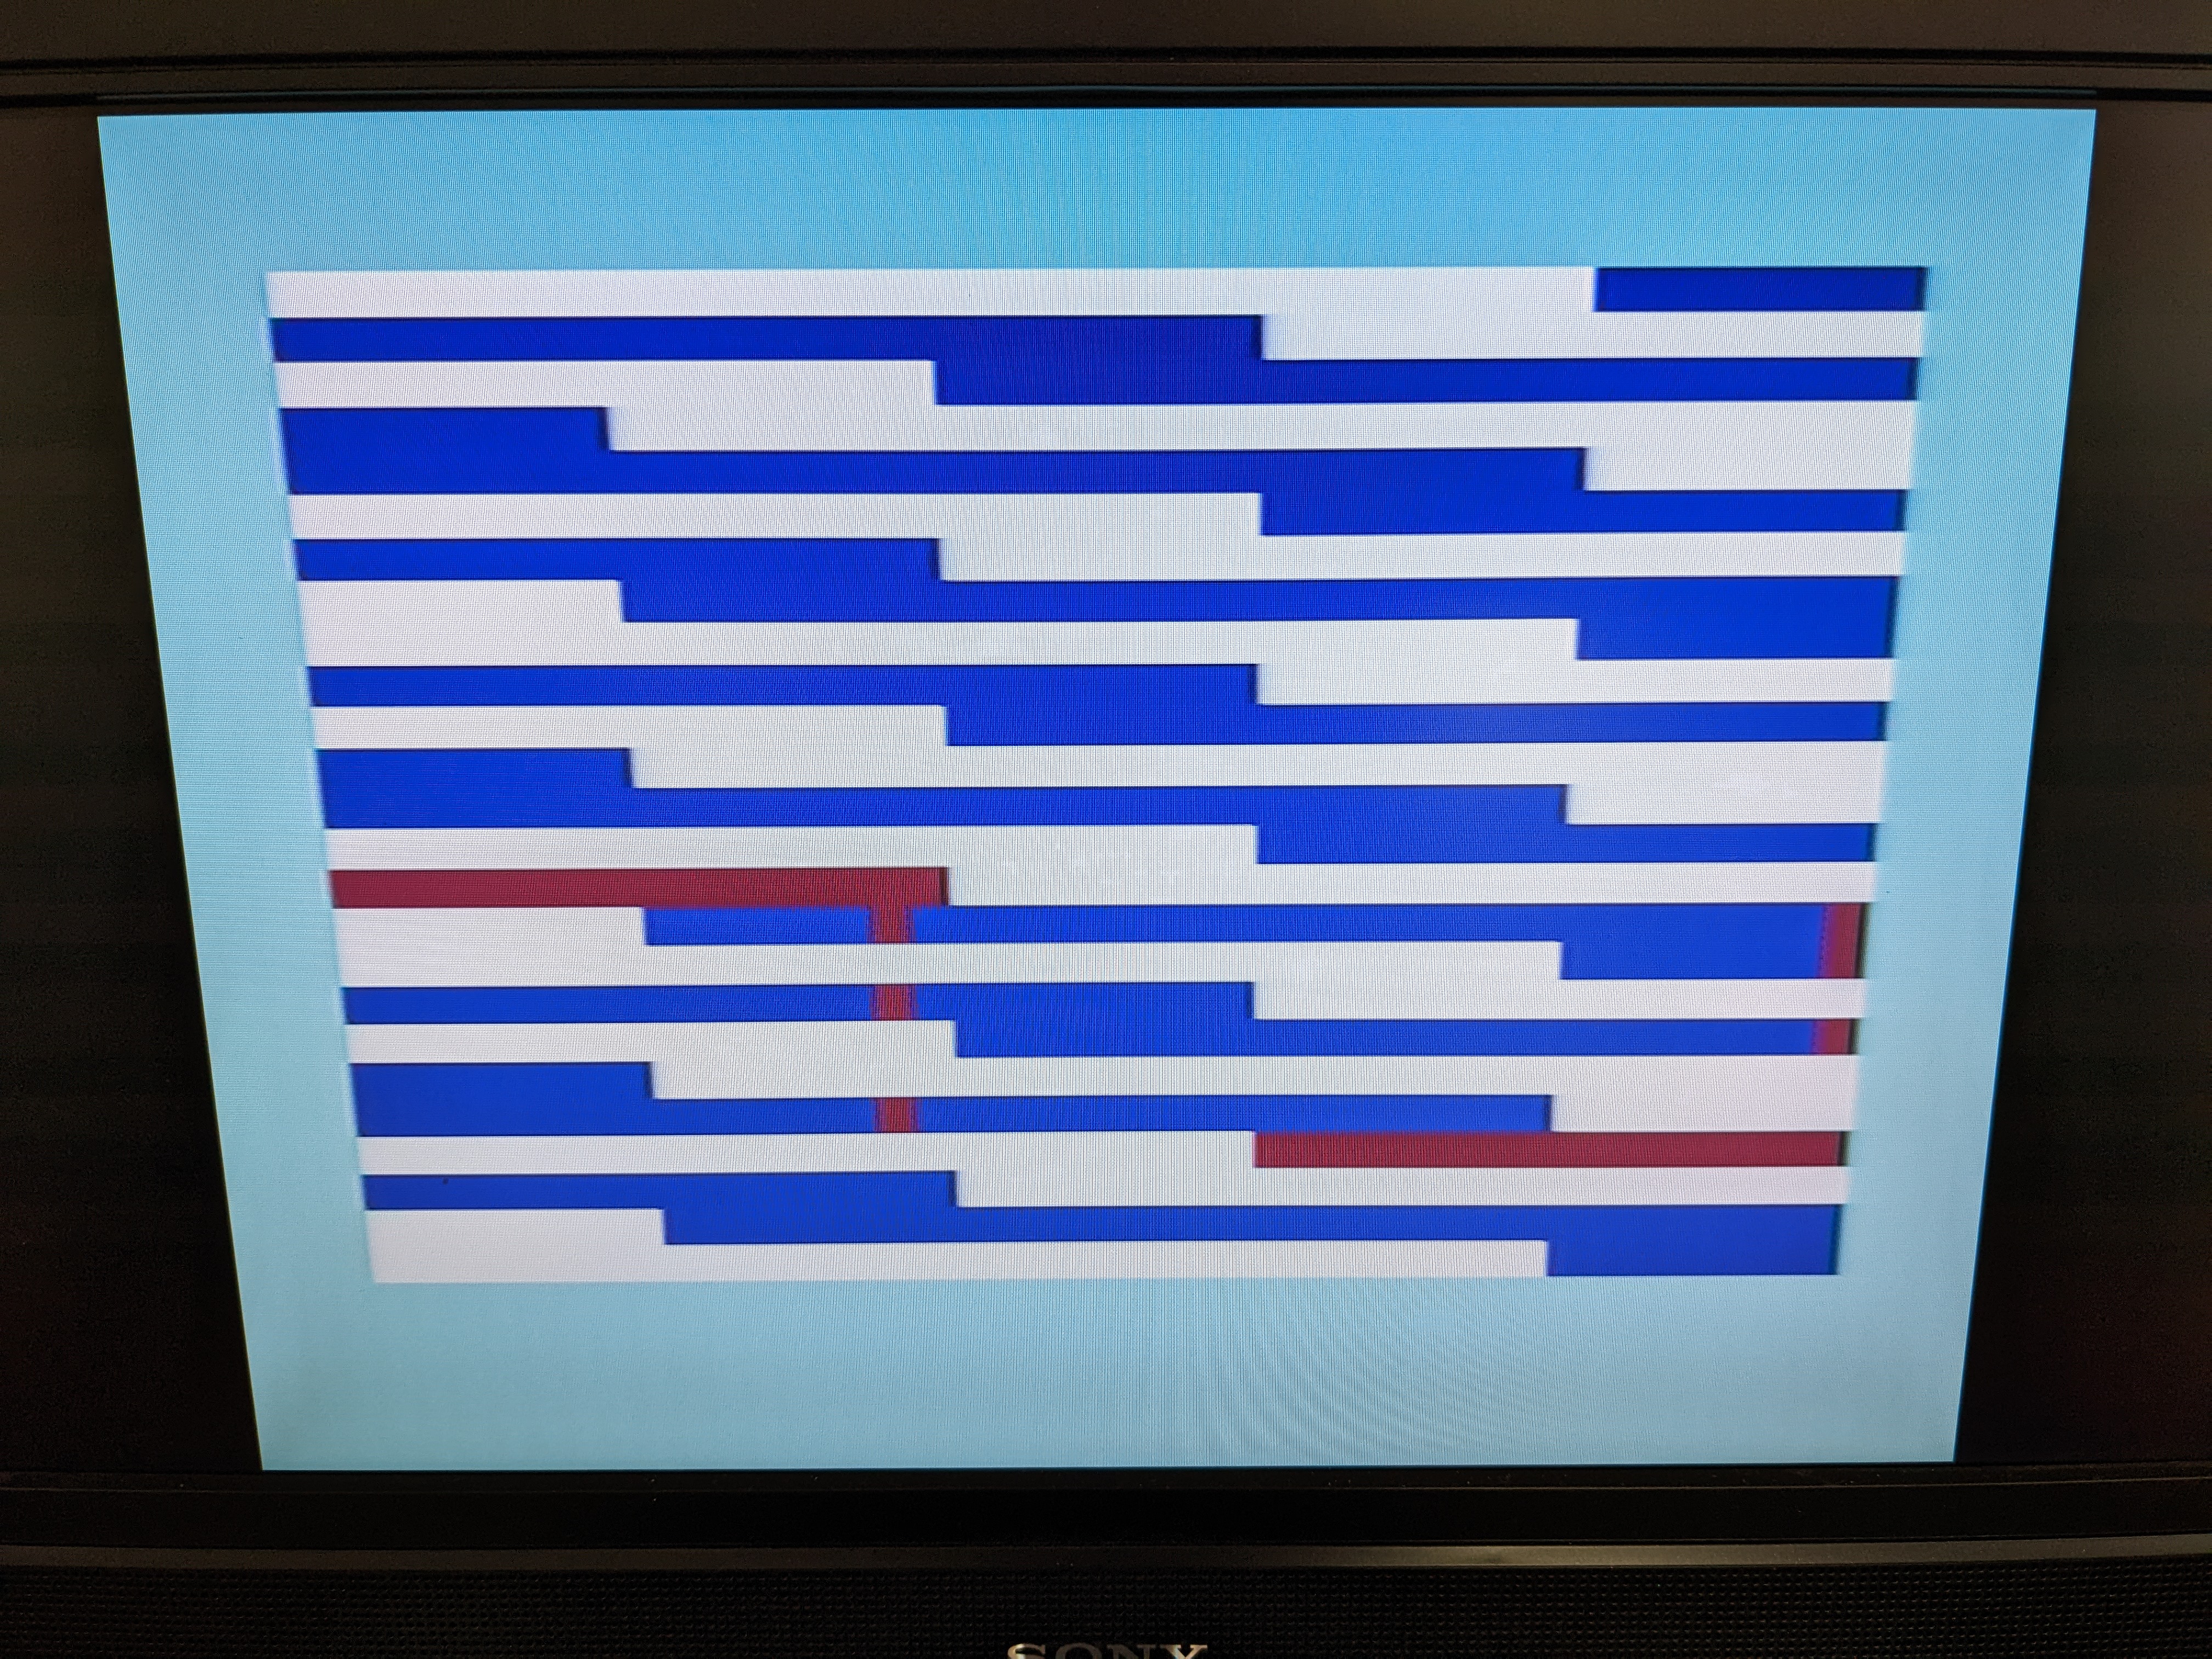
OK, well… That isn’t great either. Referring back to the fault guide this indicated that one of the CIA chips might have failed, these are identical chips and luckily on my C64 they were socketed. So I pulled them and swapped them over.
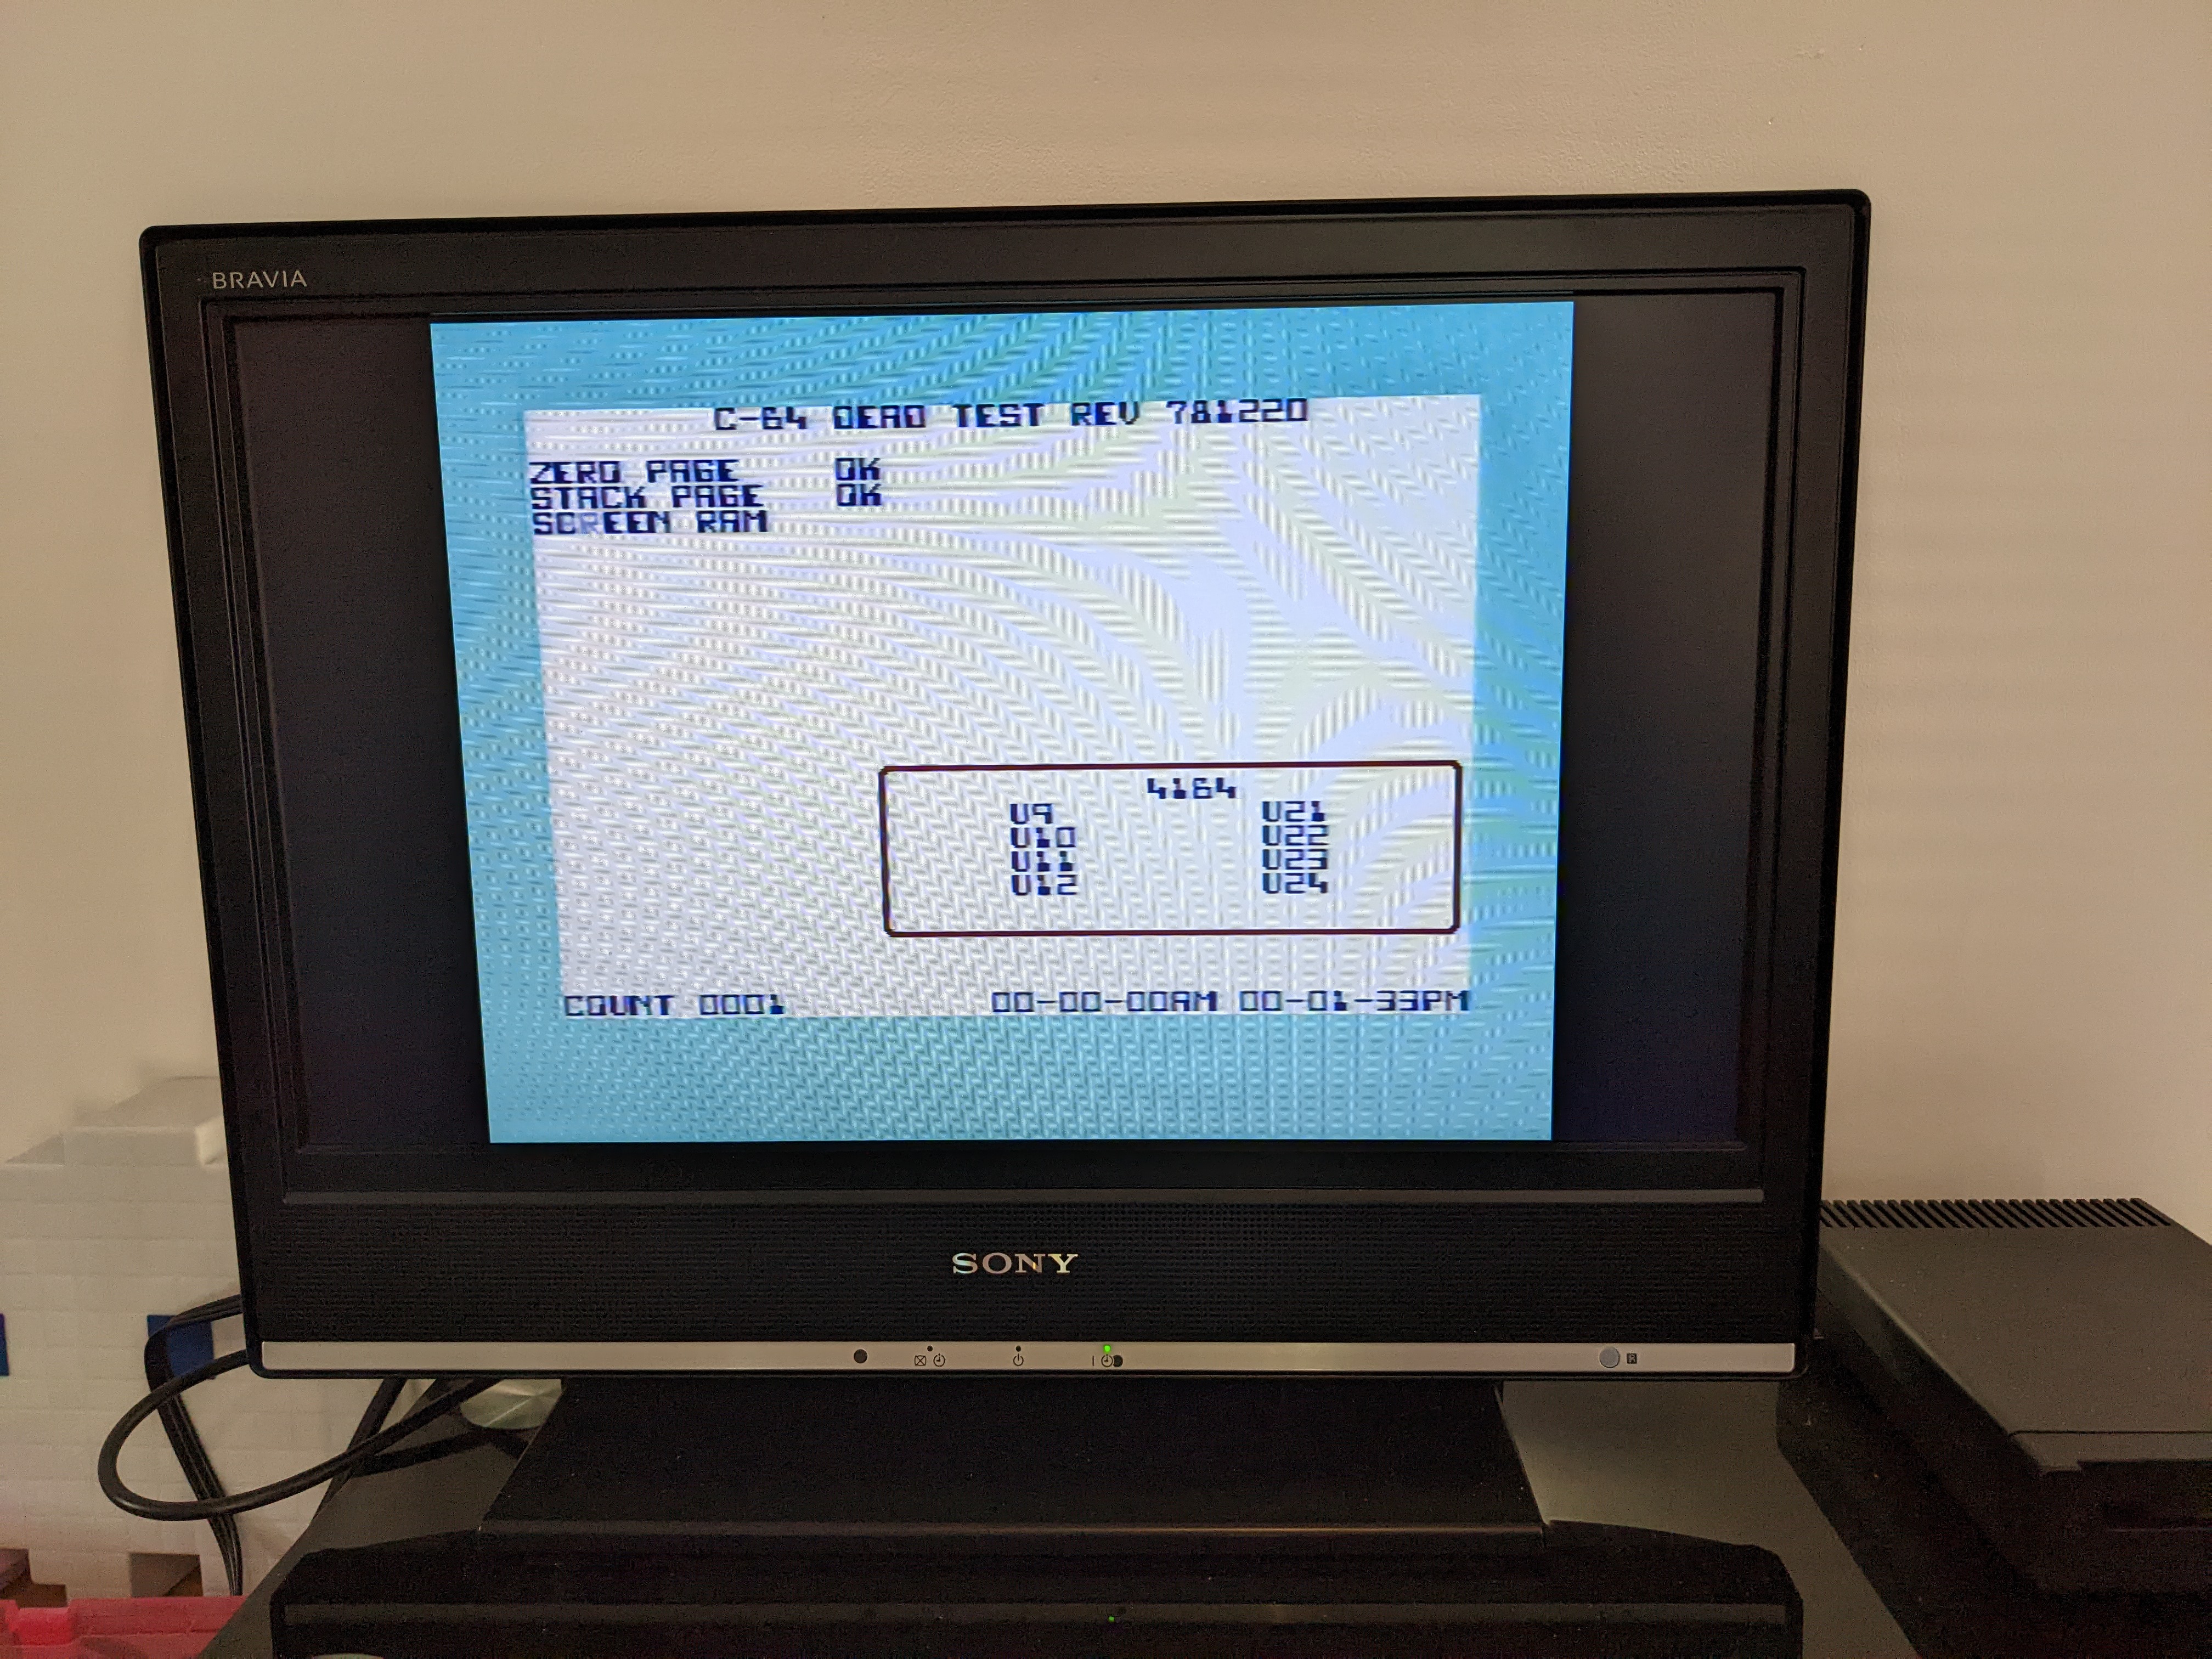
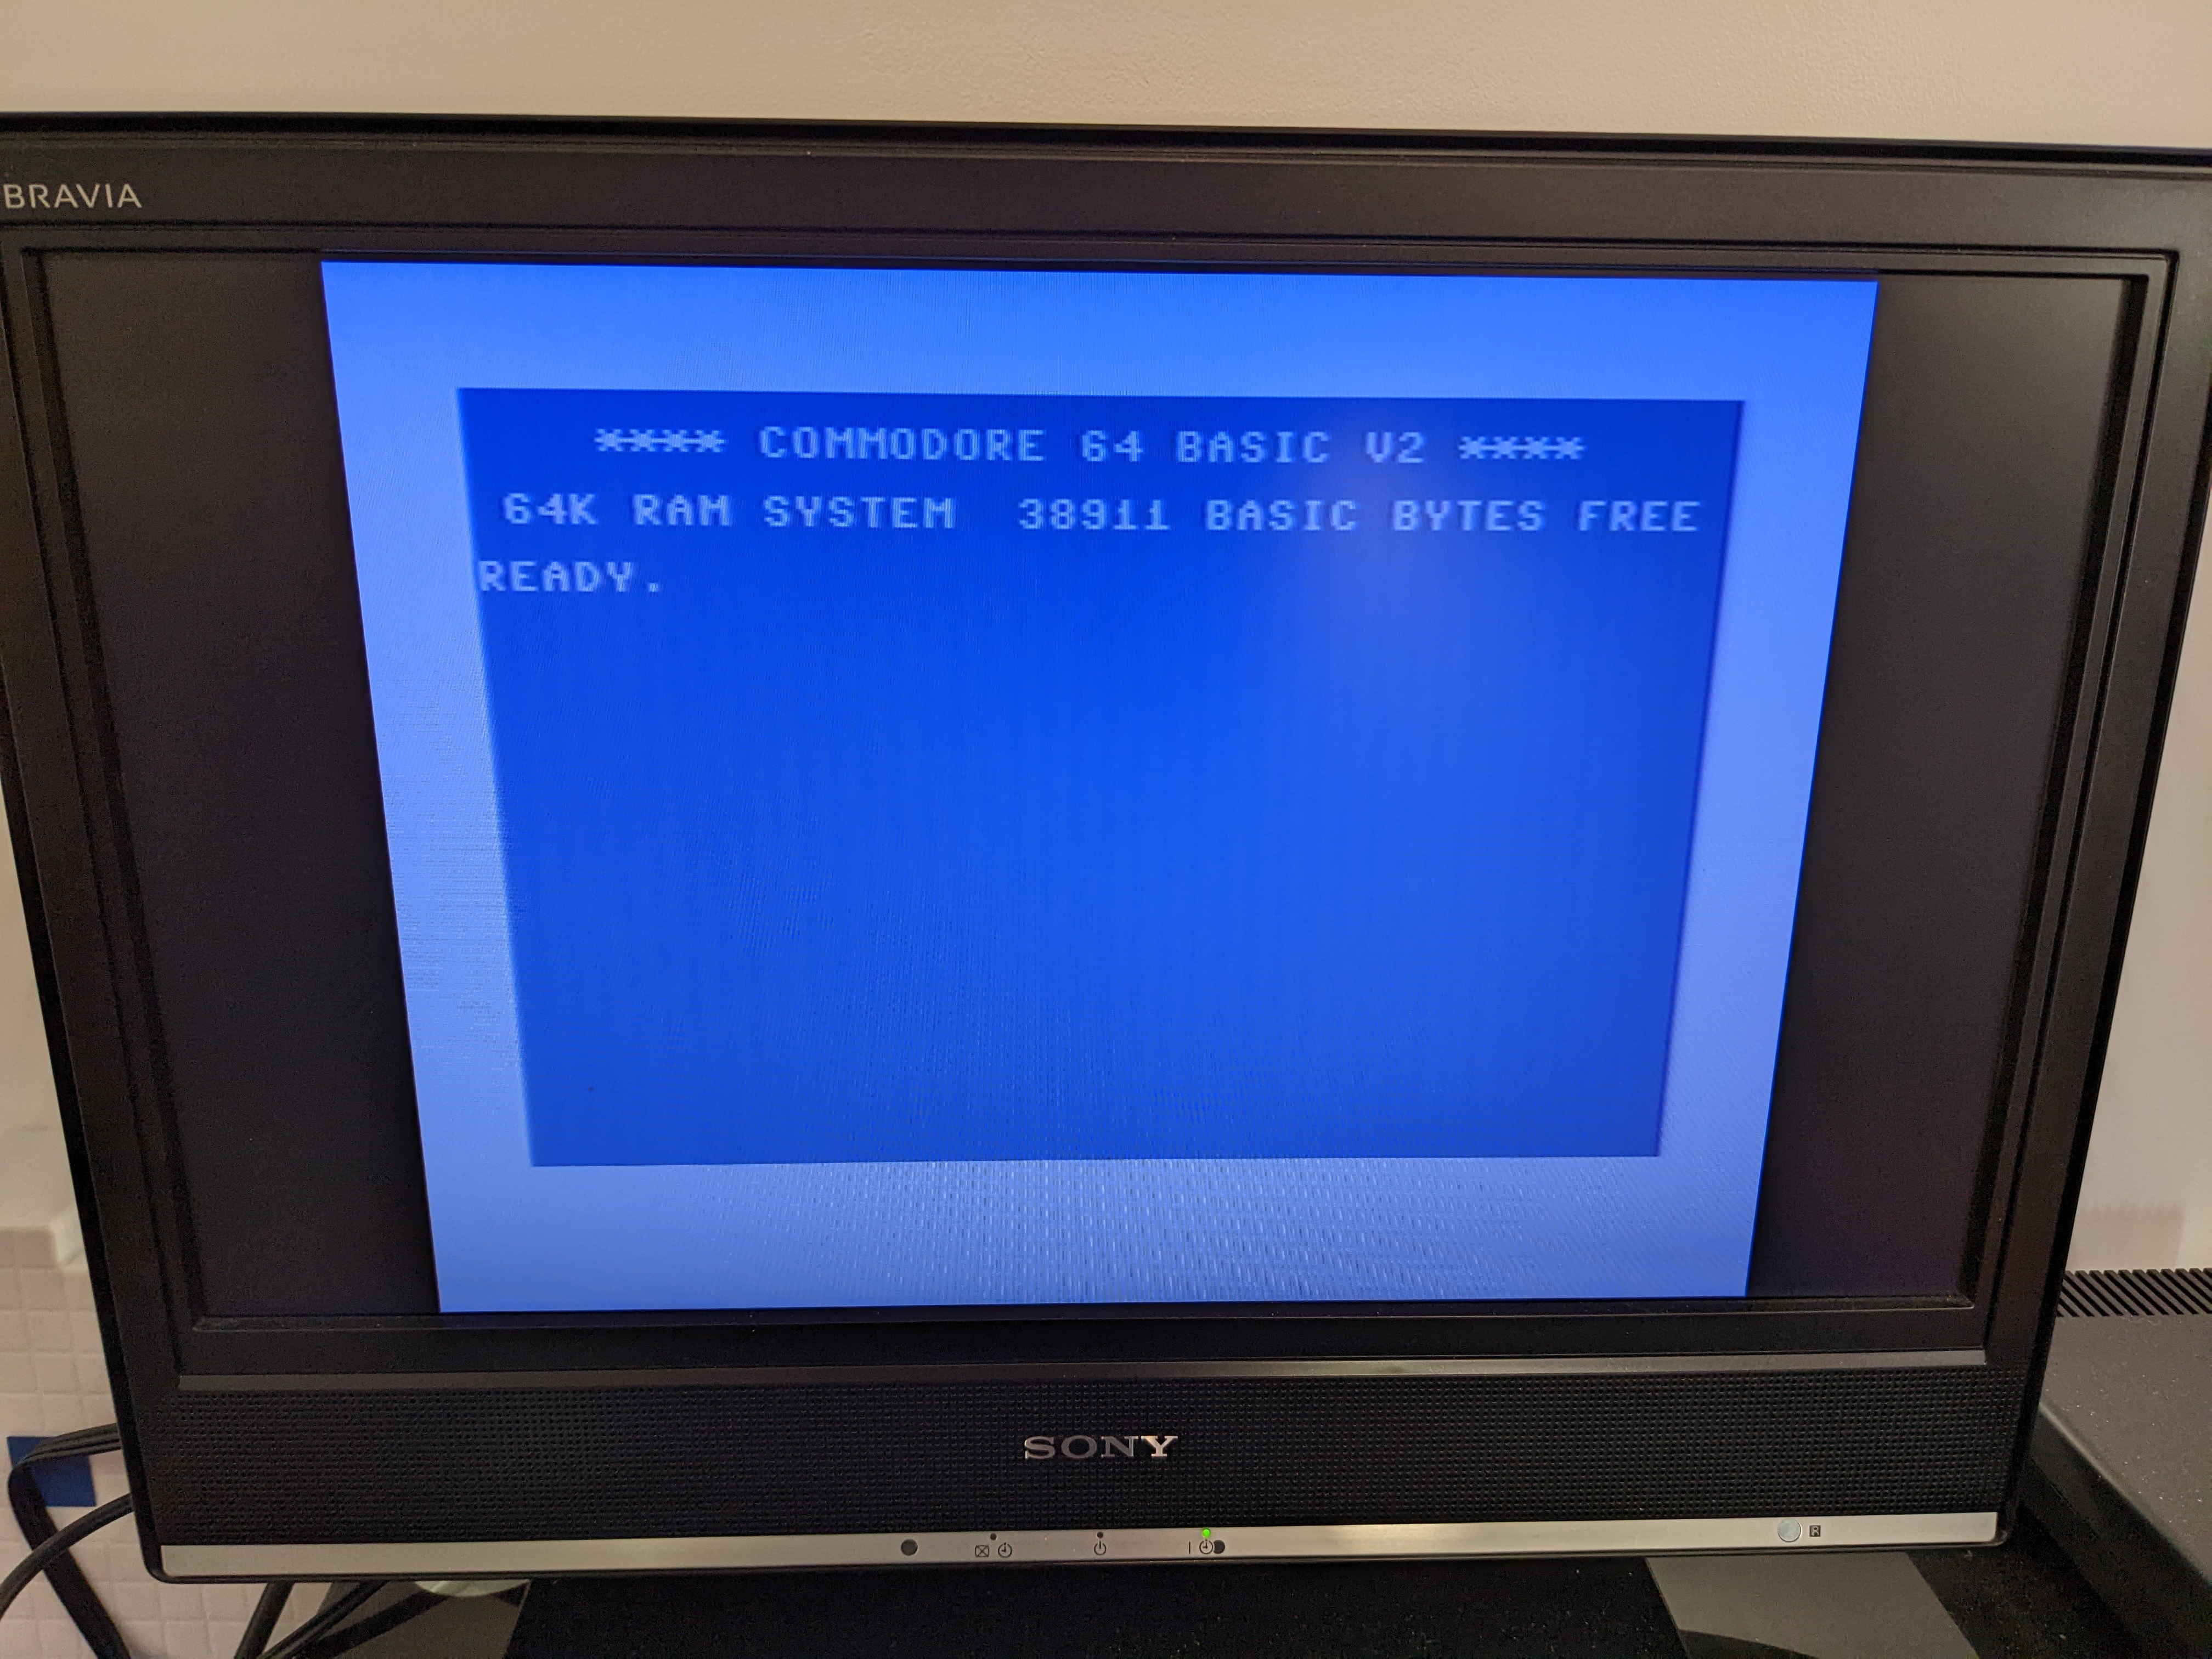
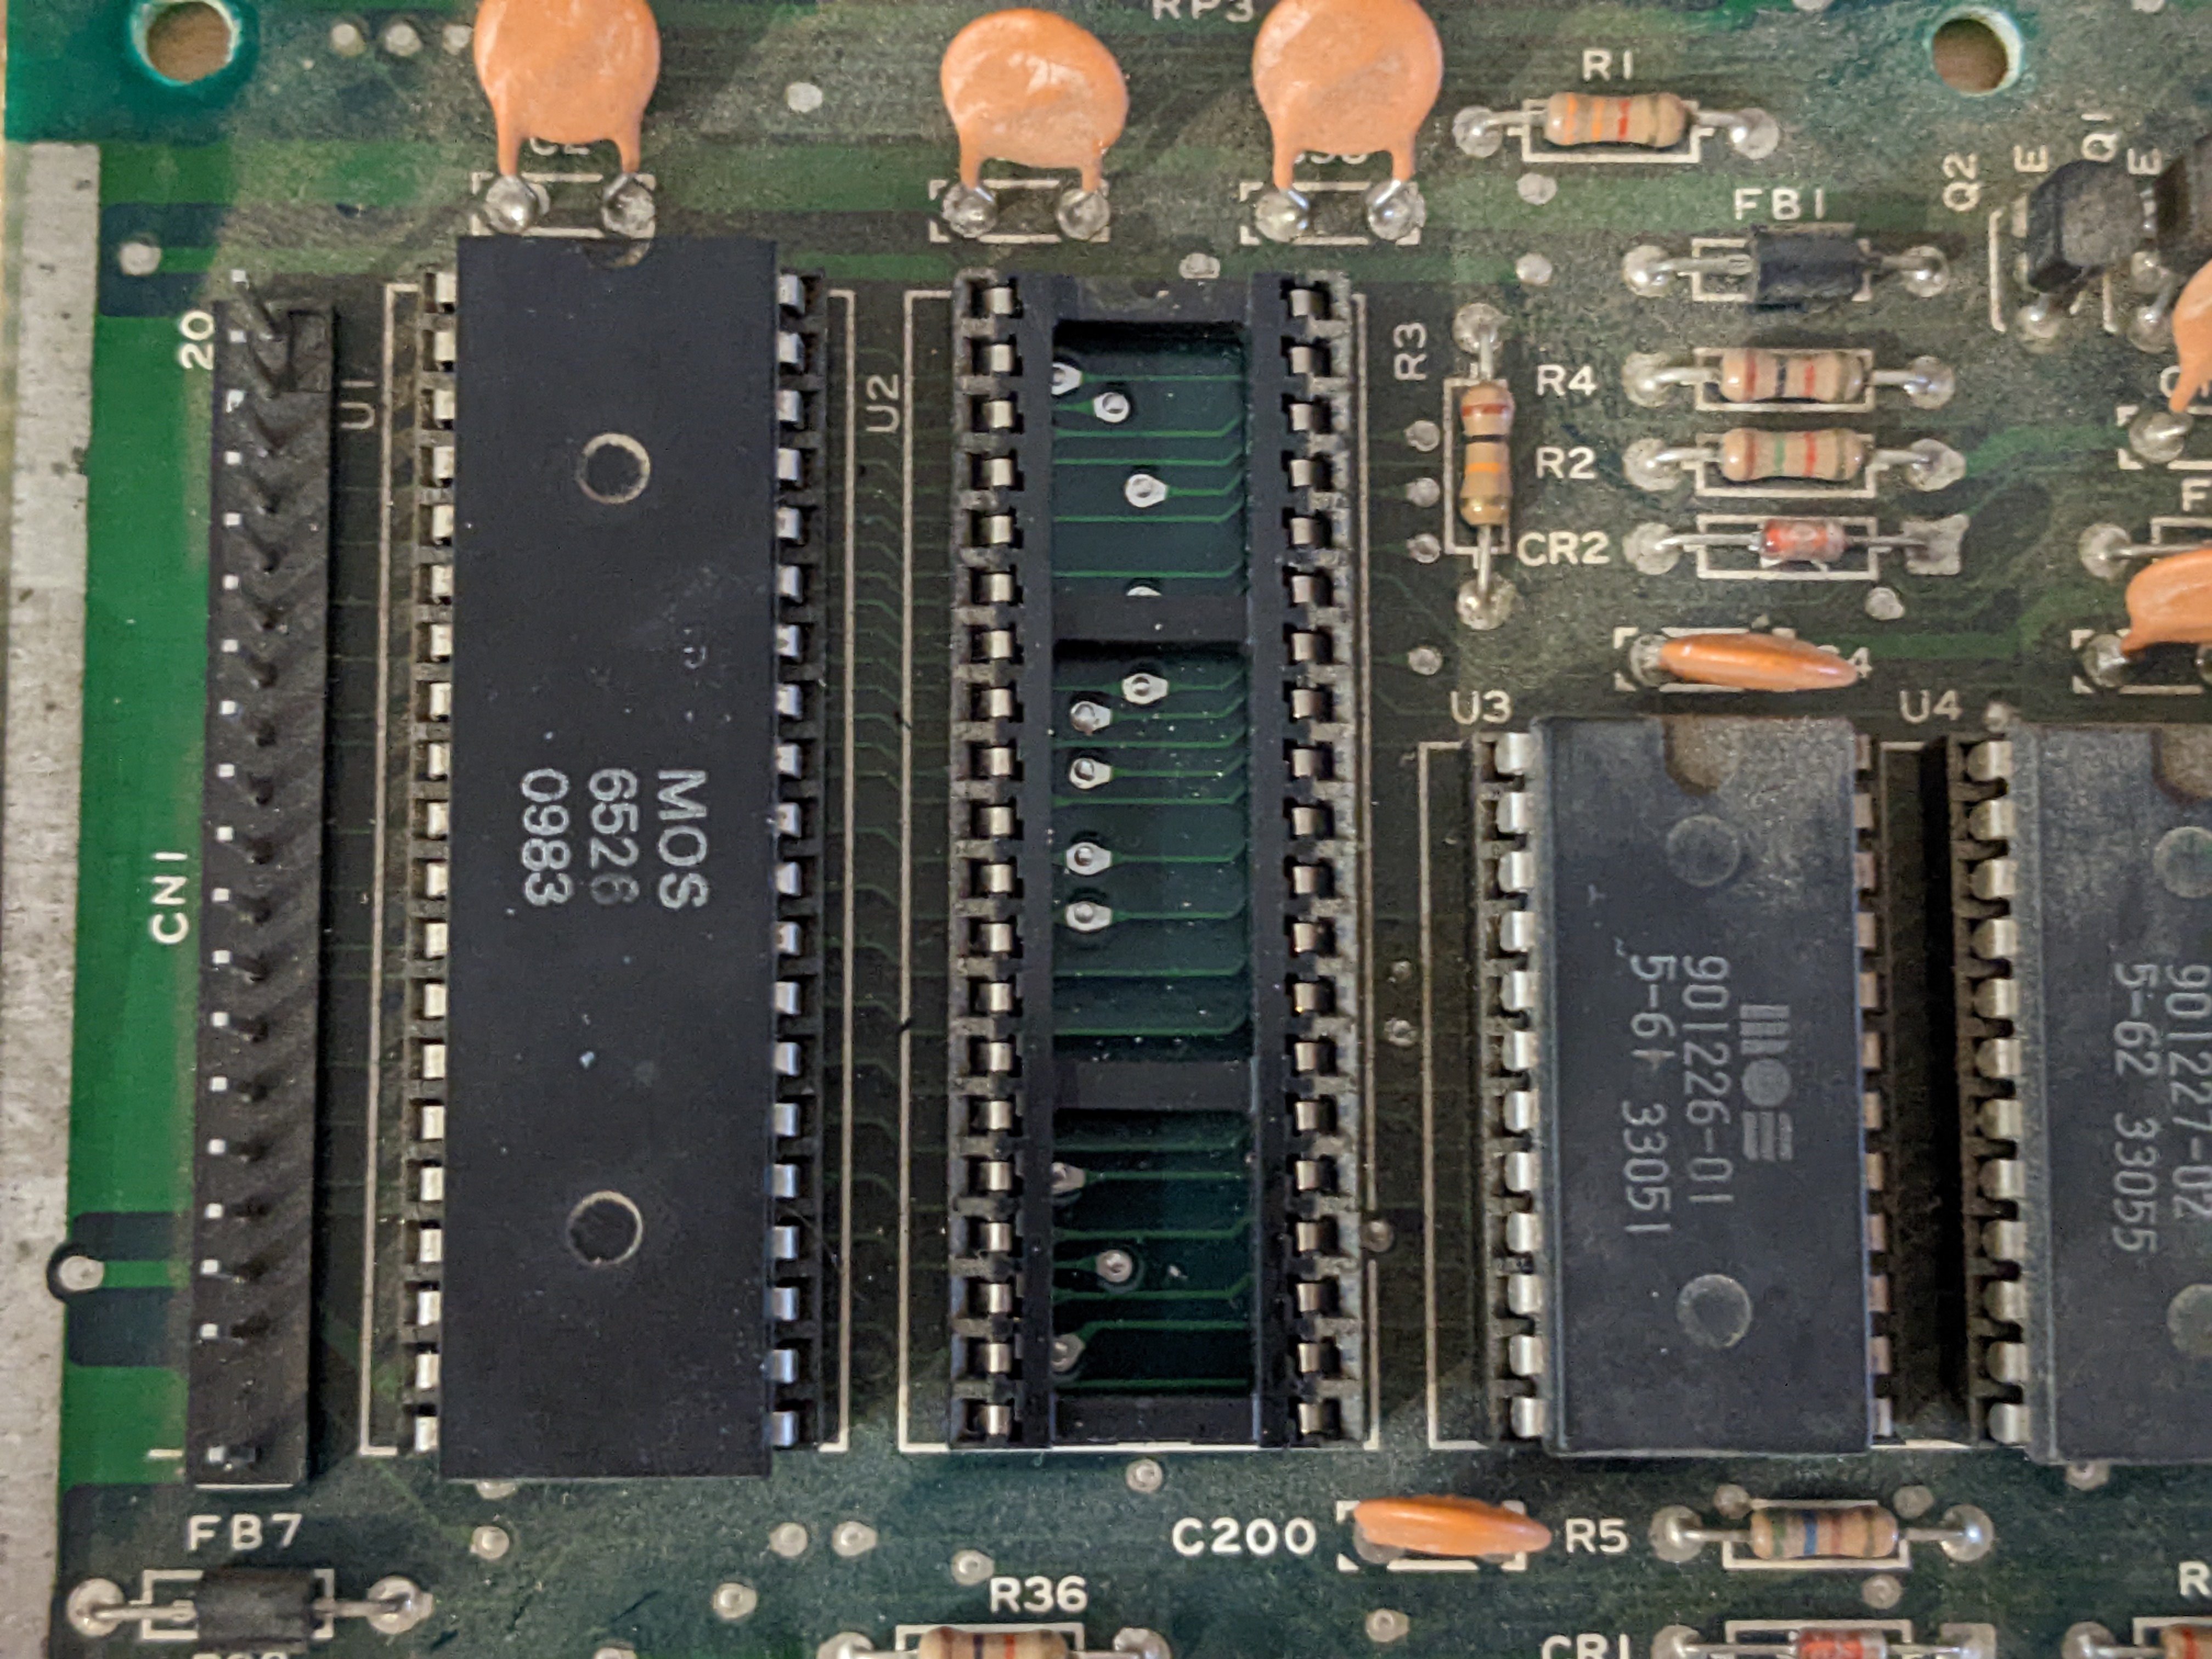
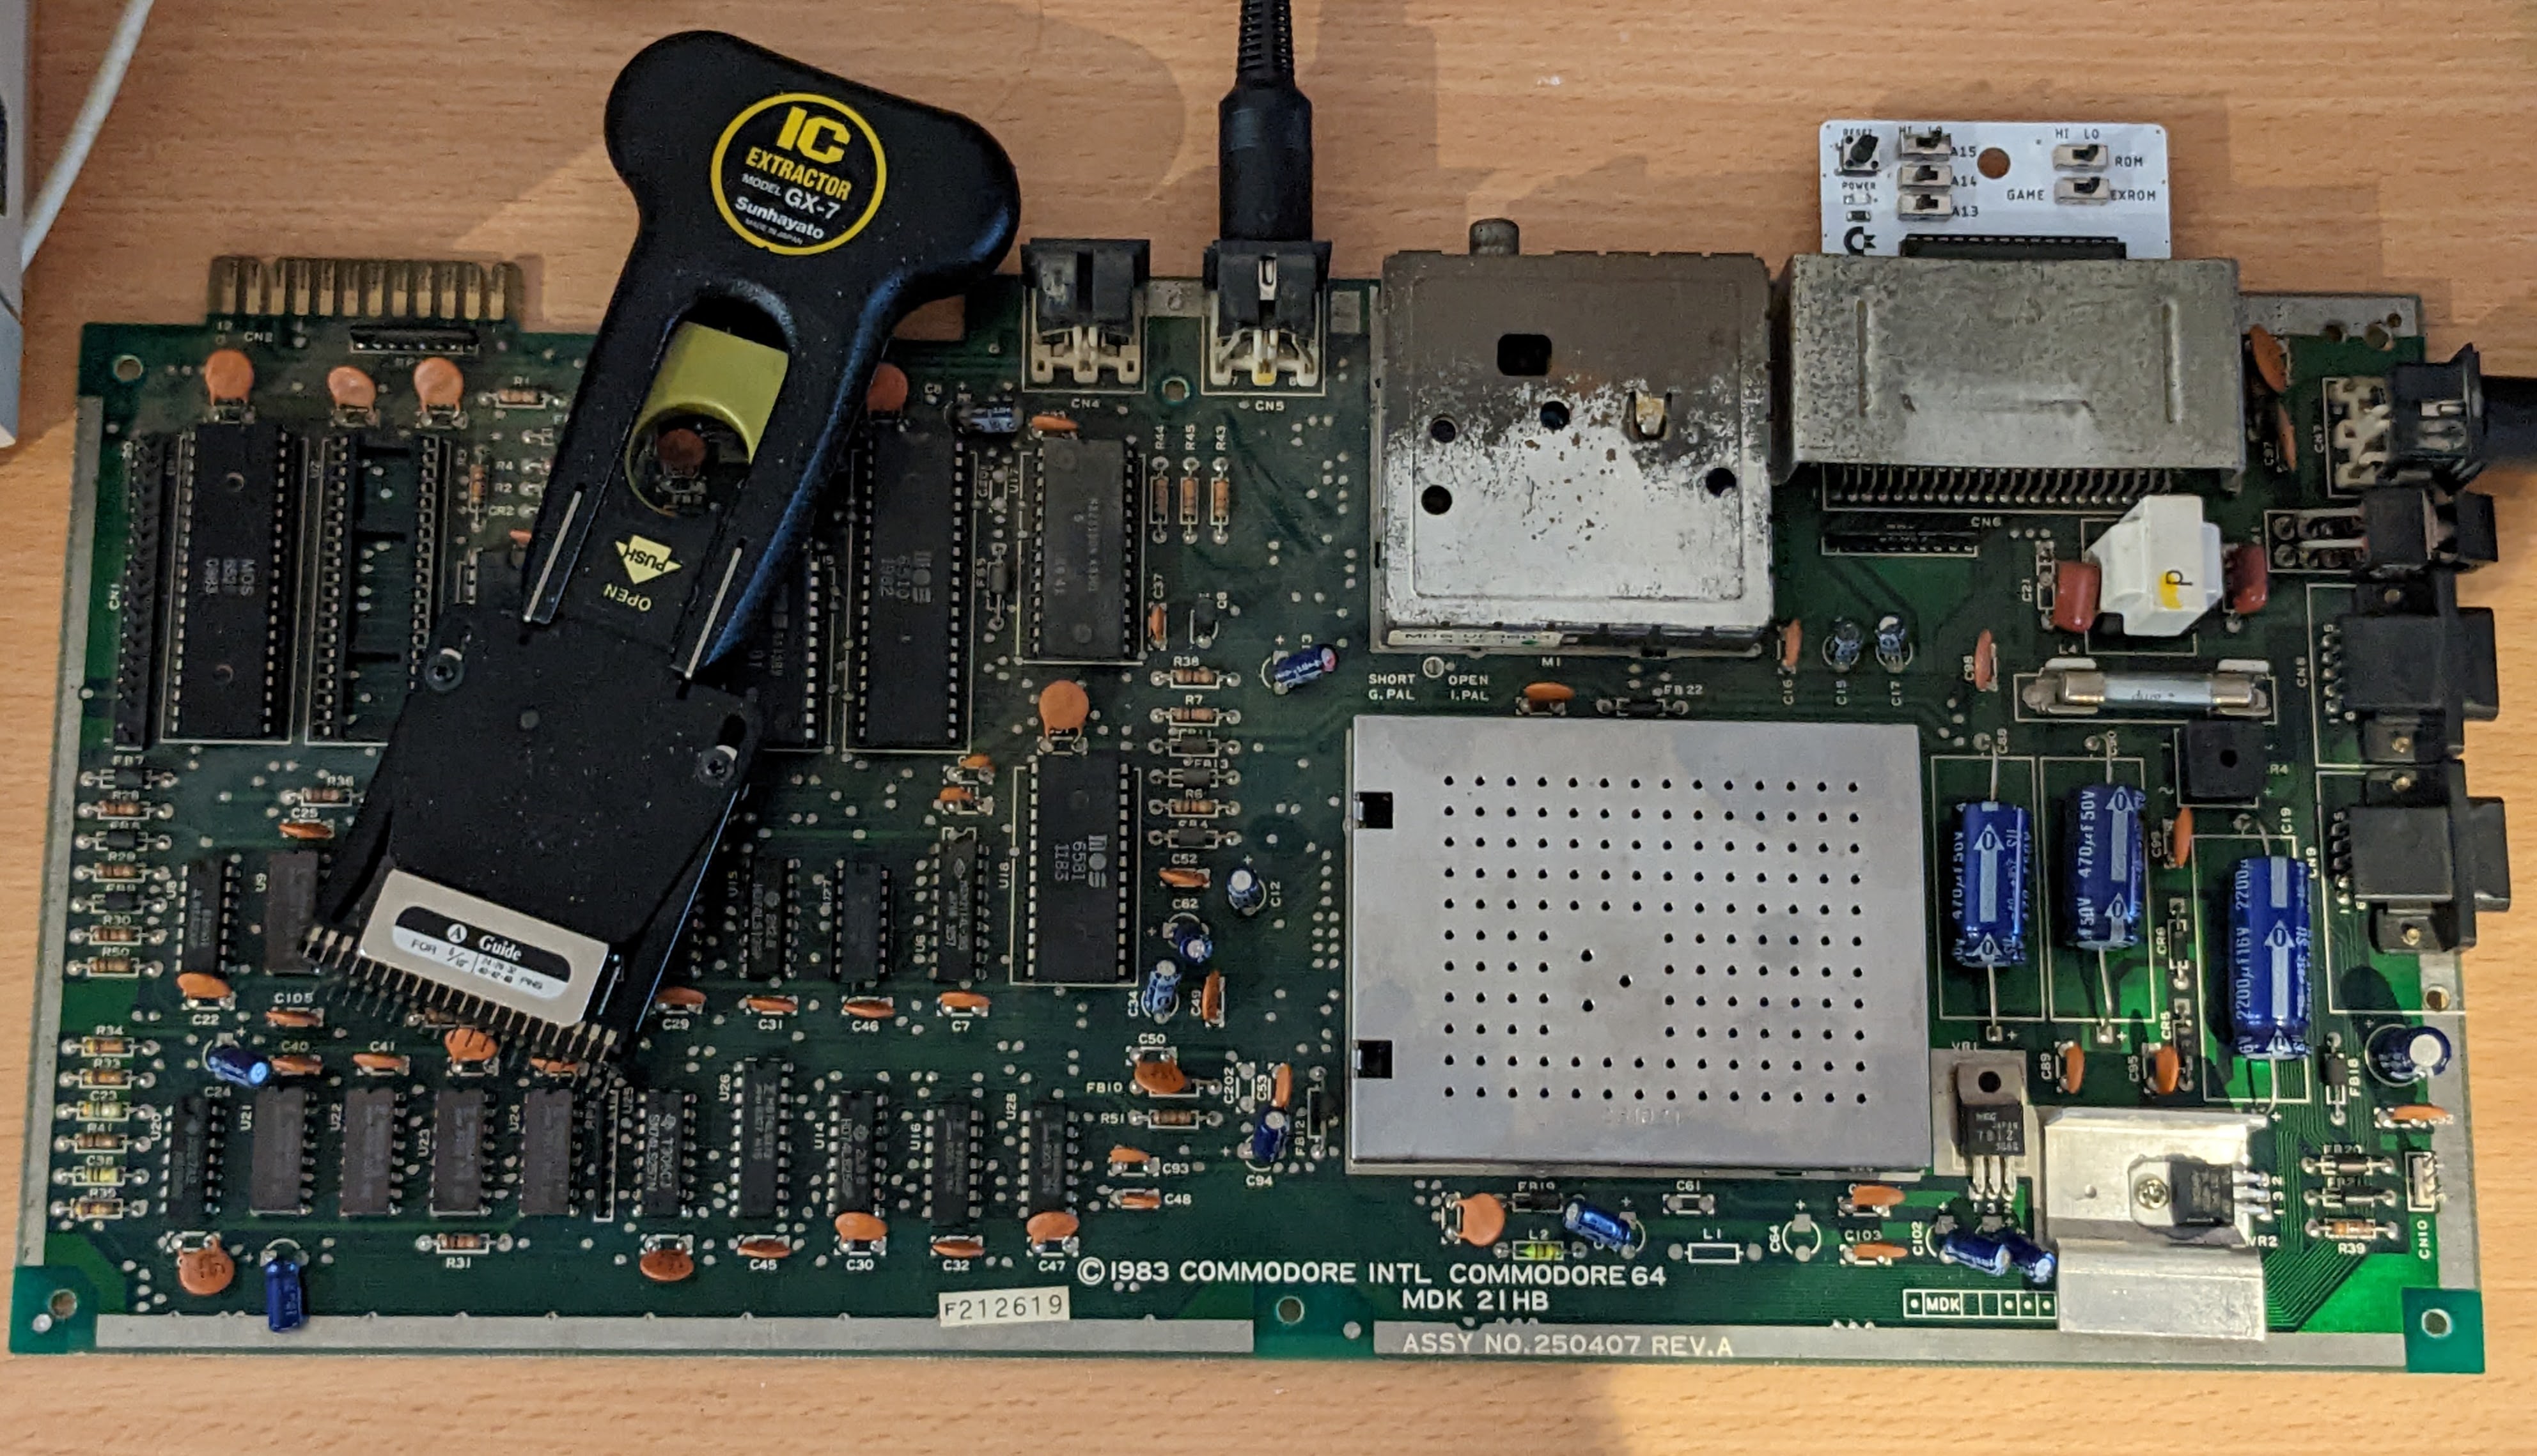
That looks more like what we want to see! After some process of elimination the CIA that was originally in socket U2 was the one that failed. A replacement has been ordered, once this turns up I can continue to make sure the rest of the machine works! I’ll leave you with the current state of the motherboard.
Leave a Reply