I have recently acquired an Amiga 500 that was marked as faulty and having a black screen whilst turning on. It turned up in the post today so I thought I would take a quick look to see where to start.

First things first, I plugged it in and turned it on. The fan with digital controls plugged into the same extension lead instantly turned off. No fuse blown or anything tripped. So for starters the PSU needs looking at.

Let’s open the main unit up…

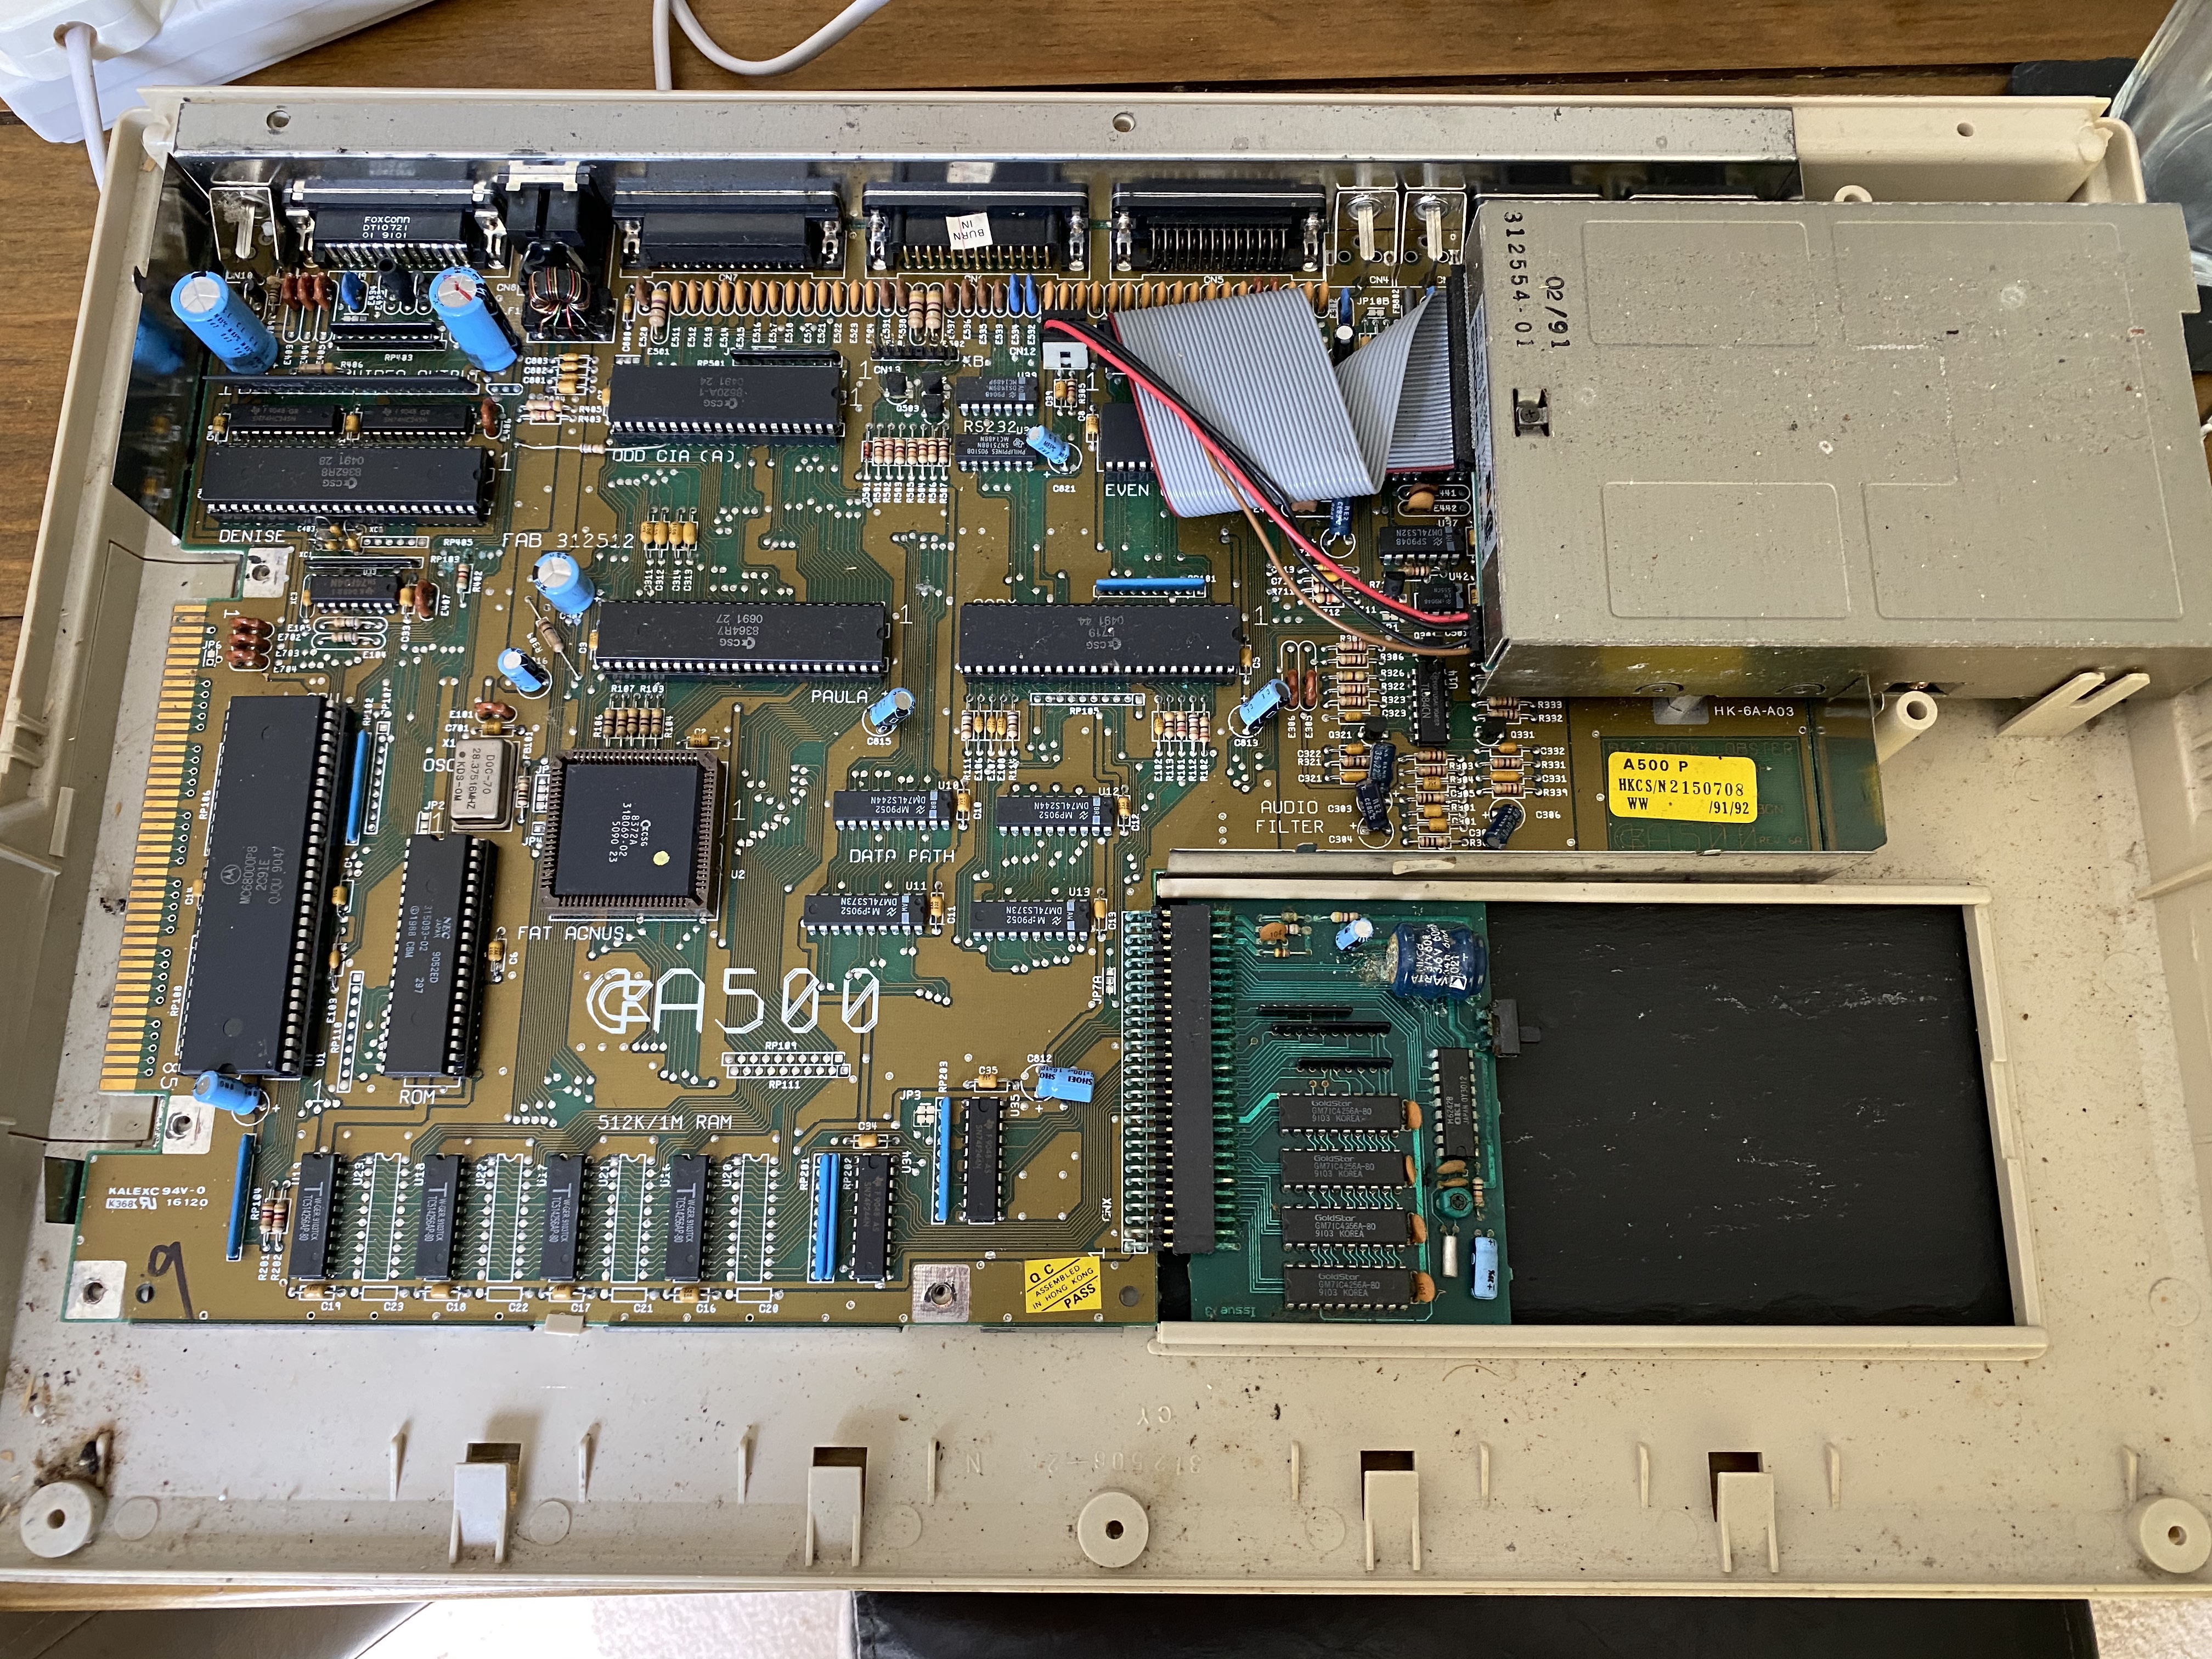
So, we have a rev. 6a board (score!). It is a bit dirty inside. A very corroded 1MB upgrade card with RTC and some slight corrosion on resistor R402. The resistor shows about 1K ohm, it should be 4.7K so that will need replacing.

This is a closer look after I started to pry it out.

With a lot of work I managed to get the expansion board out.

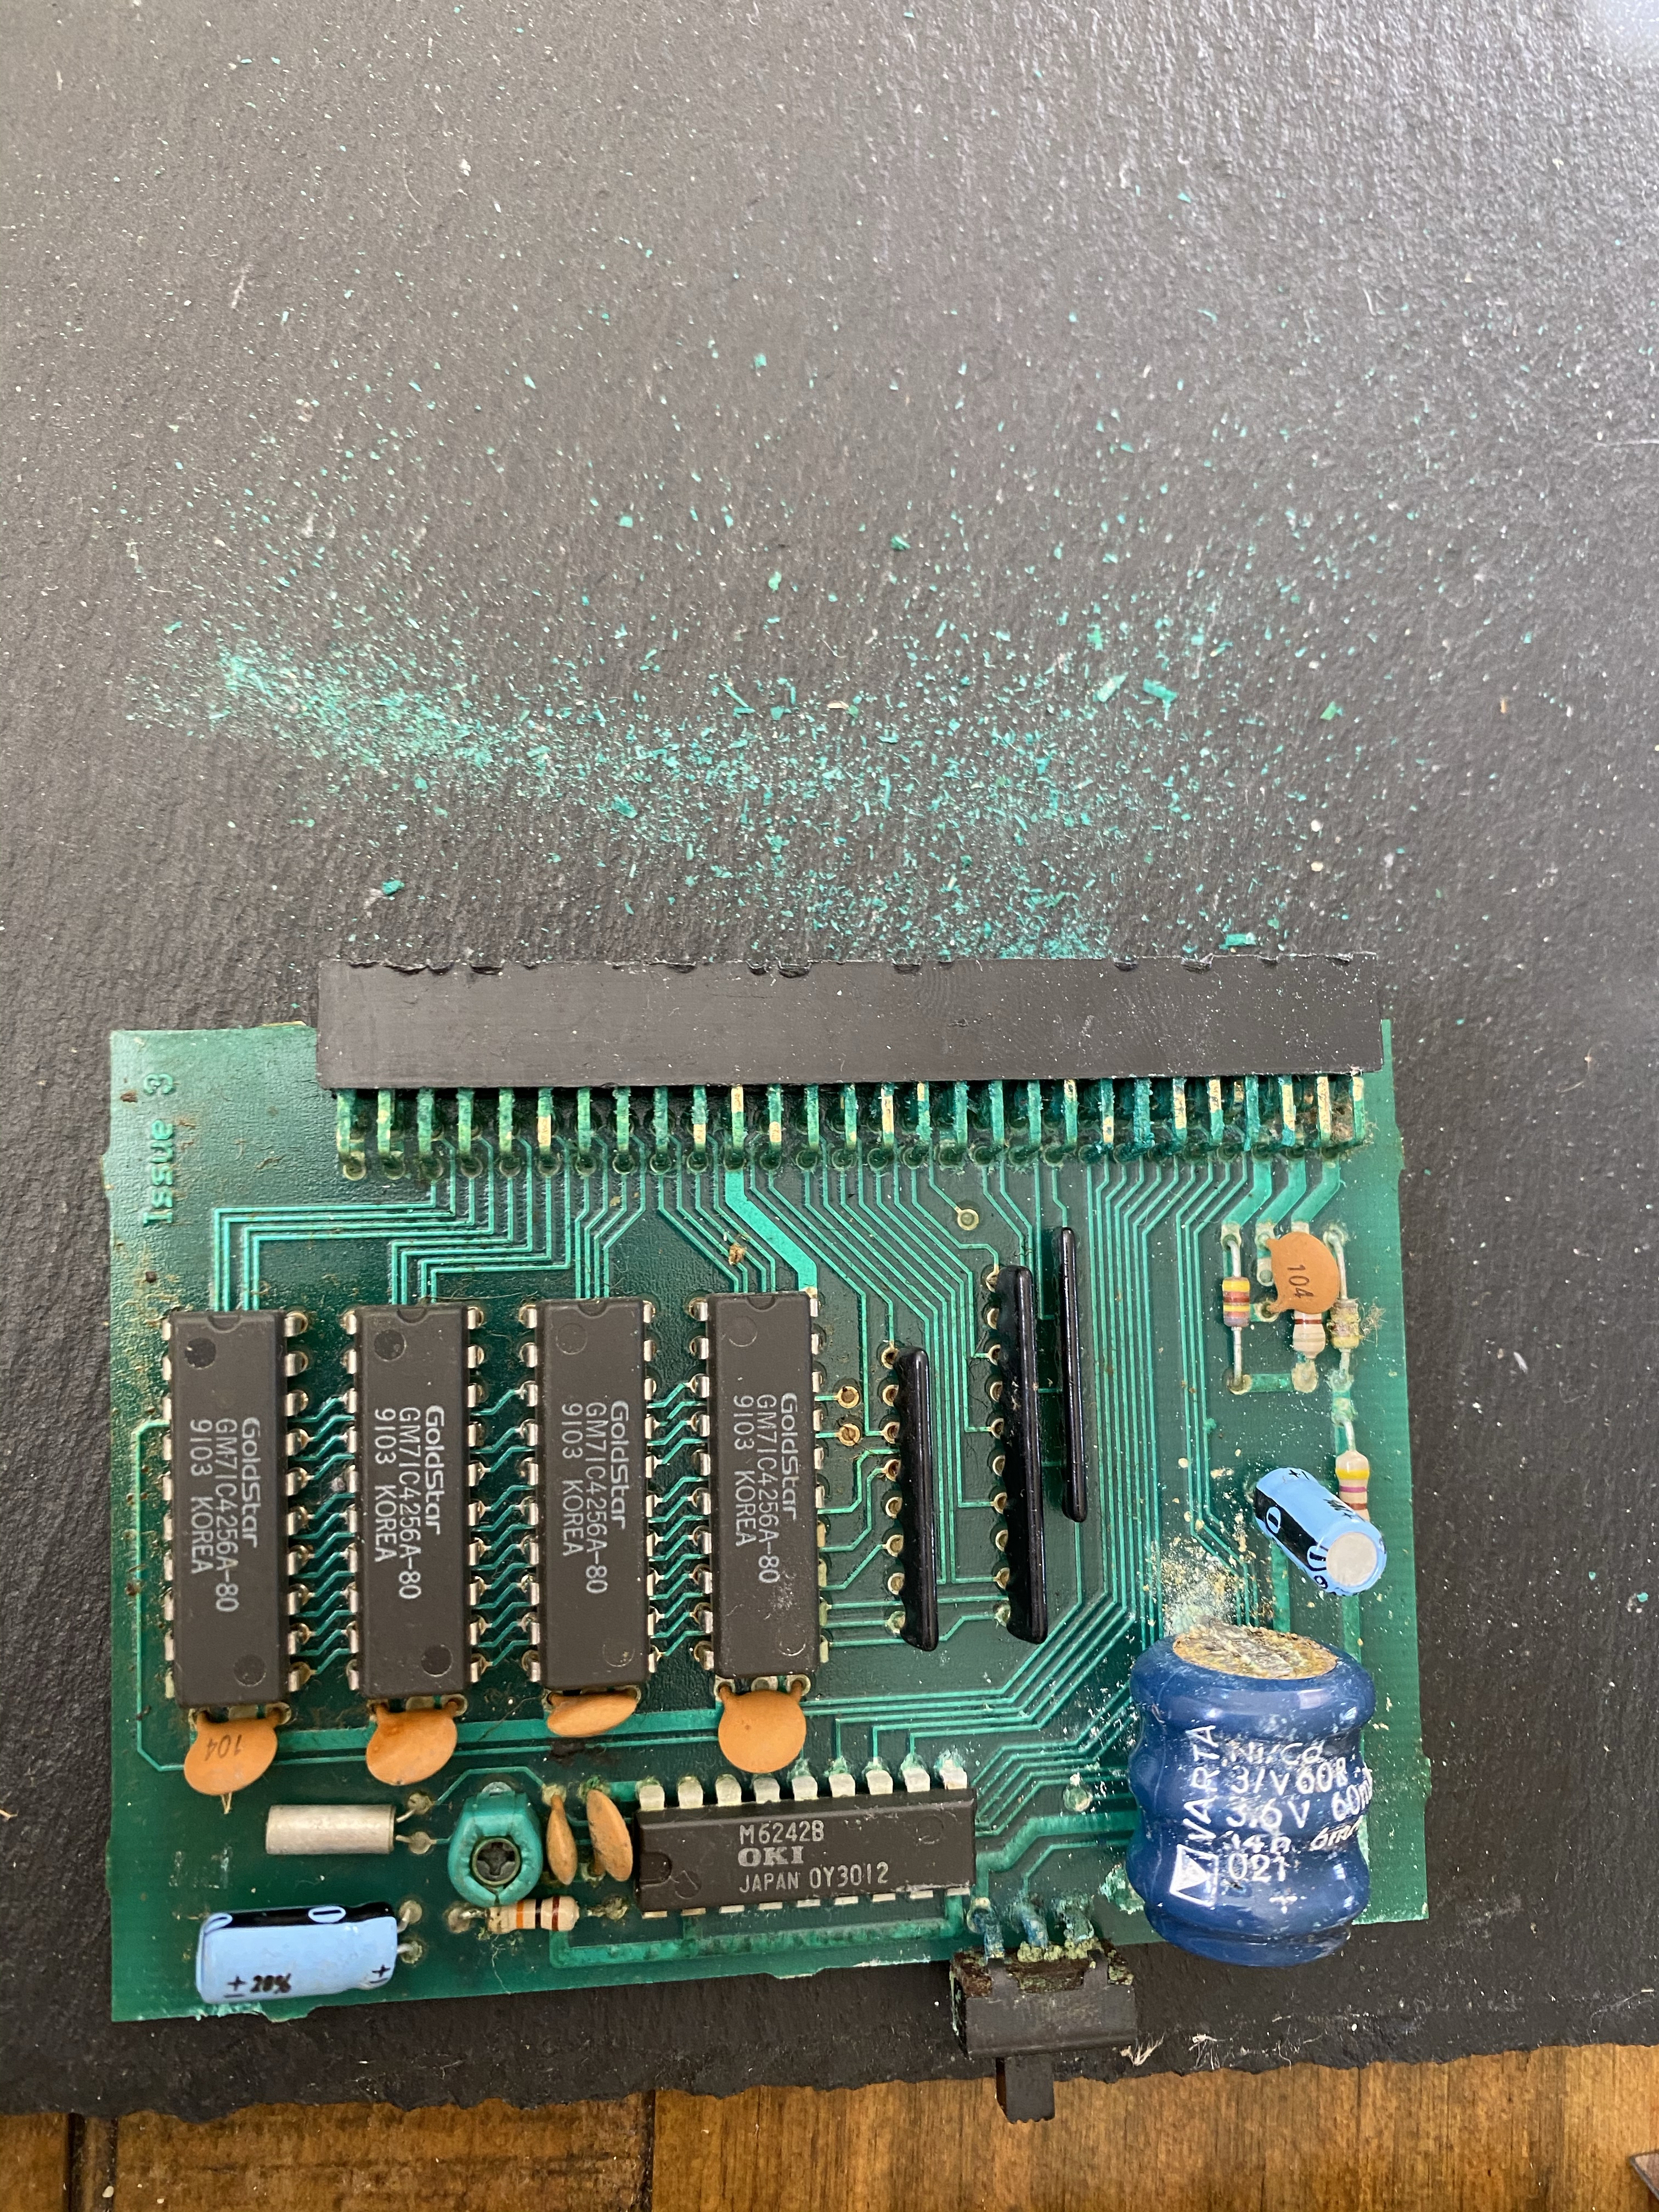
My wife was not too happy about the green dust on the dining table. This board is going in the bin. A new expansion board can be obtained very cheaply. I’ll still need to clean up the edge connector and straighten it up a bit.

I’ve put it all away for now. Next steps, cleanup, replace the bad resistor and inspect the PSU.

3 responses to “Restoring an Amiga 500, part 1”

  1. Nice work! The Amiga is too new for my retro computing taste (except for the Commodore 1084 monitor, a rebadged Philips CM8833). There should be many options to upgrade the machine a little while keeping most of the experience authentic. One extension that I think I saw mentioned somewhere is a floppy drive emulator that can use more modern storage media. Hard drive interfaces should be even easier to replicate.

    I got here via the RSS feed of https://mariadb.org/planet/. I wonder if there is any other connection to databases than Fred Fish, who maintained a collection of freely distributable software for the Commodore Amiga on floppy disks. His DBUG facility is still being used in MySQL and MariaDB.

    1. I think you mean a Gotek drive? I use one on a BBC Master 128 (which I’ll blog about soon) and have also been using it to test as part of this restoration. I will buy a new one for it as soon as I have repaired everything.

  2. […] the end of part 1 I had a lot of cleaning to do and a failed PSU. So I’ve been working on those things over the […]

Leave a Reply

Your email address will not be published. Required fields are marked *