
In the past, I’ve discussed the soldering gear and general tools I’ve used, but I haven’t really summarized the diagnostic tools I recommend. I have been asked about some recently, so I figured it is time to blog about it.
Infrared camera
I thought I’d start with the odd one first, but actually, it is an important tool which I use at least once in pretty much every repair. This is my FLIR infrared camera which plugs into my phone.

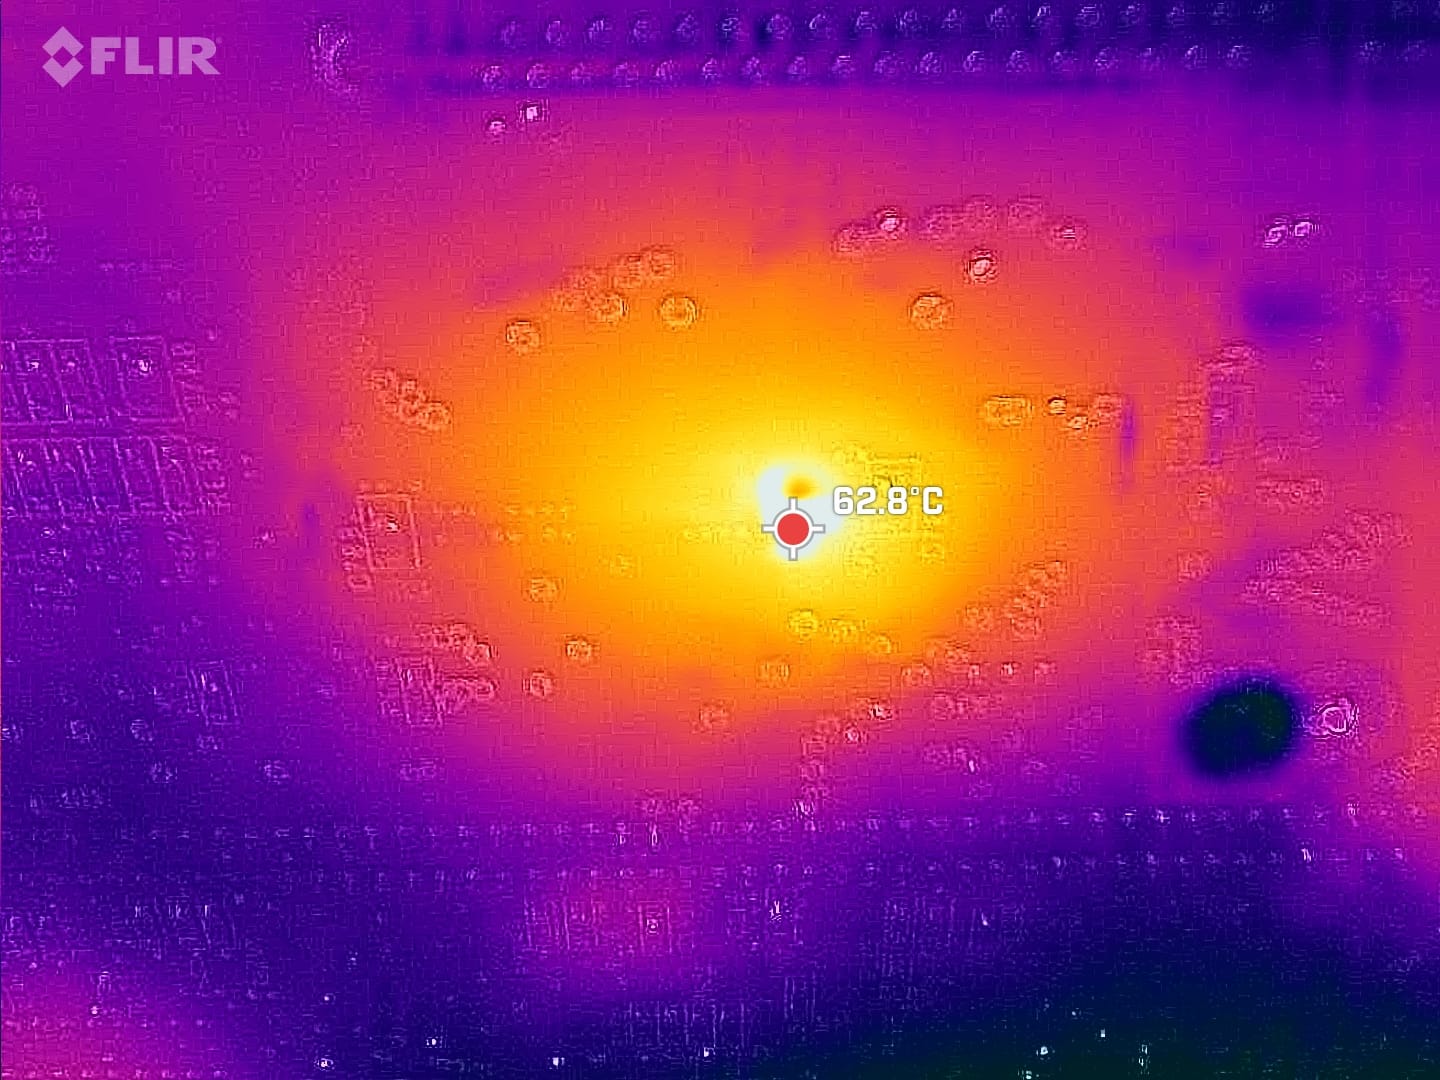
Why do I use it? Well, there are a couple of reasons. The first is, if there is a machine with a faulty chip, you can usually spot the chip quite quickly using the camera. Faulty chips, particularly RAM, often get very hot. To the extent that I don’t recommend testing by touch, I’ve been burned (literally) before by this. You can often detect the bad chip in seconds of power on, rather than having the power on for a while figuring out what is bad.
The other usage is ceramic capacitors. Over time, they can fail and when they fail they go short-circuit. They are often across power rails, so a short-circuit failure is not good. This is particularly true for SMD ceramic capacitors, the camera helps me quickly find failed capacitors as well as ones that are near failure. Almost every SMD Amiga motherboard I’ve worked on has had one near failure.

This is a ceramic capacitor that was failing on the bottom of a customer’s Amiga 4000 motherboard I repaired recently. The machine still functioned, but this would likely cause some damage as it degrades more, and is very easy to replace. When measured with a multimeter, it was clear that this had started turning into a resistor. The replacement ran stone-cold.
Multimeter
This one goes without saying, you don’t really need anything too special to start with. Good probes are quite important, some older components may have tarnished metal and making contact could be difficult with bad probes. Continuity testing is your friend when checking for broken traces or shorted capacitors. Resistance testing is useful for, well, resistors, and voltage testing should be pretty obvious.
Chip tester
I’ve mentioned in many recent blog posts that I use a Backbit Chip Tester Pro v2. I recommend this over many others because not only does it test logic, SRAM and DRAM used in retro computers, but it also tests the CPUs and many custom chips used in 8bit and 16bit machines.
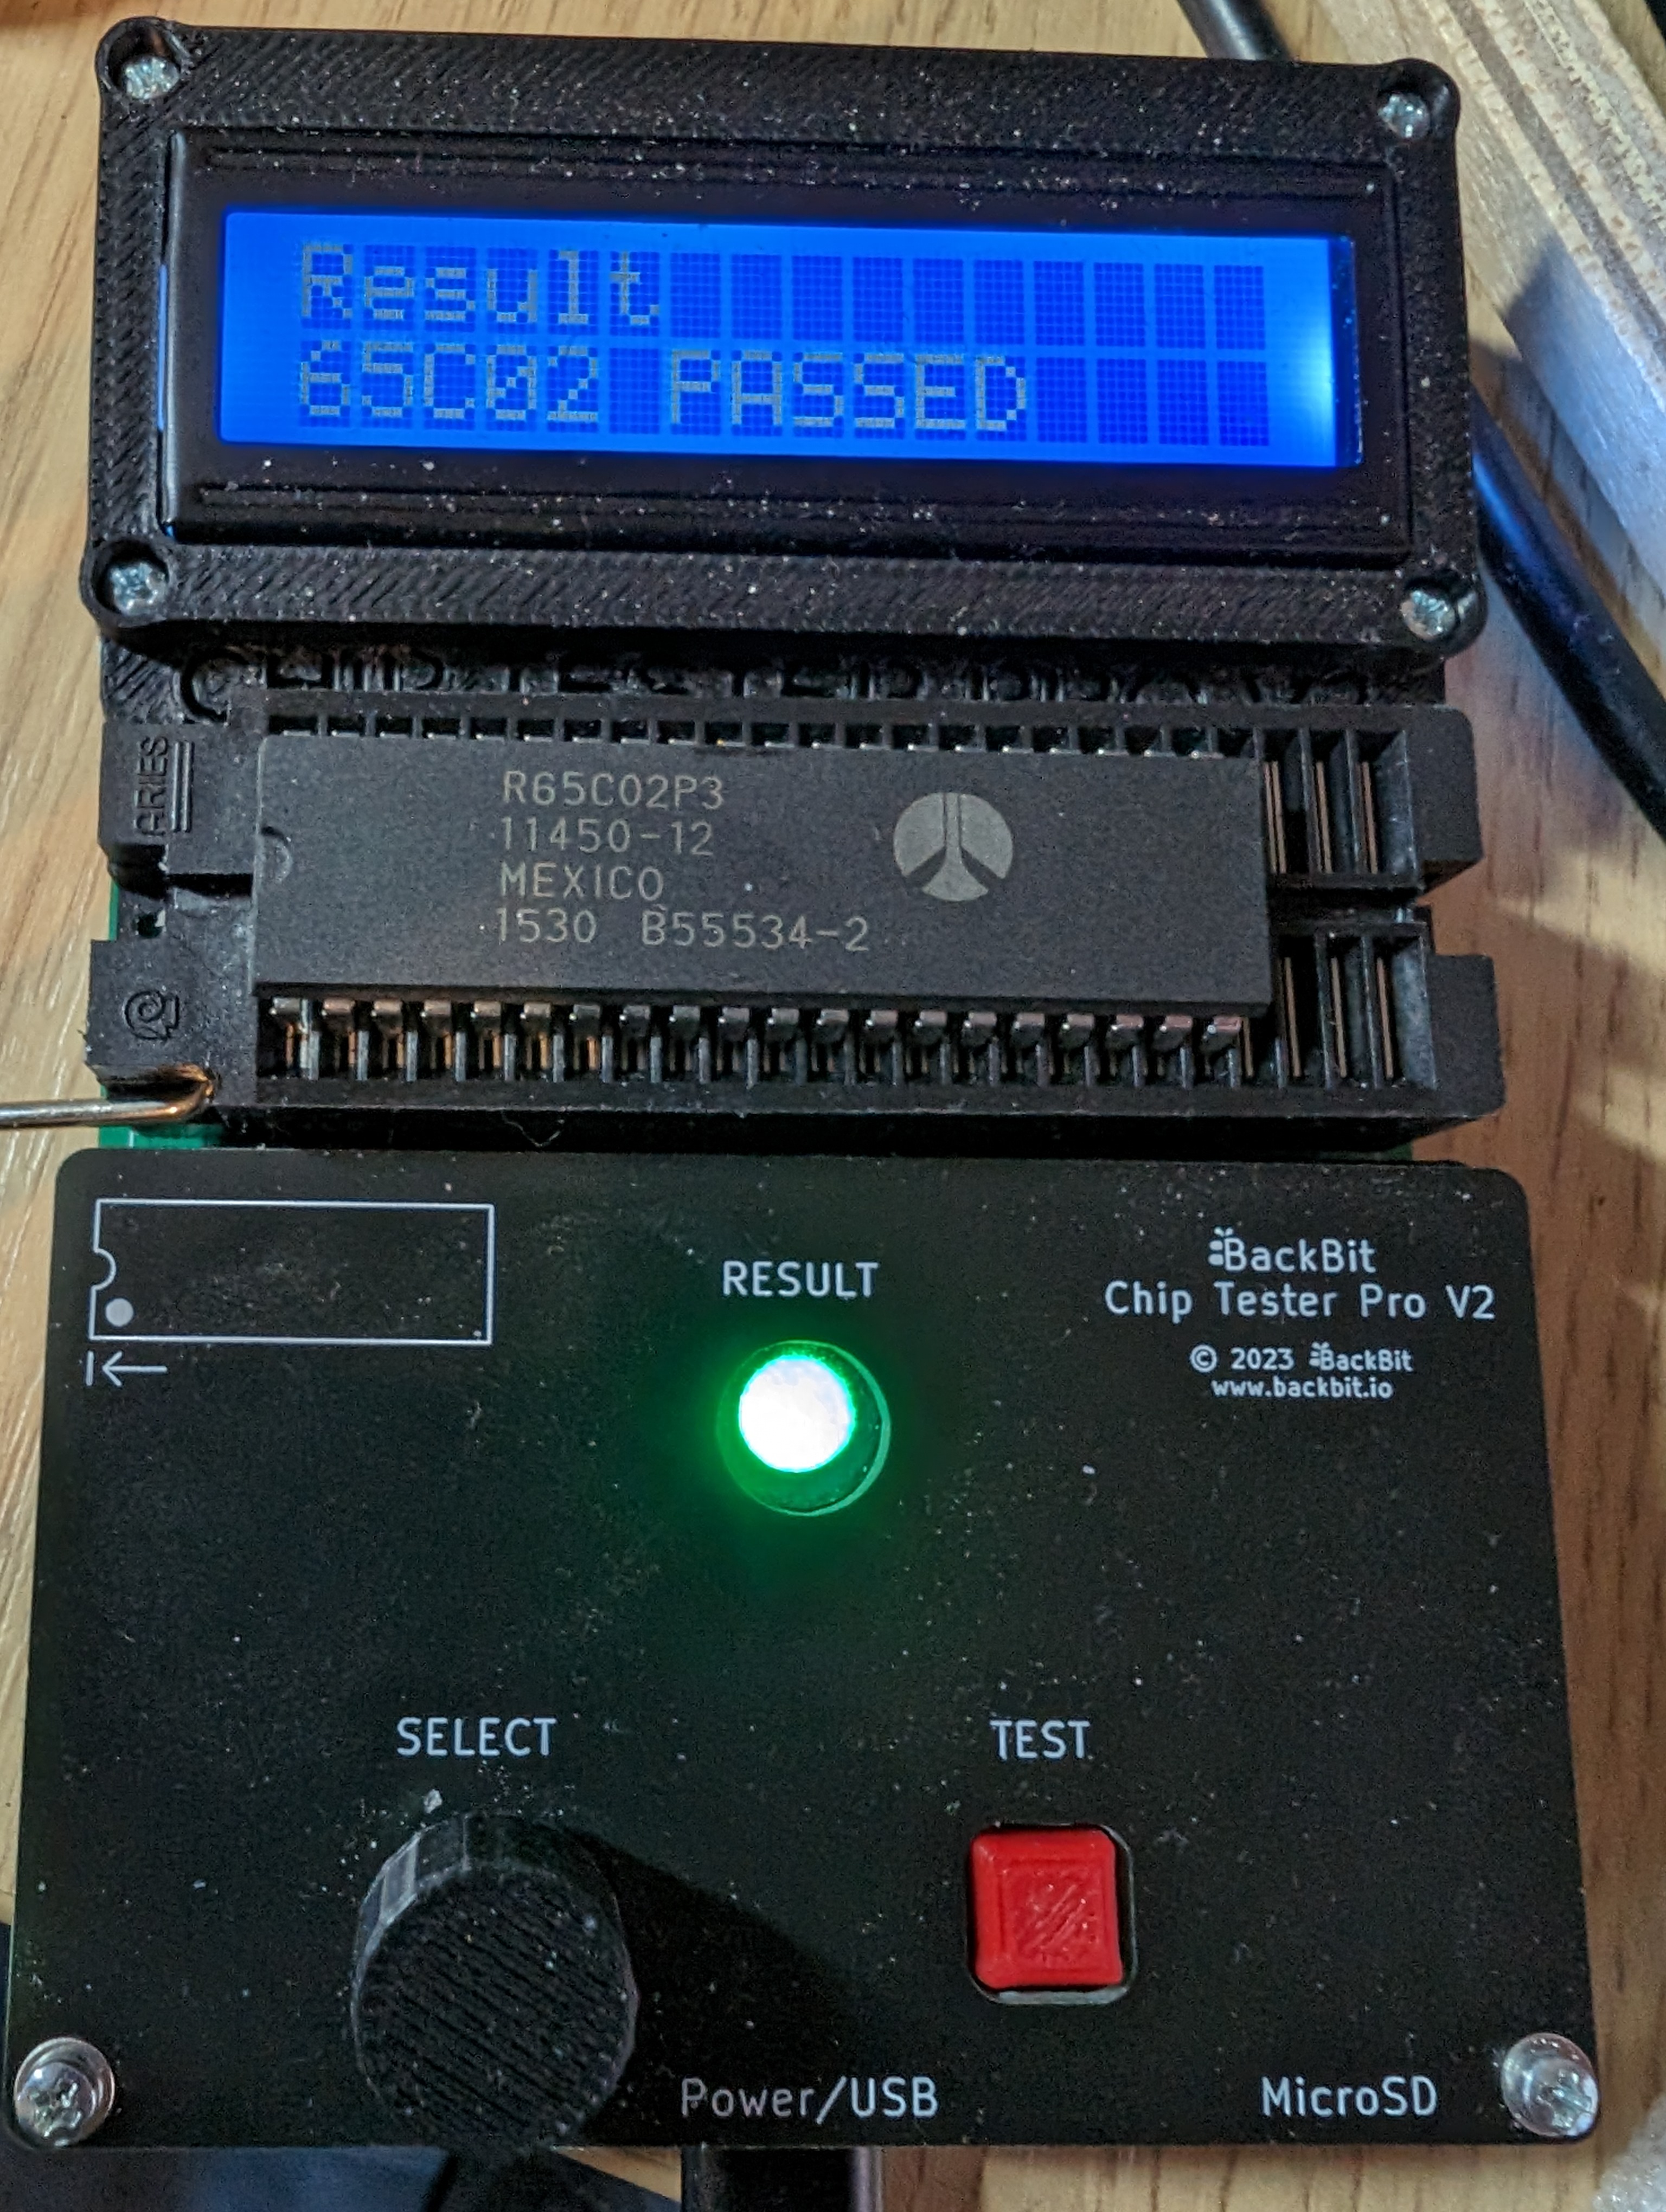
With this, I can quickly test the entire chipset and RAM of a machine to figure out the cause of a failure. It also helped me quickly go through a pile of Amiga chips that were given to me, some were known to be dead, some functioning.
Evie, the creator of this device, is constantly updating it. She has added support for Amiga RTC chips thanks to a request from me, and fixed a bug I found.
ESR tester
Sometimes it is not always obvious as to whether or not a capacitor has degraded. For such situations, I have an ESR tester. ESR stands for Equivalent Series Resistance. A high ESR will mean that although a capacitor may be close to rated value, it does not respond to ripples very well at all, causing instabilities in a circuit.
The ESR meter I use is a Peak ESR70. There are much cheaper meters out there, but I’ve struggled to get good readings from them. The Peak is by far the most accurate I’ve used.
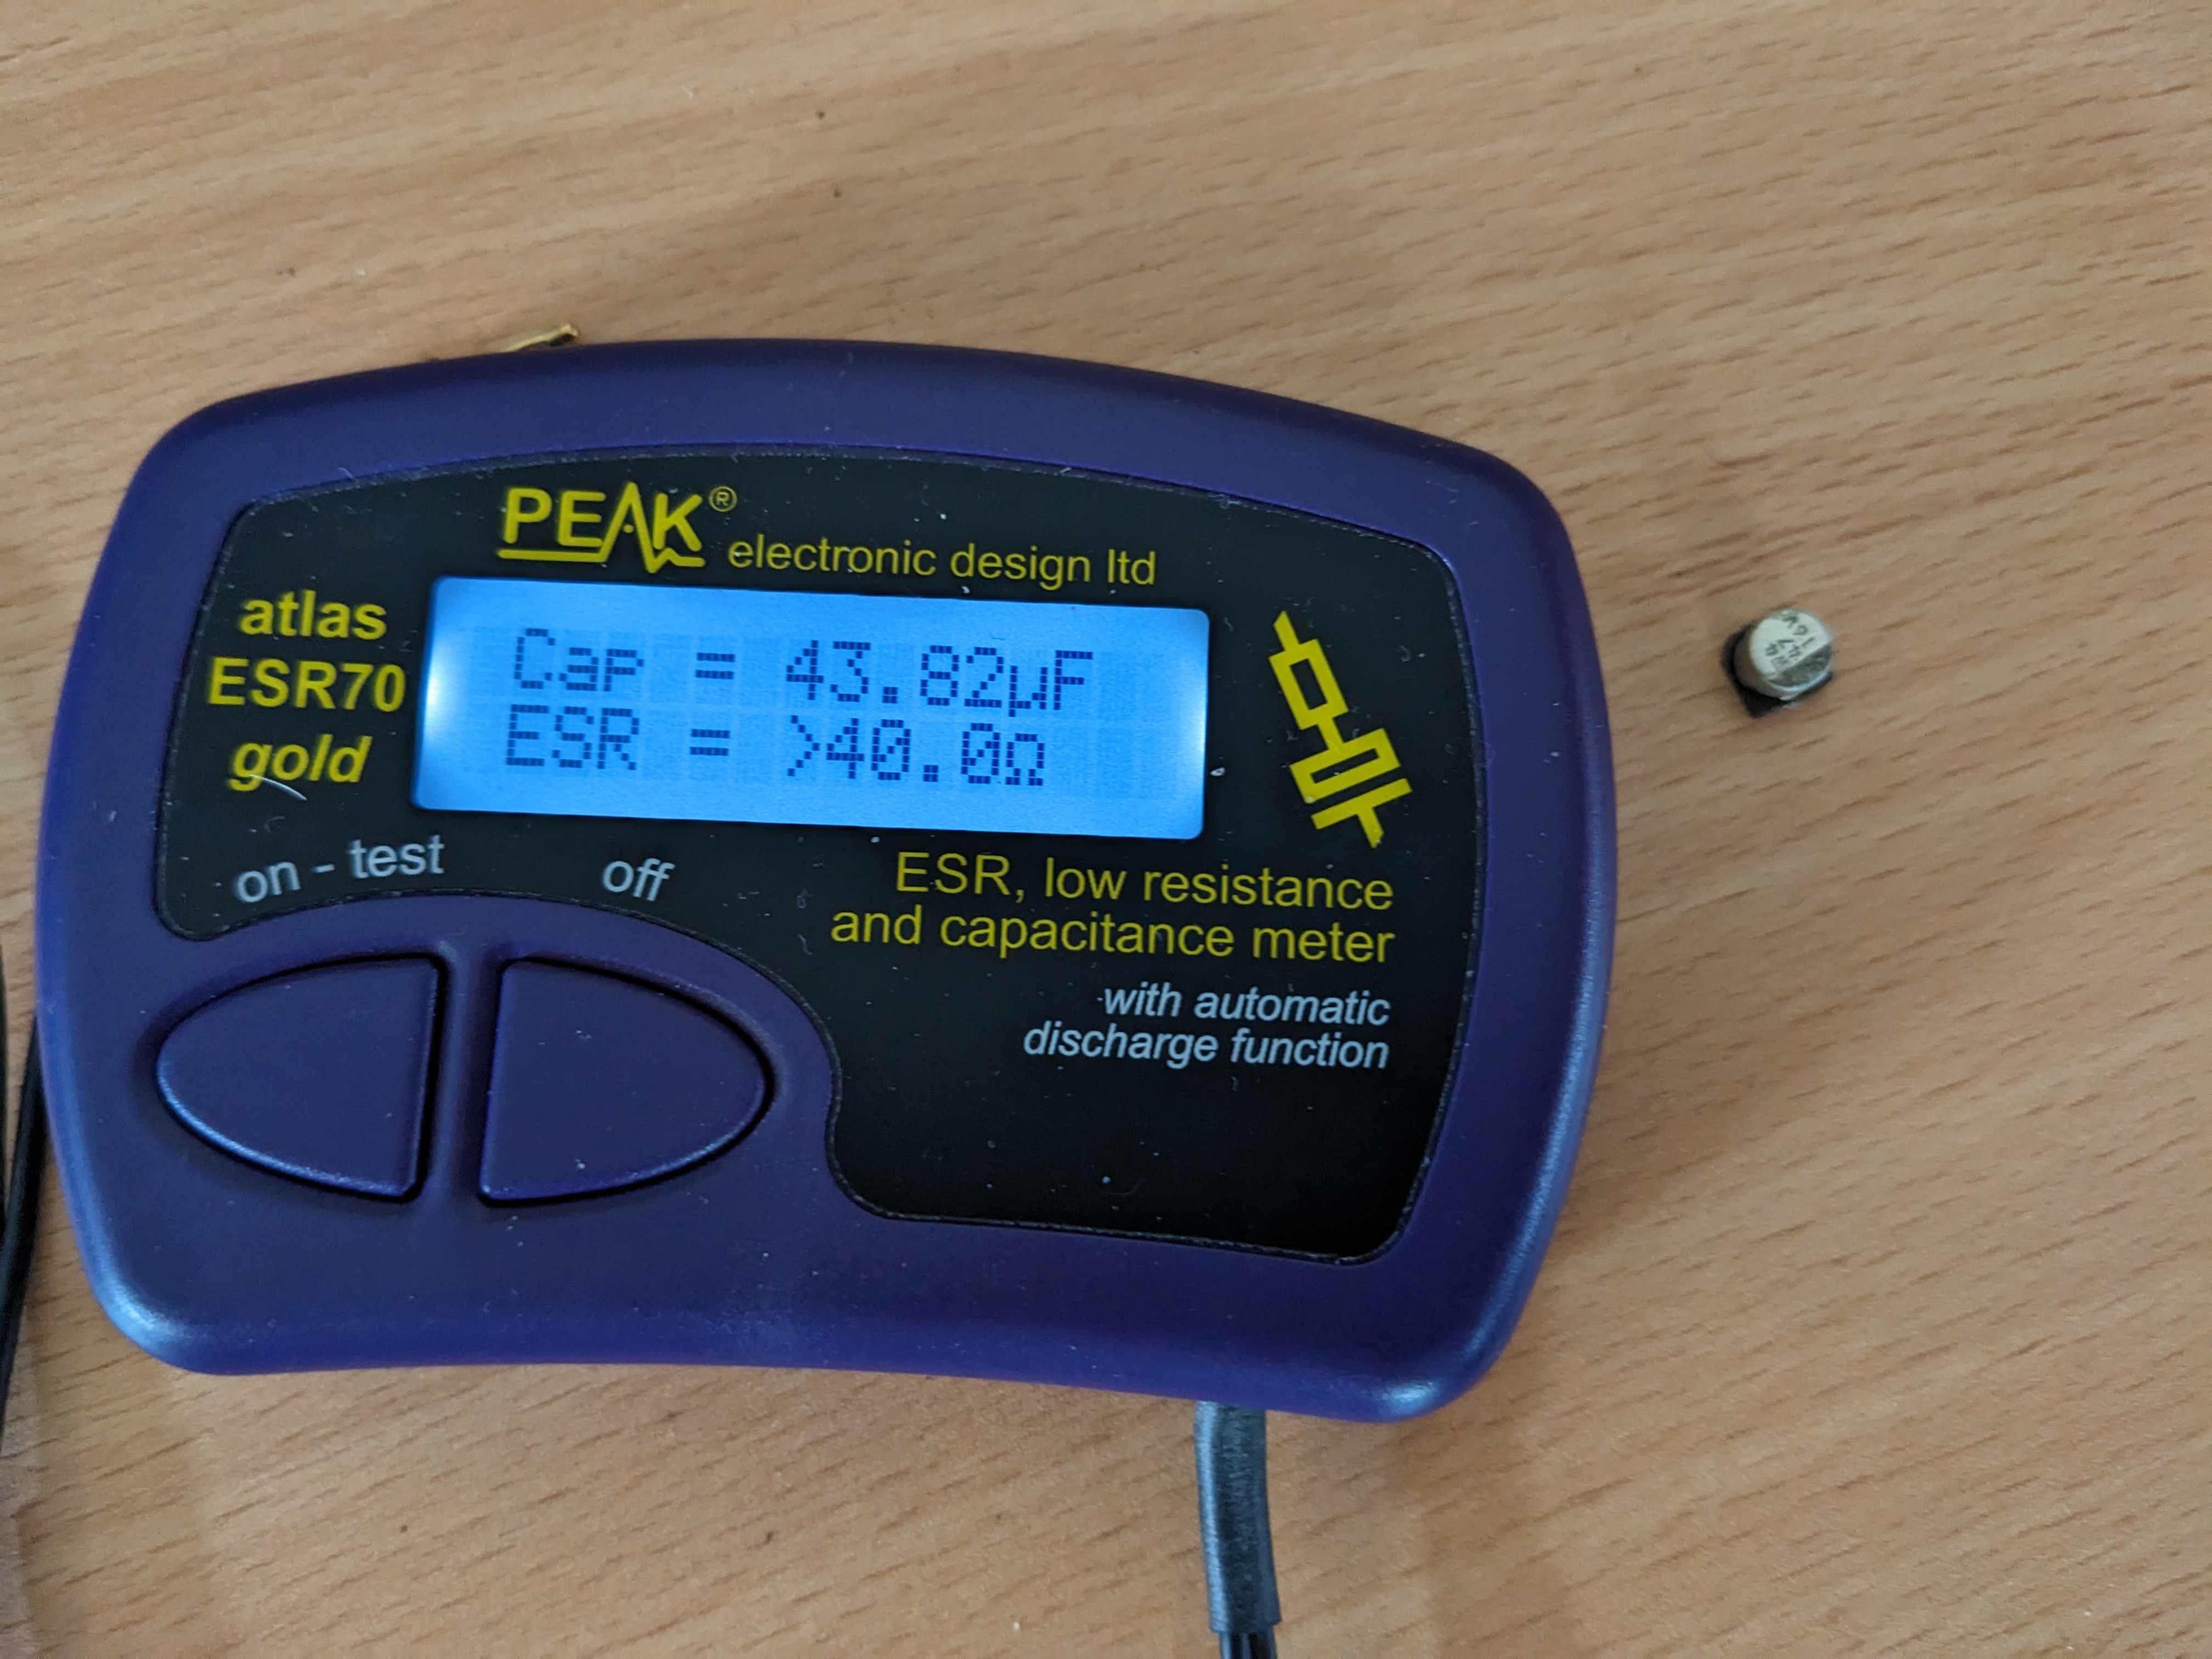
The meter comes with a handy manual that contains a table which shows what good ESR values should be for various values and voltages of capacitor. You can see in the photo above, this 47uF capacitor is not in ideal health.
In general, capacitors will need to be measured outside of the circuit, but sometimes you can still get good enough rough measurements in-circuit due to the way the meter functions.
Oscilloscope
This one is probably another that goes without saying, although I typically only resort to using my scope for more complicated repairs where other things in this post have not helped to identify the problem.

I have the above 4-channel 100MHz Siglent SDS 1104X-E. Whilst not the fastest around (especially now), at most I’m usually dealing with 20MHz signals, so this is plenty. I also have the logic analyser addon for this scope, which I also find very useful if I want to see what is happening on an entire bus.
Other tips
Tantalum capacitors
If you find any on a 12v line, just replace them. In my experience, they all go short circuit on a 12v line and can be violent when they go. Often 16v rated capacitors were used, and, over time, 12v is just too close, I guess.
Rifa capacitors
Replace on sight. The newer ones are much higher quality, and the old ones will turn into smoke generators rather quickly. BBC Micro / Master power supplies have them, I’ve seen a certain model of Amiga 2000 with one in behind the power socket hidden in heat shrink (that let out the smoke before I spotted it). I’ve also seen one fail in a monitor before, which almost caused BBC Norfolk to be evacuated when it went. The plastic casing degrades and this lets moisture from the air in, causing a short circuit. Worst case, you can usually just remove them, and it will not affect the function of the power supply.
Power supply testing
I always test power supplies with a load before I test them on a motherboard. Usually, an old IDE hard drive works great for this, but the load is important as many PSUs either won’t start or won’t be stable without load. You can then test the voltages. I’ve heard recommendations of wiring them in serial with a light bulb before, which will protect against short-circuit conditions and limit current. I don’t do this yet, but I really should. It is on my list.
SMD electrolytic capacitors
Just replace them. They may be OK for now, but when they fail, they are corrosive to the board underneath. Usually at least one has failed over 30 odd years. The smell when they leak is a bit fishy.
Early 2000s electrolytic capacitors
In this case, I’m talking through-hole, these should all be tested. There was a chemical formula error back then, which caused them to fail early. Usually, there is a visual indication of this, the top bulges or bursts. But it is good to test them too for early failure.
Check for shorts
Do this before applying power. A low resistance between the motherboard voltage lines and 0v line can be normal, even 100ohm or so, depending on the computer. But a dead short is an indication of a problem. Spotting early can avoid damage later. There are techniques you can use to find the bad component, including setting a low current on a bench power supply and a thermal camera. Alternatively, you can use a multimeter and measure the milliohms of the short in various places across the board to narrow down where the failure is.
Want more?
If this is useful to people, I’ll write up more tips and tools in a future post. I’m also designing some more test gear for some machines, which will be covered in the coming months.
Leave a Reply