

I have restored the boxed Amiga 1000 main unit and the mice that came with it. Now is the turn of the keyboard.
About the keyboard
The Amiga 1000 keyboard came from a time before the standard layout we know today was fully formalised. The cursor keys are closer to the main character keys, and the numeric keypad is missing some maths operations. It uses mechanical key switches and at the time it would have been a very nice unit to have. As an added bonus, it slides under the machine when not in use.

It is wired to the Amiga using a 4P4C connector / cable that is sometimes referred to as an RJ9, RJ10 or RJ22. An old 4-pin telephone handset receiver cable usually does the trick if you ever need to replace it.
I have repaired one of these keyboard before, but I figured I’d document this repair too, especially because there are some new techniques.
As we can see in the first blog post in this series, the keyboard doesn’t fully work.
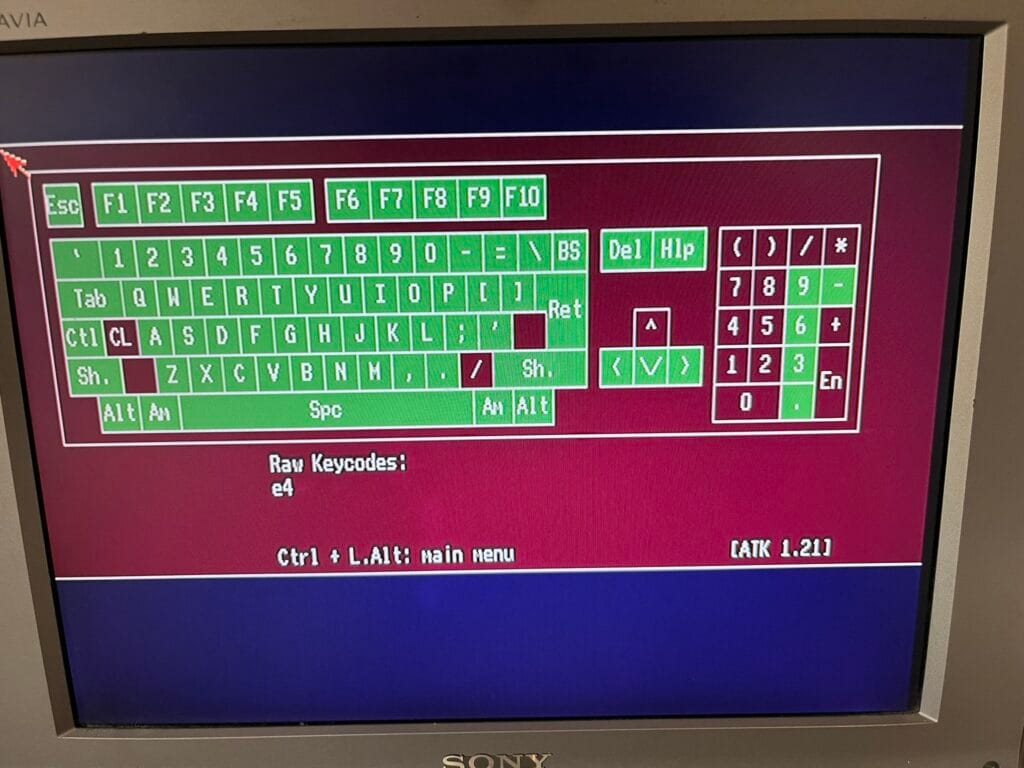
Now, the top row of the numeric keypad and the “+” key doesn’t exist on this keyboard. But even with those eliminated, there are quite a few keys not working. In addition, some of them were physically getting stuck down.
First phase
The first part of the repair is to disassemble the keyboard. There are four screws holding the casing together. One of which I provided in the first blog post because it was missing. I then removed the key caps, these will be cleaned later.
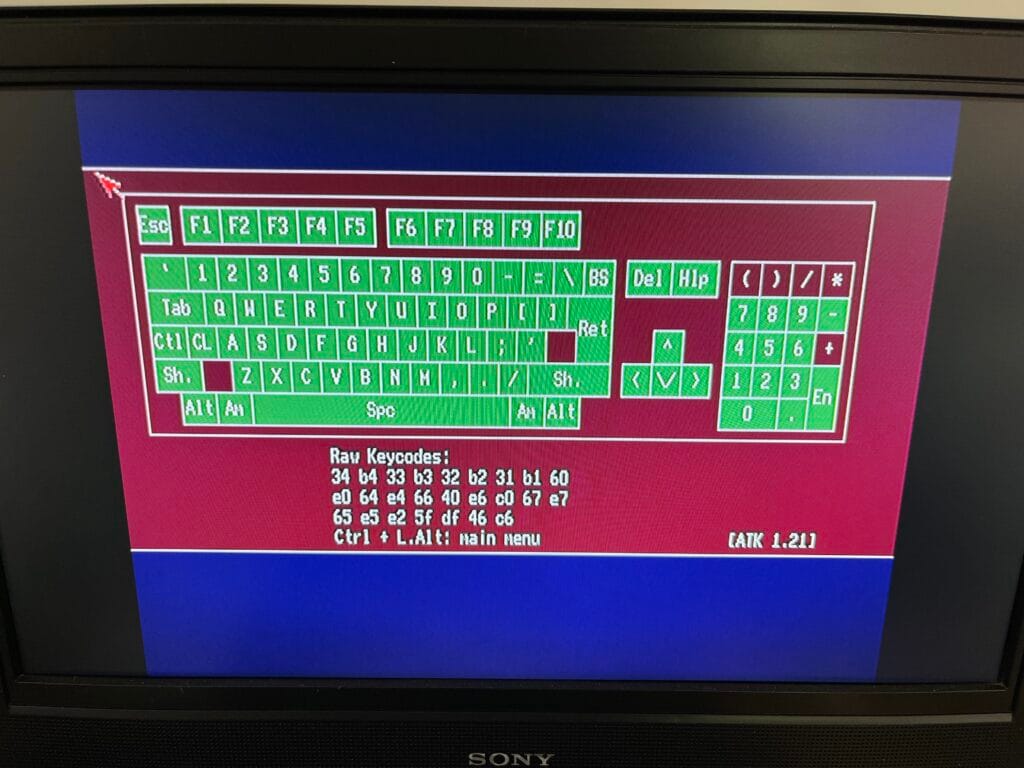
Now, with the machine running, I re-ran Amiga Test Kit, sprayed contact cleaner into the keys that were failing and pressed them a lot to work in the fluid. This definitely helped, more of the keys came alive.
This made things a lot better. We are down to three keys that are not functioning. The up cursor, the numeric keypad ‘7’ and the ‘Enter’ key.
Key Switch Repair
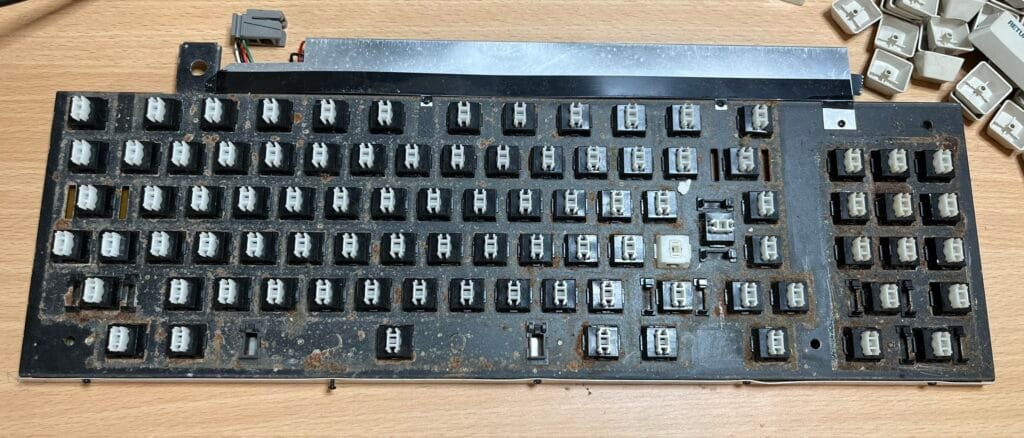
To repair these last three, I need to remove the inner casing and disassemble the keys themselves. The casing is held on using five tiny screws at the front of the keyboard and four more at the top. Many were already quite lose. The metal housing then slides off, revealing a clear piece of plastic protecting the PCB.
Each faulty key needs desolding from the PCB, then by pushing clips at the front and back sides of the key, it is released from the metal top board.
In my previous blog post about keyboard repair, I mentioned that it was a little tricky to open the keys. Someone saw this and created a tool to open them. I printed a couple of these ready.
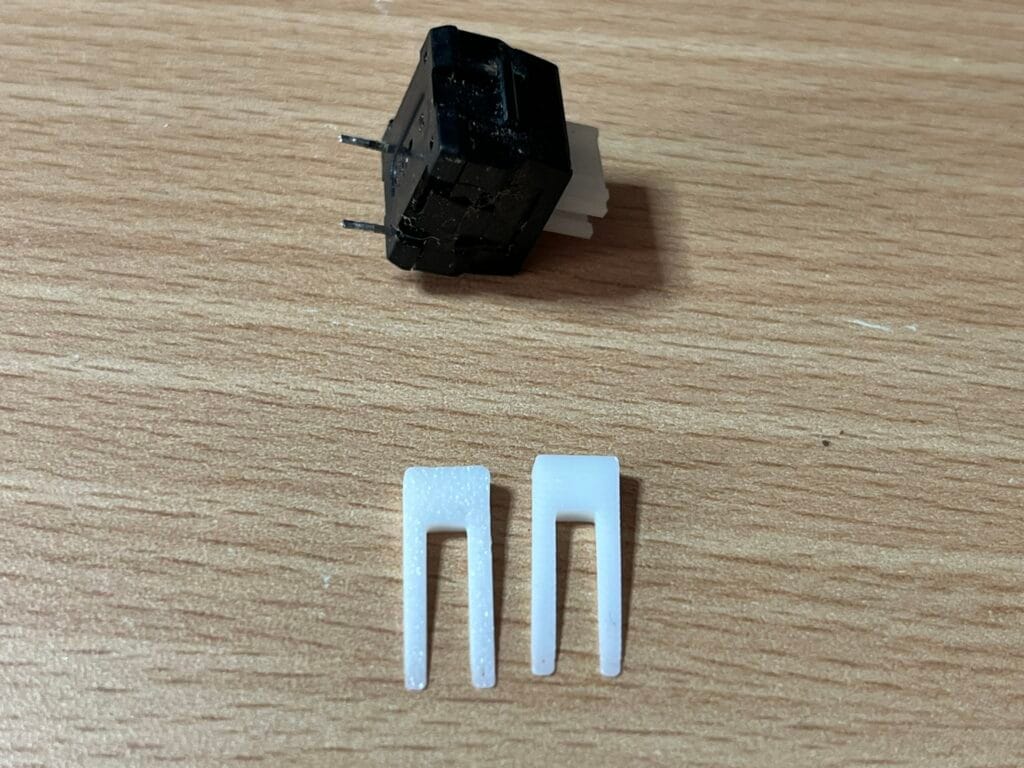
These slide into either side of the key, releasing the clips holding it together. A spudger or similar tool can then be used to separate the key. This made it a lot easier than last time.

The key itself is made of four main parts. The top and bottom housings, the sprung slider and the electronic contact section.
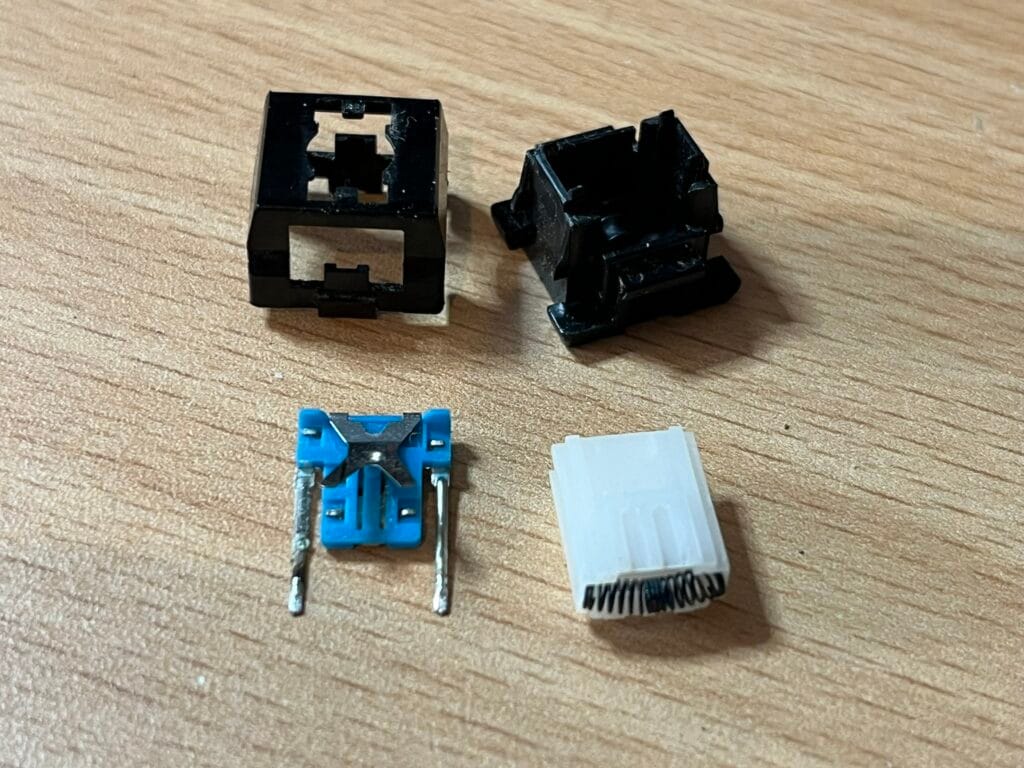
The way it works is a little complicated, but basically the bottom of the slider has a horizontal spring in it, that gives most of the physical resistance and key spring back motion when it pushes against a bump in the bottom of the key housing. There is a section in the middle of the bottom housing that this rests on and buckles against when pressed.
When the key is pressed, the side of the white plastic slider pushes against that metal cross shape on the electronic contact section. This in turn pushes a tiny plastic button which makes contact between the two pins.
This particular key had corrosion on one of the legs, which I cleaned off. The general fix for these is to spray contact cleaner in the tiny button section and bend the metal cross up slightly so that the white plastic pushes it a little more, and it pushes against the tiny plastic button properly.
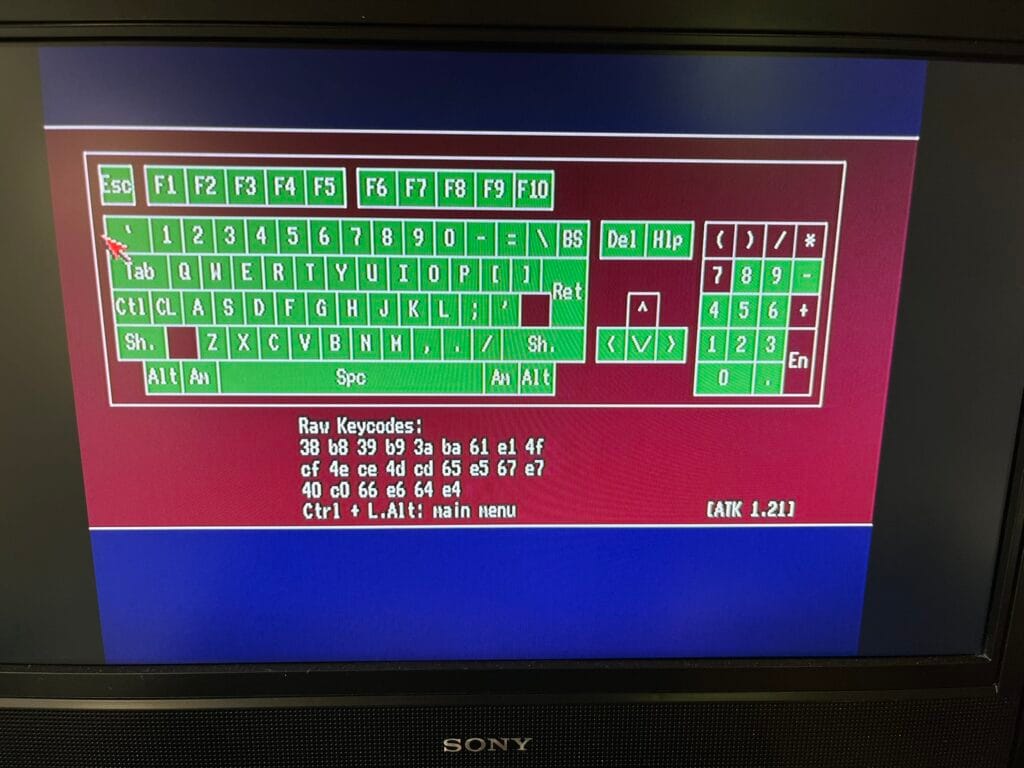
Once I had done this and had done a continuity test of the keys to confirm they were fixed, I soldered them back into the keyboard to test.

Excellent! We now have all the key switches functioning.
Cleaning and Reassembly
All the keys were cleaned and dried. They were a bit grubby and I suspect that is what was causing them to stick down. Then comes the fun of making sure I pop them all back in the right place.

Unfortunately, once the key caps were back on, three of the keys started sticking again. These were the Esc, Left Alt and Return keys.
More Key Repairs
On closer inspection, I found that the white plastic sliders for Esc and Left Alt keys were cracked. When you put the key cap on, the cracked plastic expands slightly, wedging it in the key housing. I’m taking a two-pronged approach on this one. First of all, I found a supplier of new key switches, they are coming from China, so will take a while. In the meantime, I disassembled the current switches and tried to glue the cracked sliders. This didn’t work, but it gave me an idea, which I will get to shortly.
As for the Return key, this is a little bit more complicated, but easier to fix. This has the normal key switch and a white blank module which is like a key switch, but it is used as a support. Inside there is just a slider, no spring.

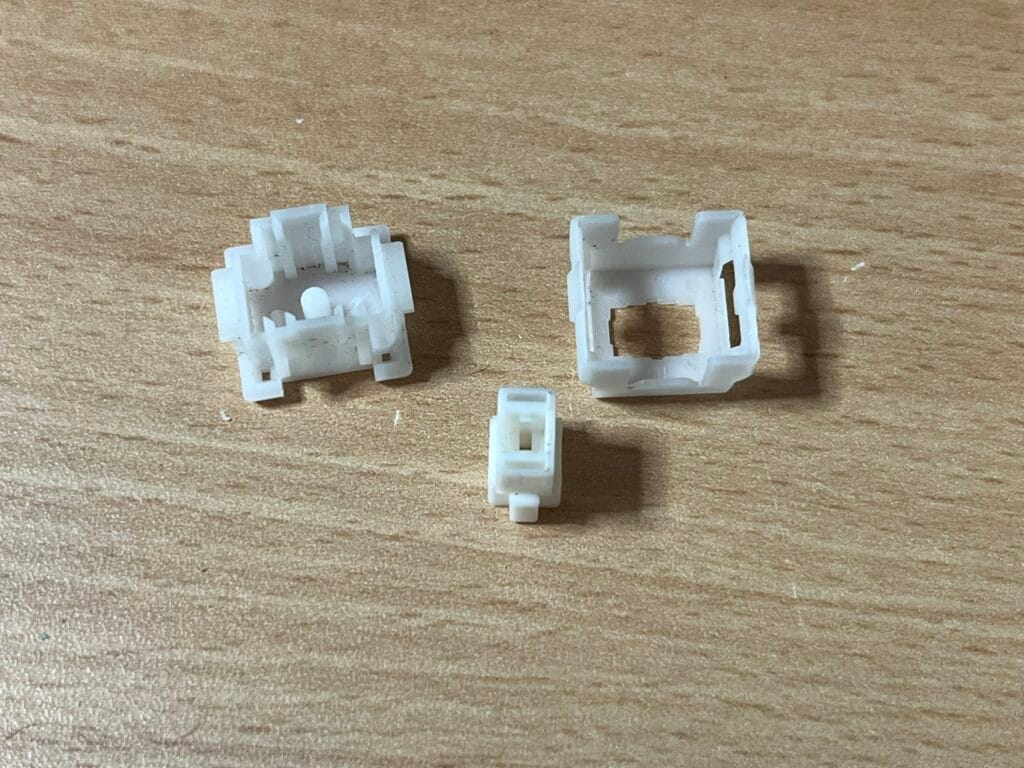
To fix this, I used silicone spray to lubricate the blank module slider. After that, the Return key worked perfectly.
New Parts
When the glue failed, I had a sudden realisation: I own 3D printers, I can try and make a replacement part. I set to work designing, and after seven iterations of minor tweaks, I had a final design.
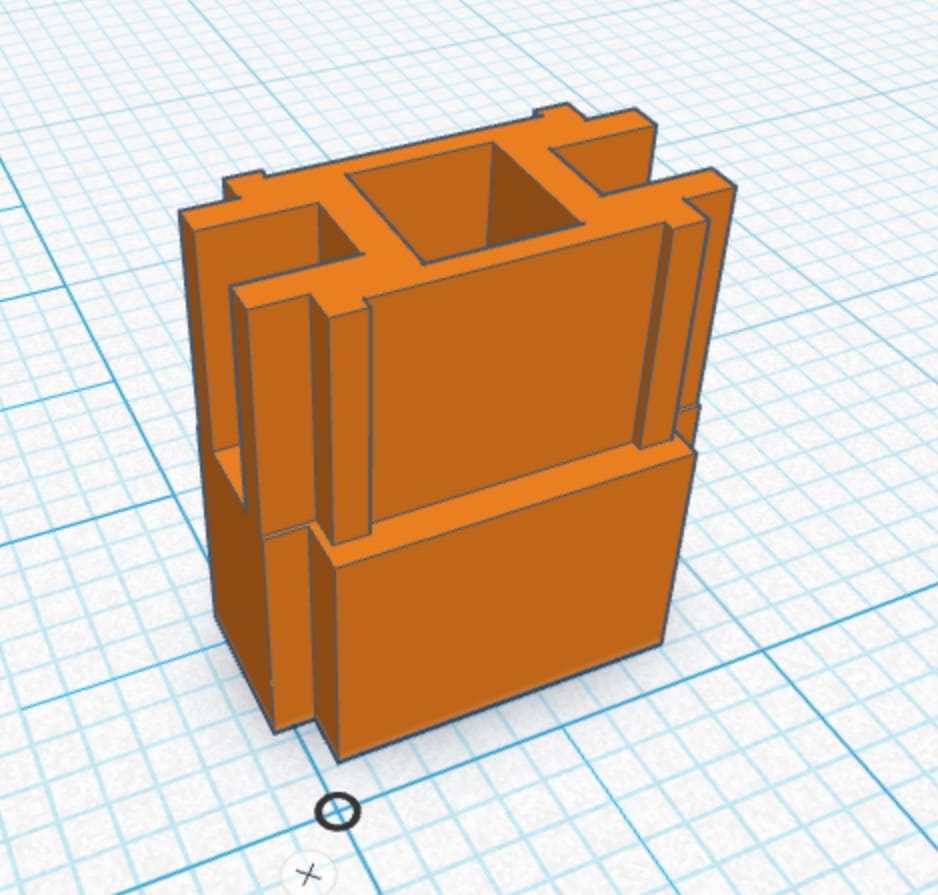
Once printed and assembled, this is what it looked like. The white one is the original.
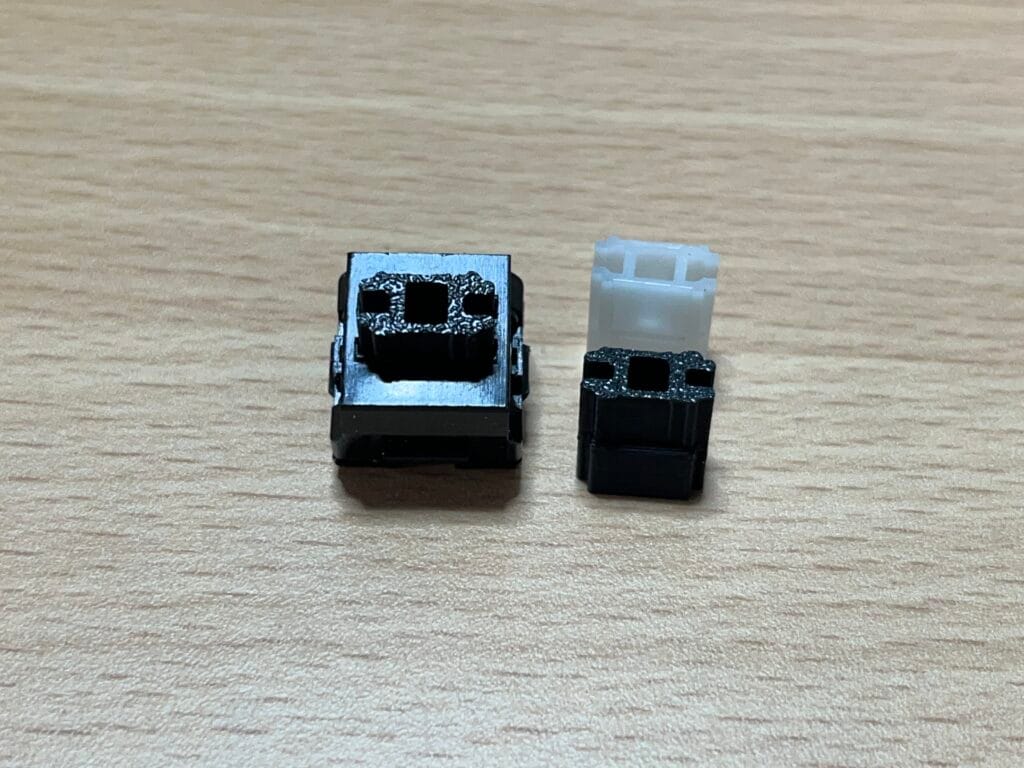
My design puts a little more tension on the spring than the original, which means that the key requires a little more force. But for the Esc and Alt keys, that doesn’t really matter. I have made the design available for others on Cults 3D.
At some point in the future, the replacement keys I ordered will turn up, and if this design eventually fails, I will have the spares I need to replace them.
Final Repair
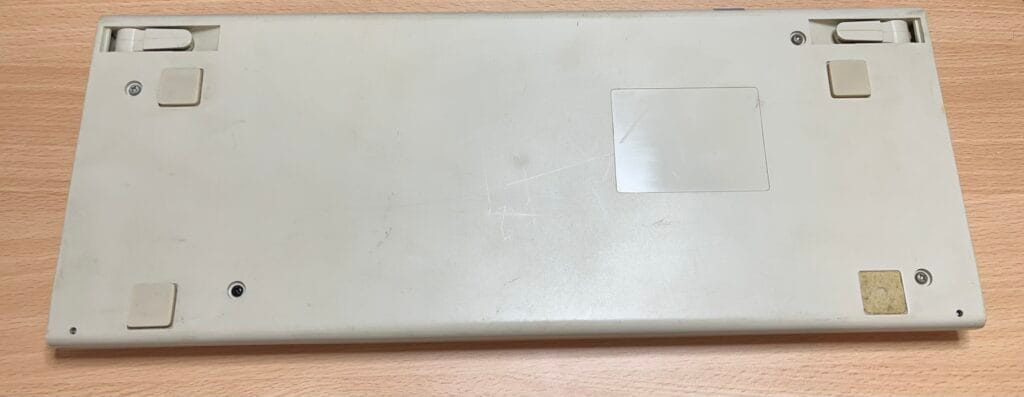
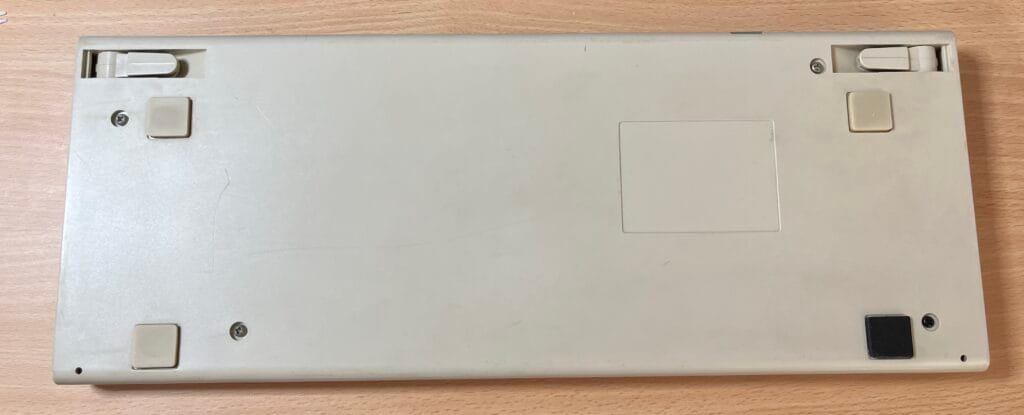
You may have noticed a foot was missing from the bottom of the keyboard. I happen to have a spare black one from the last time I repaired one of these keyboards, so I cleaned the area and stuck that on.
And there we have it! A fully functioning Amiga 1000 keyboard!

Leave a Reply