

On Saturday, I was at a Norwich Amiga Group meetup, where I got to meet Stuart (Stoo) Cambridge again. For those who don’t know, Stoo is a great graphics designer and used to work for a famous game development company called Sensible Software.
Stoo brought a couple of Amiga 4000s along with him for me to repair. So, this is the first post in a series where I repair these machines.
The machines
Here we have a 68030 Amiga 4000 and a 68EC030 Amiga 4000. The main difference between the two is the 68EC030 CPU does not have an MMU, which can be very useful to speed up things such as ROM operations.
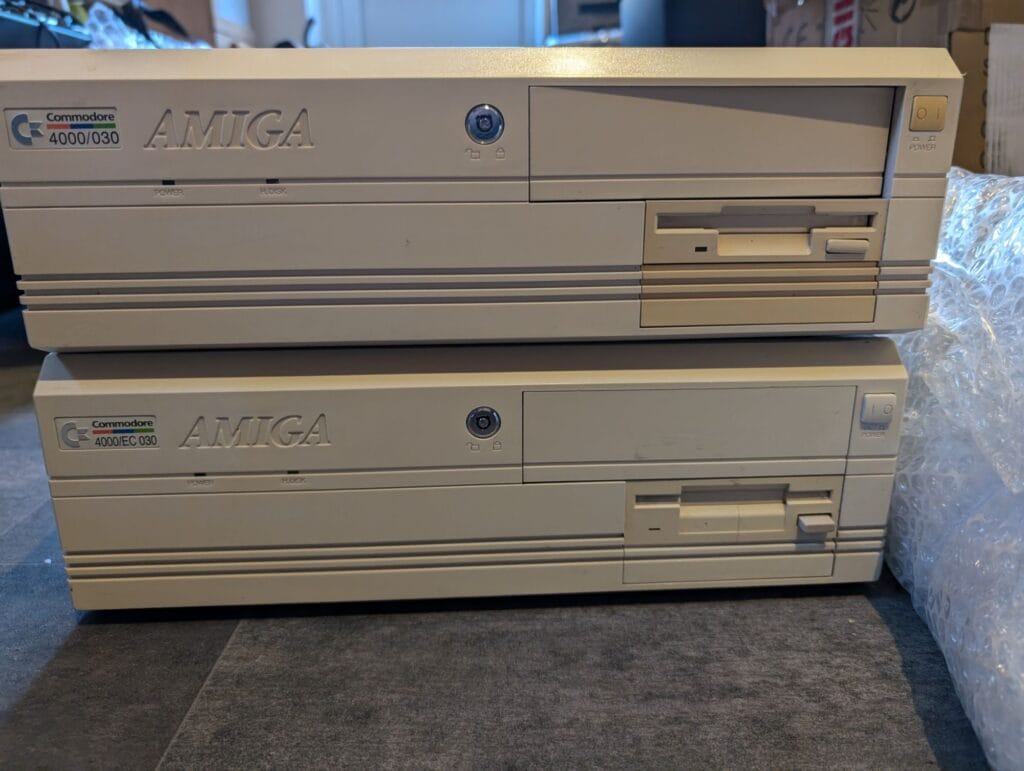
Stoo is famous for a game called Cannon Fodder, and in that game, every soldier you play with is named. Stoo being the third soldier you get. So, I think for this series, I should name these after the first two. The top machine will be Jools and the bottom one called Jops.
I believe these machines came from a company Stoo was a part of after his time in Sensible. But they wouldn’t have had much usage because they moved to PCs very quickly afterwards.
Stoo also gave me an A4000 drive cage with two drives in it. I said I would archive these if I could.

Inspection
Let’s open up Jools first.

Stoo thoughtfully removed the battery from the motherboard about 5 years ago. Unfortunately, there is still a bit of corrosion. With my Hafnium board, I could see that the Chip RAM socket was good, but the Fast RAM sockets were showing the first 8 bits of the data bus are failing. This is an indication that the ground trace to U891 is broken. Possibly more traces to that chip too, but the ground trace failing is quite a common failure with these machines.
In addition, the mouse / joystick ports are going to need replacing. Of course, the whole machine will need a recap.

Next up, inside Jops…


Again, Stoo has removed the battery on this machine. The damage doesn’t look as bad. The Fast RAM passed in Hafnium, but it looks like the address line A2 has failed on the Chip RAM.
Jools diagnostics
I removed the motherboard and did a quick clean up of the battery damage to the most critical area. I will be doing more clean up as I go on, and the person who will be receiving this machine in the end has asked for the RAM sockets to be replaced. But they are going to be taking it away for an event before then.


A quick probe with a continuity meter confirmed that the ground trace to U891 is indeed broken. One other data trace appears to be broken too. But I will do a complete diagnosis later, it is very possible that traces are damaged for the RTC and three chips to the left of the battery. These will be fully tested. The RTC chip itself often fails, so this will be tested as we progress.
Next time
For the next post I’m going to repair the damage found in Jools so far, do a bit more cleaning and testing. Hopefully, we can get this board into a bootable state!
Leave a Reply