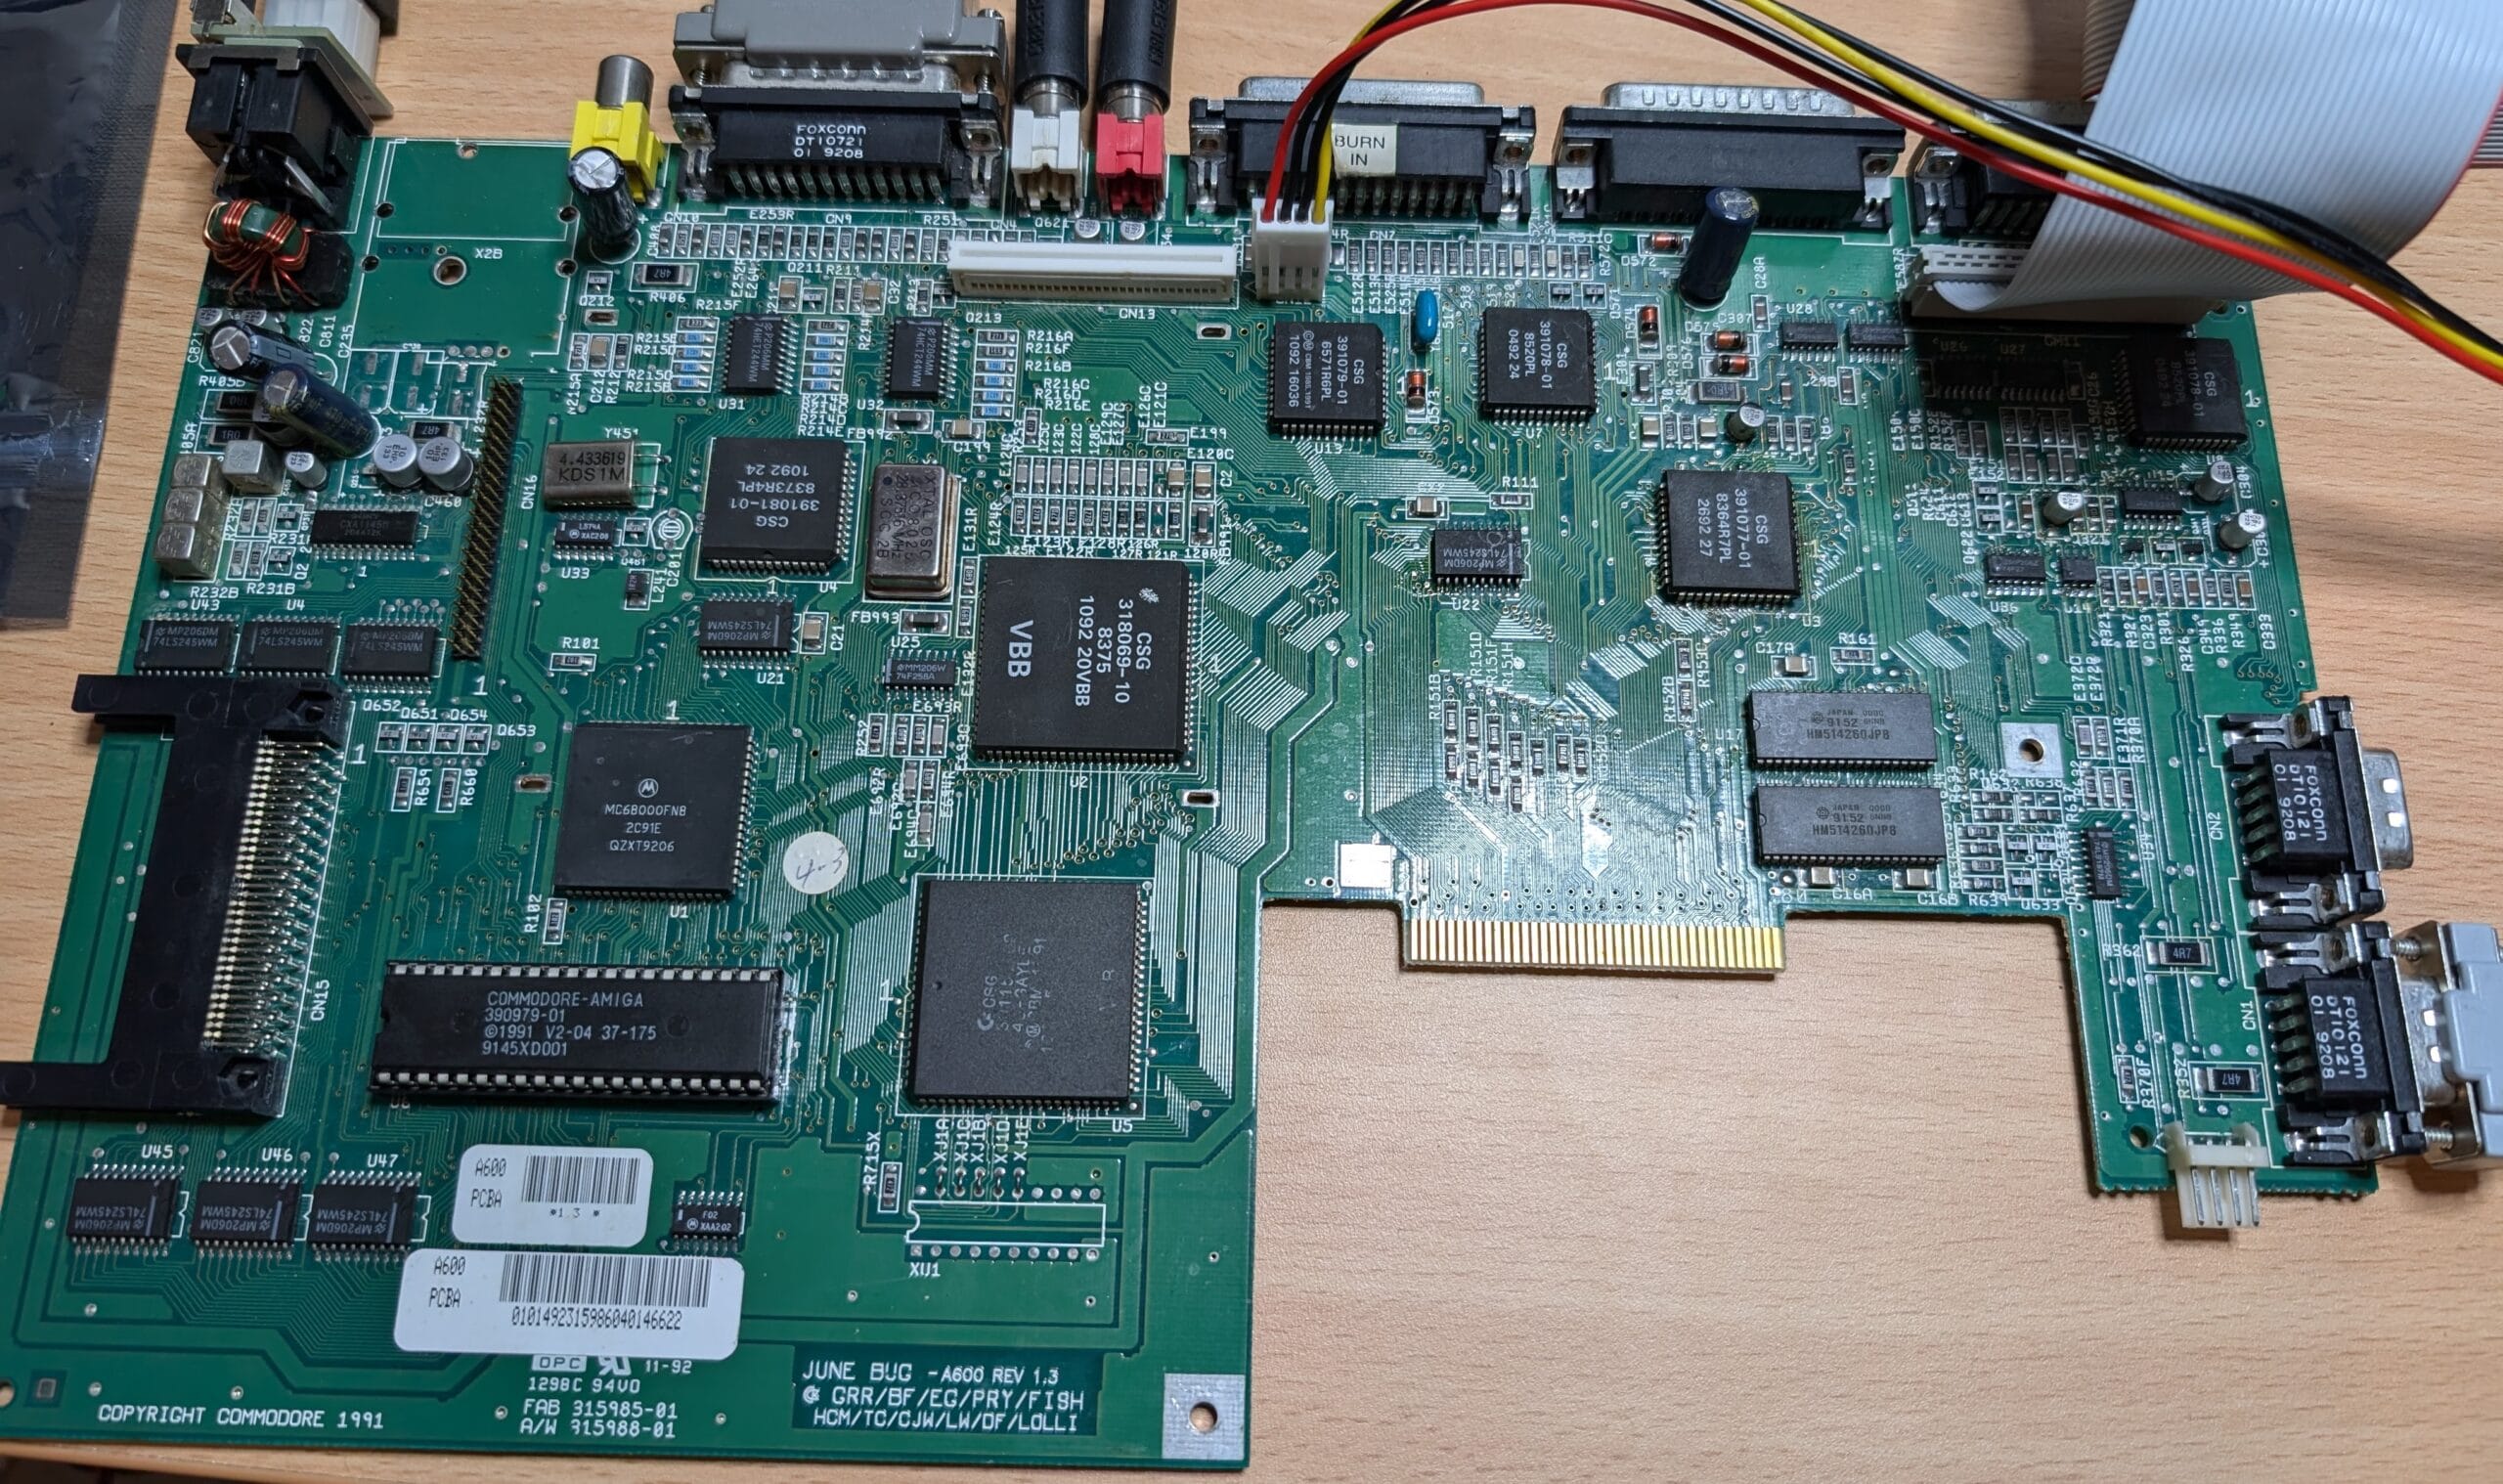
I have a lot of customer repairs in right now, and most are awaiting new parts (mostly SMD PLCC sockets, as I have run out). In the meantime, I bought a faulty Amiga 600 motherboard, which Karl Dyson (Retro32) pointed me to. It was available for a very low price. Let’s see if I can fix it.
The Fault
This is the motherboard I received, setup ready for testing.

What I know based on the description given:
- This is a revision 1.3 Amiga 600 motherboard.
- It has been recapped. Doesn’t look like they did a great job, though.
- Paula has been replaced. Not the best soldering job either, but I don’t want to touch it up if I don’t want to redo it if I don’t have to.
- Right mouse button is stuck down.
- There is no ROM. I shoved a spare Kickstart 2.04 ROM in there to test.
Diagnosis
Right mouse button immediately screams a Paula issue, but there are usually other issues that happen at the same time, such as IRQ handling failure. To describe how I diagnosed the fault, I first need to describe how a few things work.
On both ports, the left mouse button, which is also the joystick fire button, is read by one of the CIA chips. The middle and right mouse buttons go into an analogue port of Paula. Paula is traditionally known as the Amiga audio chip, but it has a few extra functions on top of this. This is likely why the previous owner tried to replace Paula.
Paula has a special digital mode for those analogue pins which pulls them up and then pressing the button produces a low voltage.
In this case, you can see this was not happening correctly.

The buttons are acting as if they are being held down. In addition, whilst I was running other tests, I noticed that the audio volume was all over the place. This was a big hint to the problem.
The analogue parts of Paula, and much of the audio circuit, run on a separate power source. This also has a separate set of grounds to the digital side, which are separated from the digital ground by a ferrite bead. This ferrite bead reduces any digital high-frequency noise from affecting the analogue things.
When testing with a multimeter, there should be almost no resistance between digital ground and analogue ground. In this case, it was nearly infinite. The problem was, there was no ground reference, which means the ferrite must be bad.
Resolution
To resolve the problem, I desoldered the current bead. Marked as E301 on the motherboard.


It was actually snapped in two and fell apart whilst desoldering, which would explain why it wasn’t working.
I don’t have any of the right size in-stock right now, so I temporarily used a 0805 ferrite in its place until a new one arrives.

Not great, but it should do the job until a new one arrives.
Testing
I loaded up Amiga Test Kit after this and re-ran the same tests.

The buttons were not held down, and worked correctly! At this point, I had a working Amiga 600 motherboard, but there were more things to do.
Recap
As I said before, I was not quite happy with the original recap job.


I replaced them with the Wurth capacitors I usually used, carefully removing and then replacing the keyboard connector whilst I did it. There is not much room for even my smallest irons with the keyboard connector in-place.


A little bit fluxy for now, but this board will have a nice ultrasonic bath later.
Everything still worked well, and I was happier that all the electrolytic capacitors had actually been changed properly.
After that, it was just a case of replacing the missing ROM. I burned Kickstart 2.05 onto a 27C400 EPROM and popped that in. 2.05 is the version the Amiga 600 typically came with, it adds IDE support to the Amiga.

Conclusion
I now have a 100% working Amiga 600 motherboard. This is what it looks like before cleaning.

I’m going to replace the ferrite with the correct sized one, and give the board a proper ultrasonic clean, then it will likely go on sale.


Leave a Reply