
In my retro collection is a Pentium 3 based computer which I will be blogging about once I finish building it completely. But in the mean time I figured I would update the BIOS in it to fix an issue, and bricked it in the process. This is what happened and how I fixed it.
Ooops!
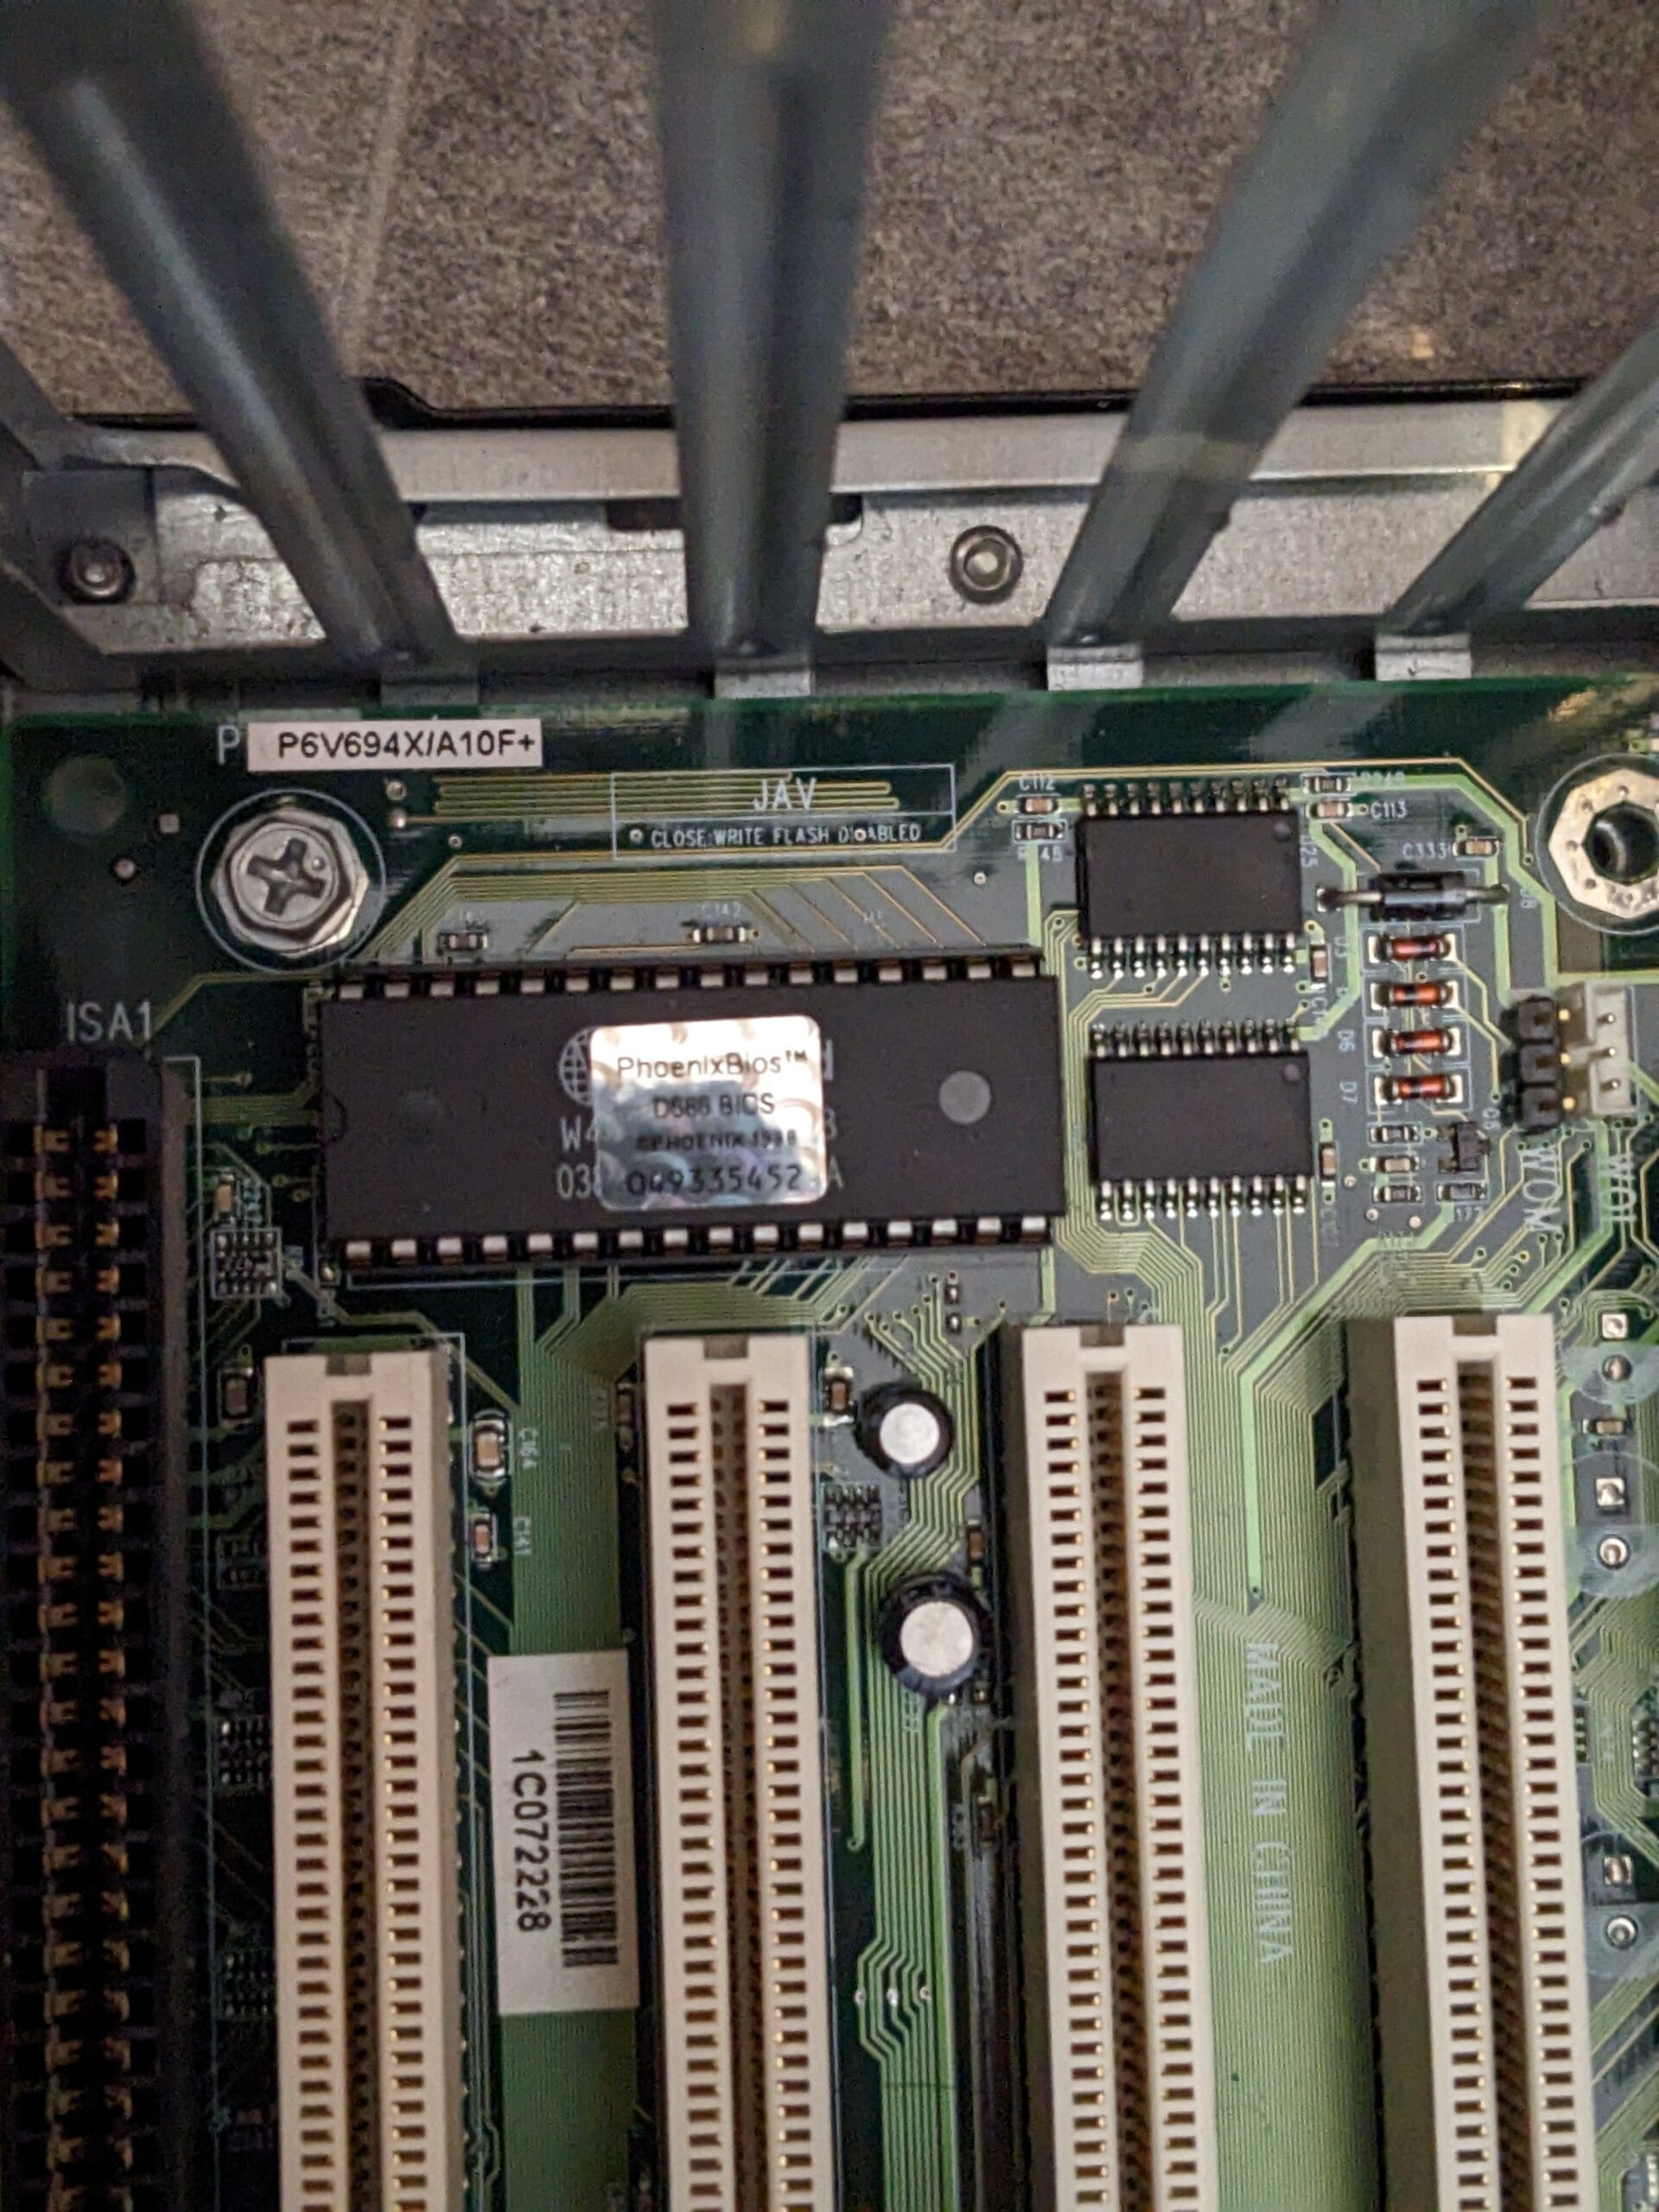
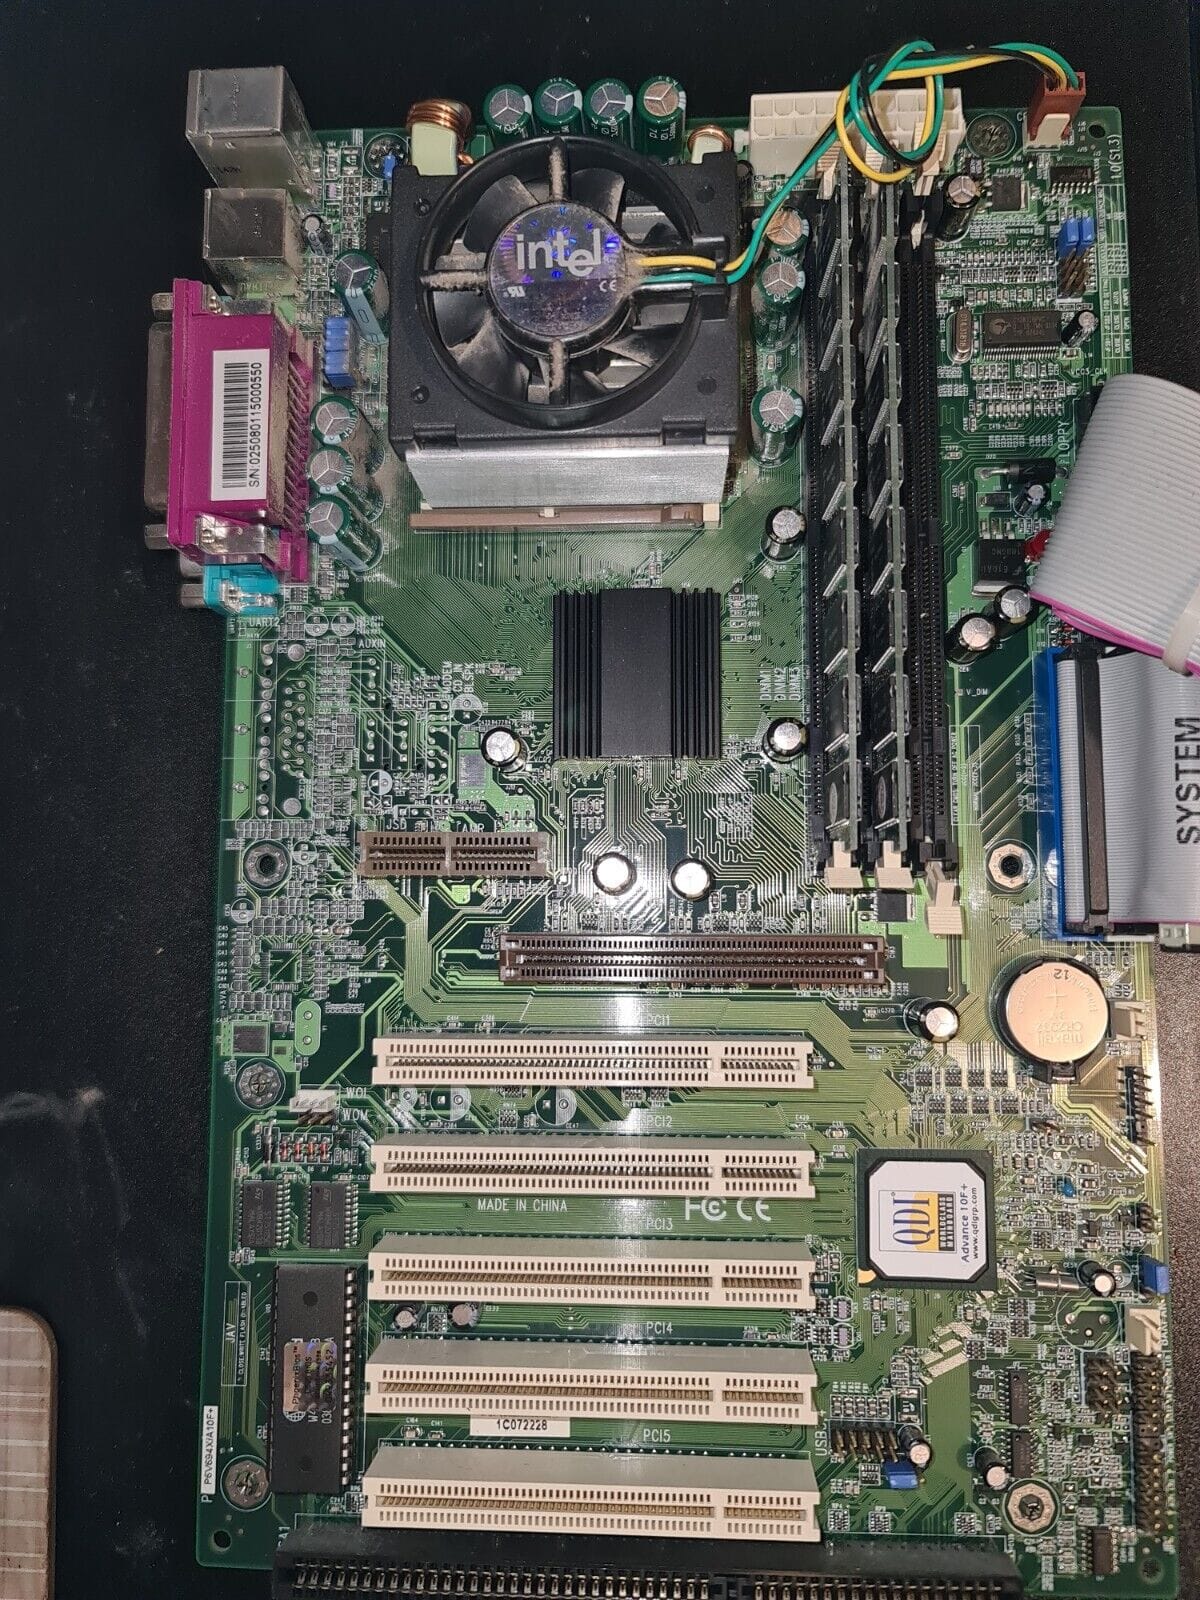
Over the last few months I’ve been building a Pentium 3 based retro machine capable of playing late 90s / early 2000s games. I’ve tried a few motherboards out in this system, but at the moment it is running a QDI Advance 10F motherboard. This is a socket 370 motherboard with plenty of PCI and an AGP slot. Perfect for a Windows 98 era machine.
I was trying out a SATA -> PATA converter with this machine and whilst it worked it was clearly running in PIO instead of UDMA mode, so the performance was quite painful. After a bit of searching for solutions I figured the BIOS needed an update to fix it. Apparently the BIOS in this machine is very out-of-date, with the initial 1.0 release and the last released one is version 4.6. “Great!” I thought, this will have lots of fixes and likely give me UDMA back.
I downloaded this BIOS from an archive of QDI’s website, flashed it and rebooted, and… black screen. Arse…
OK, maybe there is some POST issue I can fix, so I brought out my POST diagnostics card. Which told me that basically everything is dead. The BIOS is crashing very early.
The Solution
On a modern PC there are methods to recover from this, but on older machines like this the BIOS needs to be manually flashed back into health. Luckily I was smart enough to tell the flash software to backup the BIOS before flashing it. I just needed something to flash it with.
With a spark of inspiration I remembered I was given a parallel port EPROM programmer a while back, and given that the BIOS is a DIP chip it should fit. It just needed to discover what kind of flash chip it was. Peeling back the sticker reveals this for us.
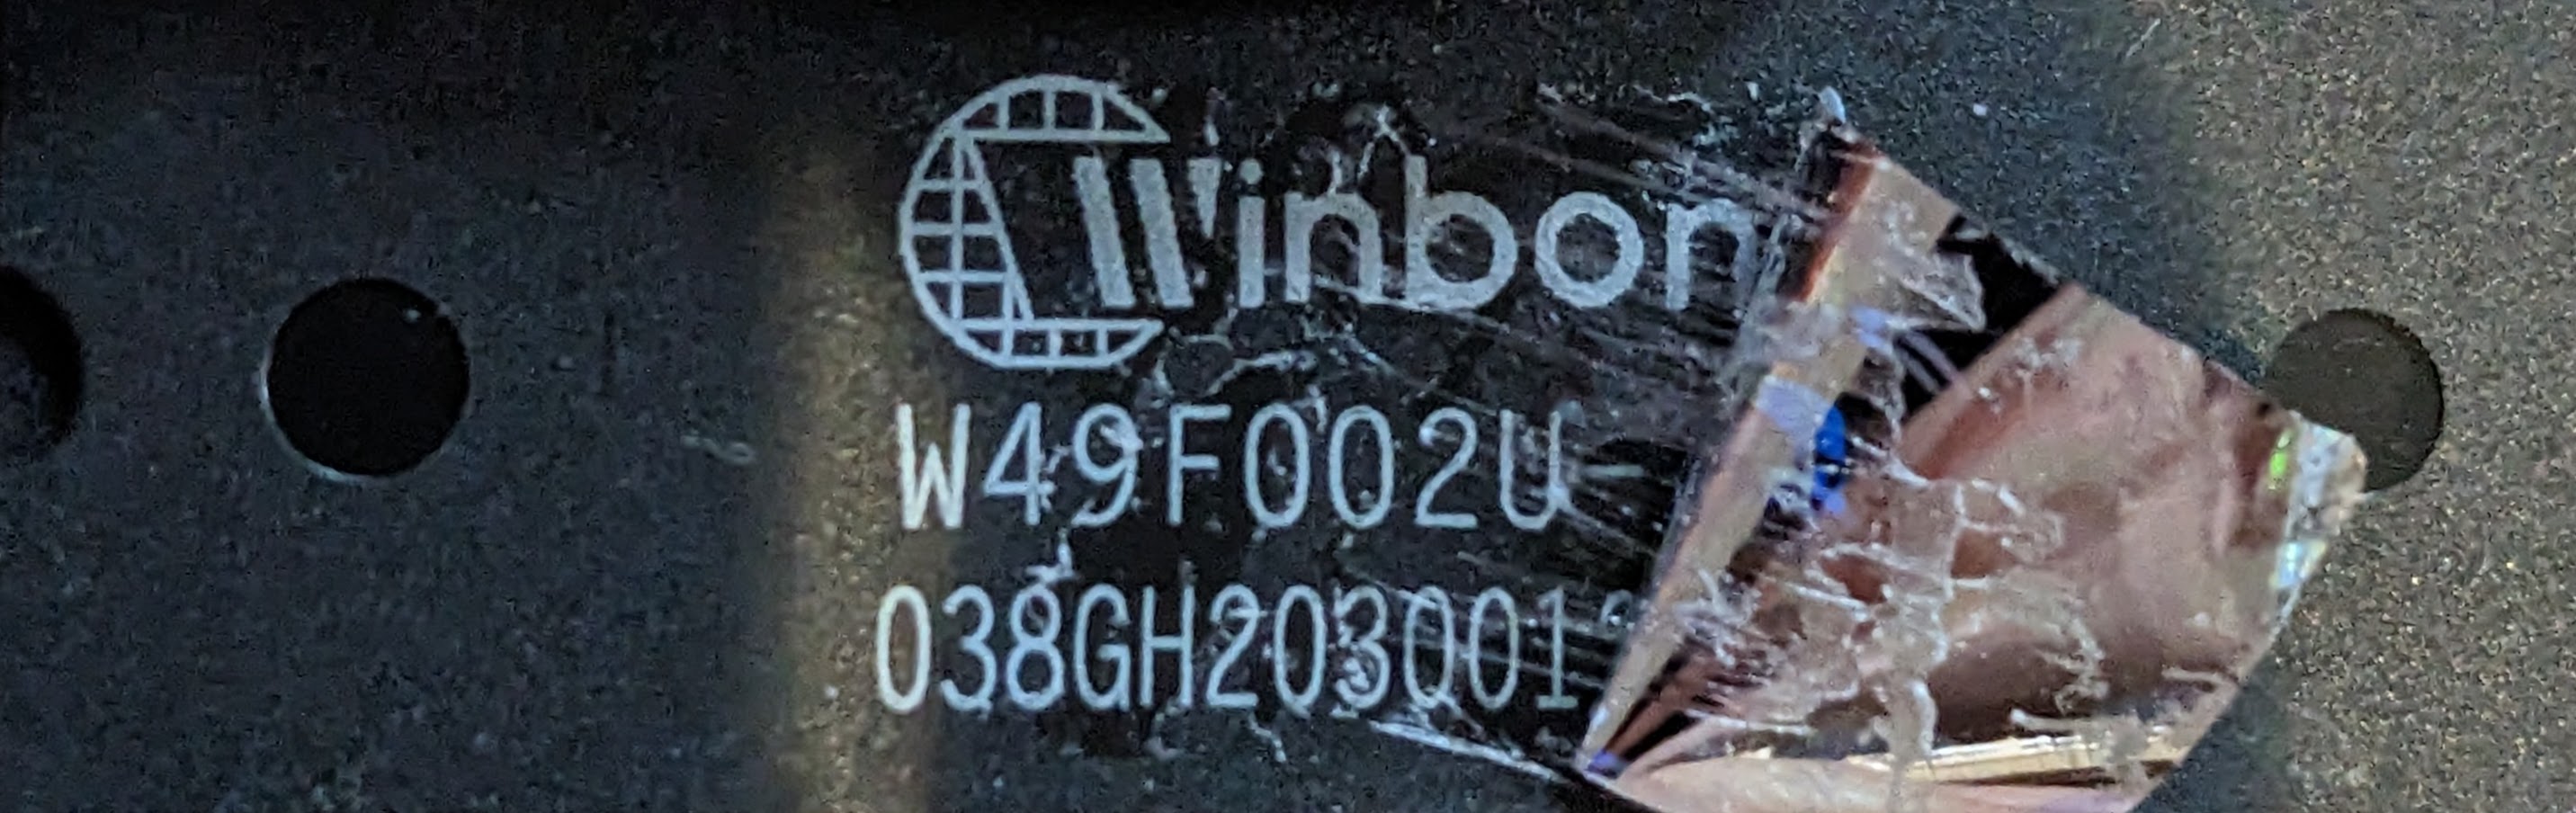
As luck would have it, that chip is supported by my EPROM programmer (an Elnec PREPROM-02aLV). Elnec still exist and still have their software for their older programmers downloadable today. So I downloaded a version which should work and pulled out a ThinkPad X41 that is running Windows 2000 and has a dock with a parallel port. I installed the software and plugged in the programmer which immediately powered up (a good sign).
The programmer was detected properly, so in goes the flash chip. I took another backup of the current contents, it turns out it does match the 4.6 firmware file correctly. My guess is this firmware doesn’t actually support my motherboard.
I flashed the old backup I took to the chip and waited (it isn’t the fastest, but at least I knew it would work).
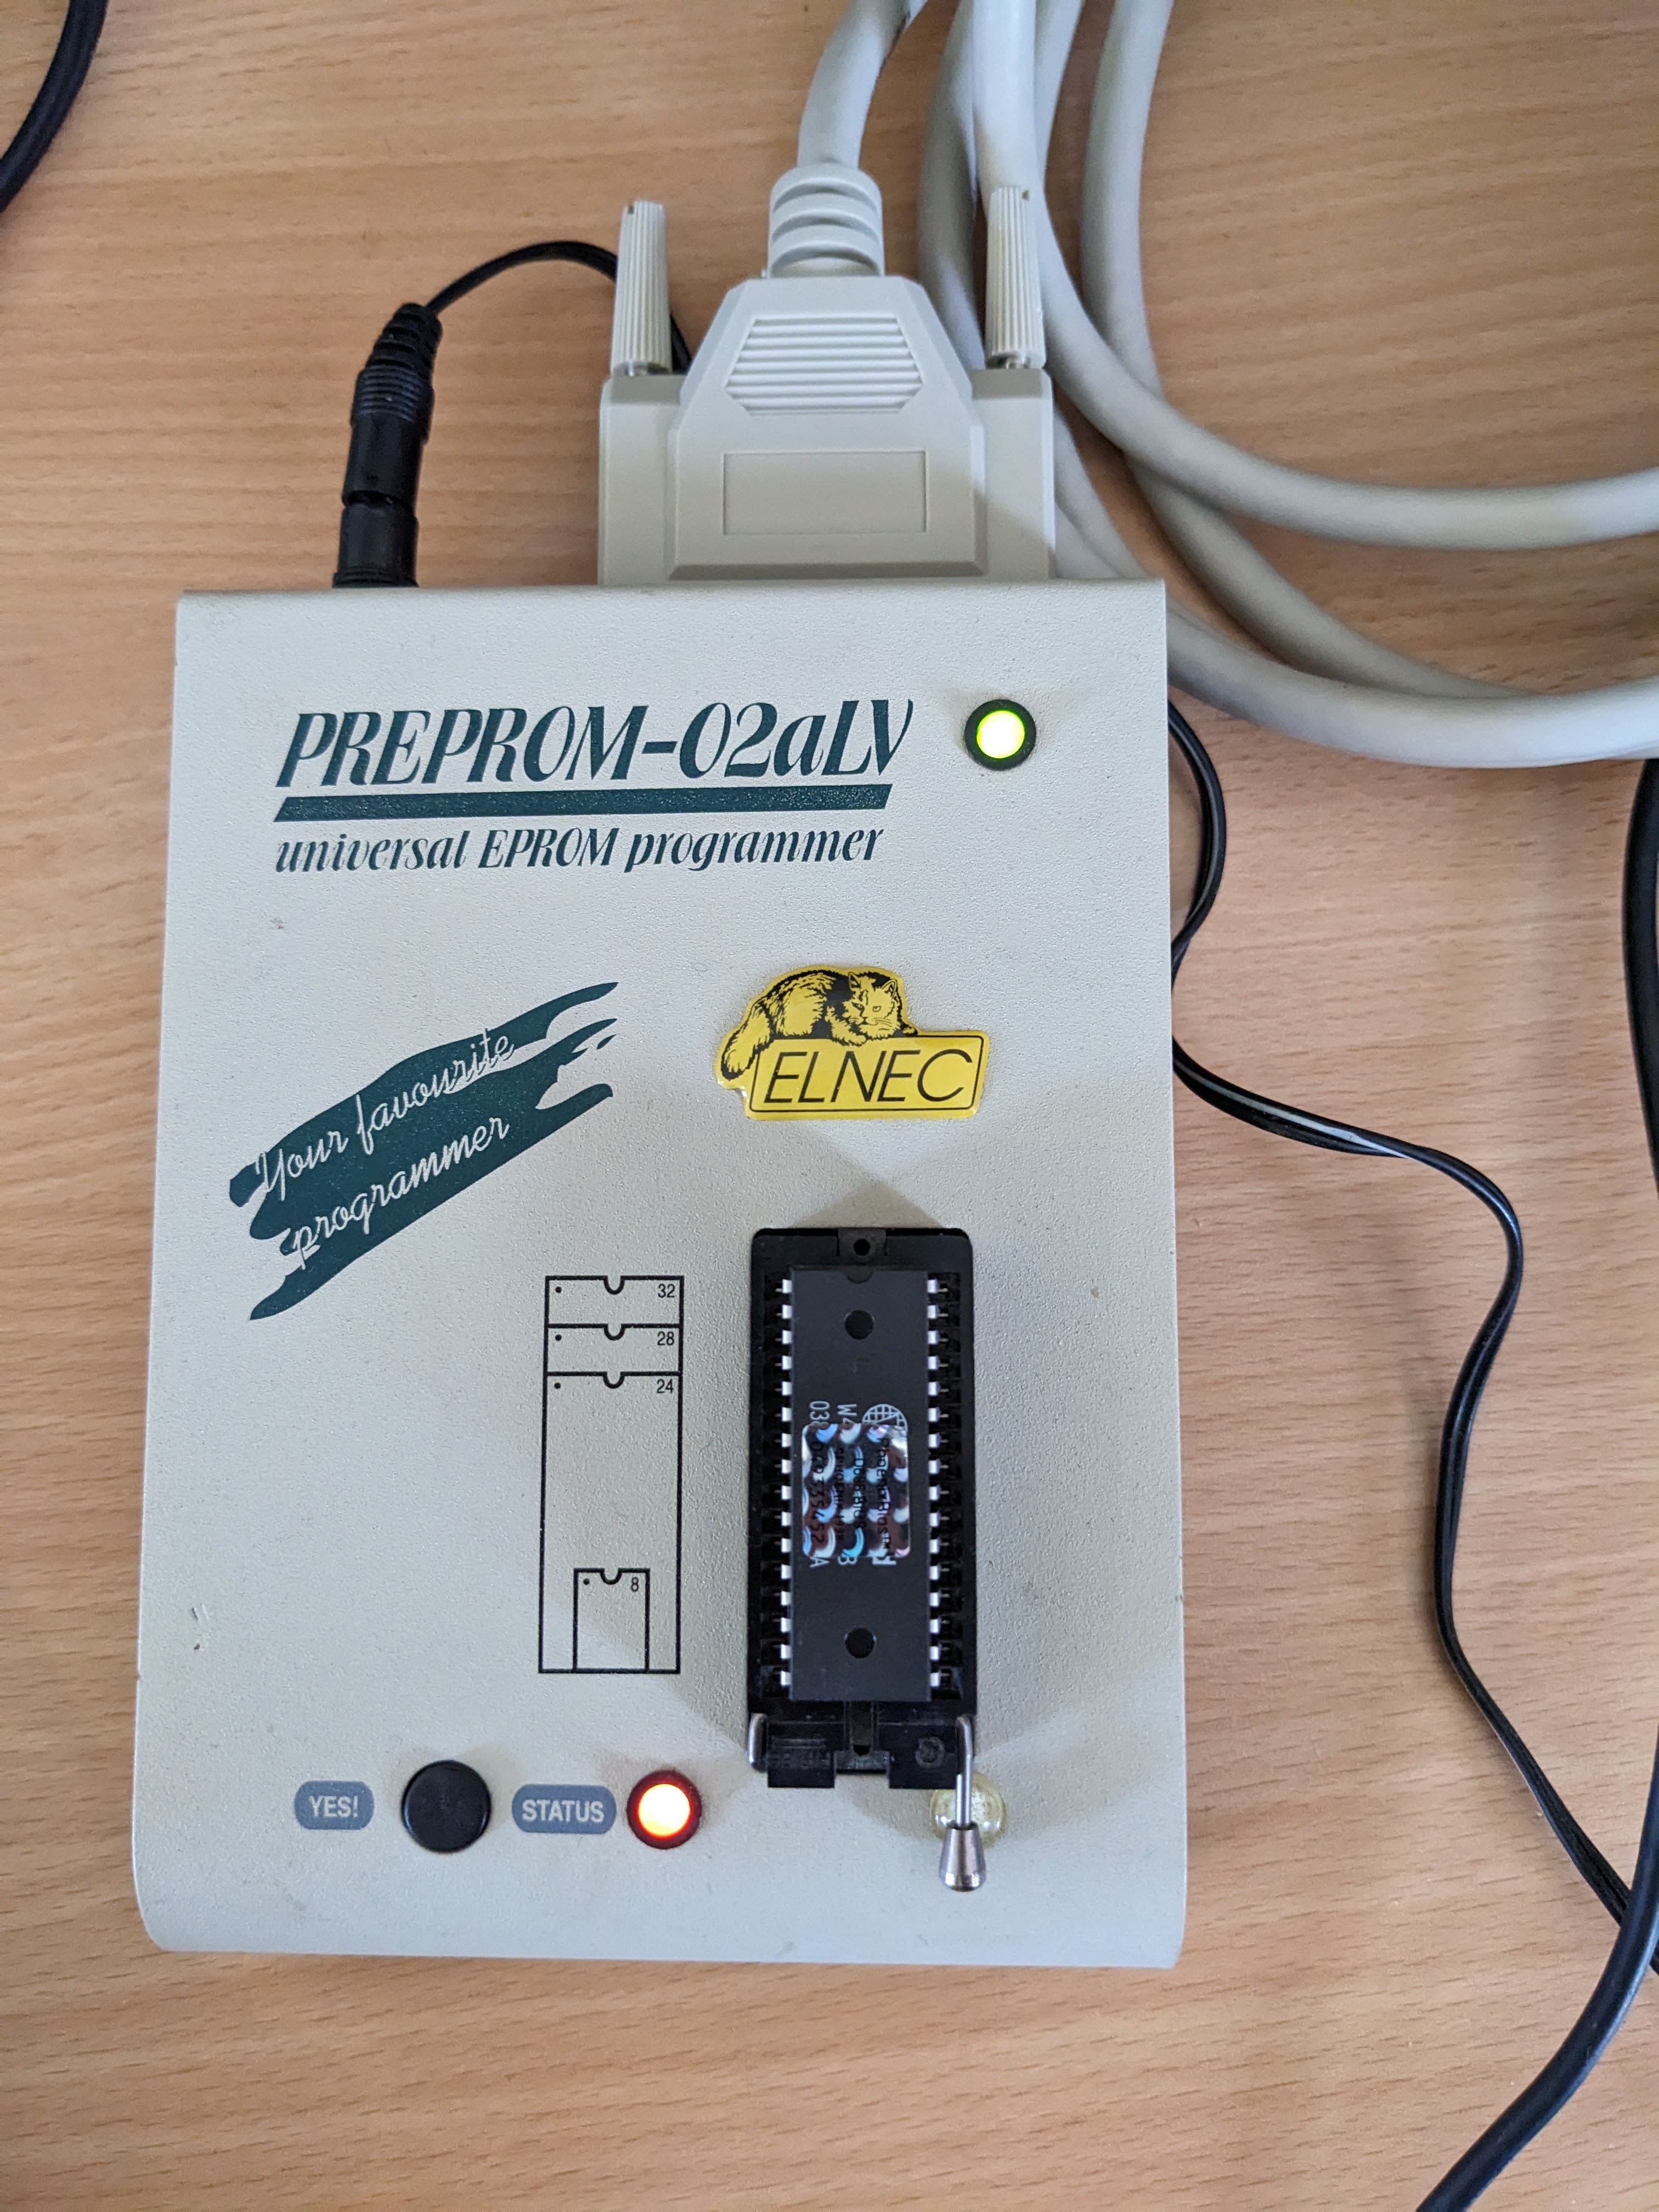
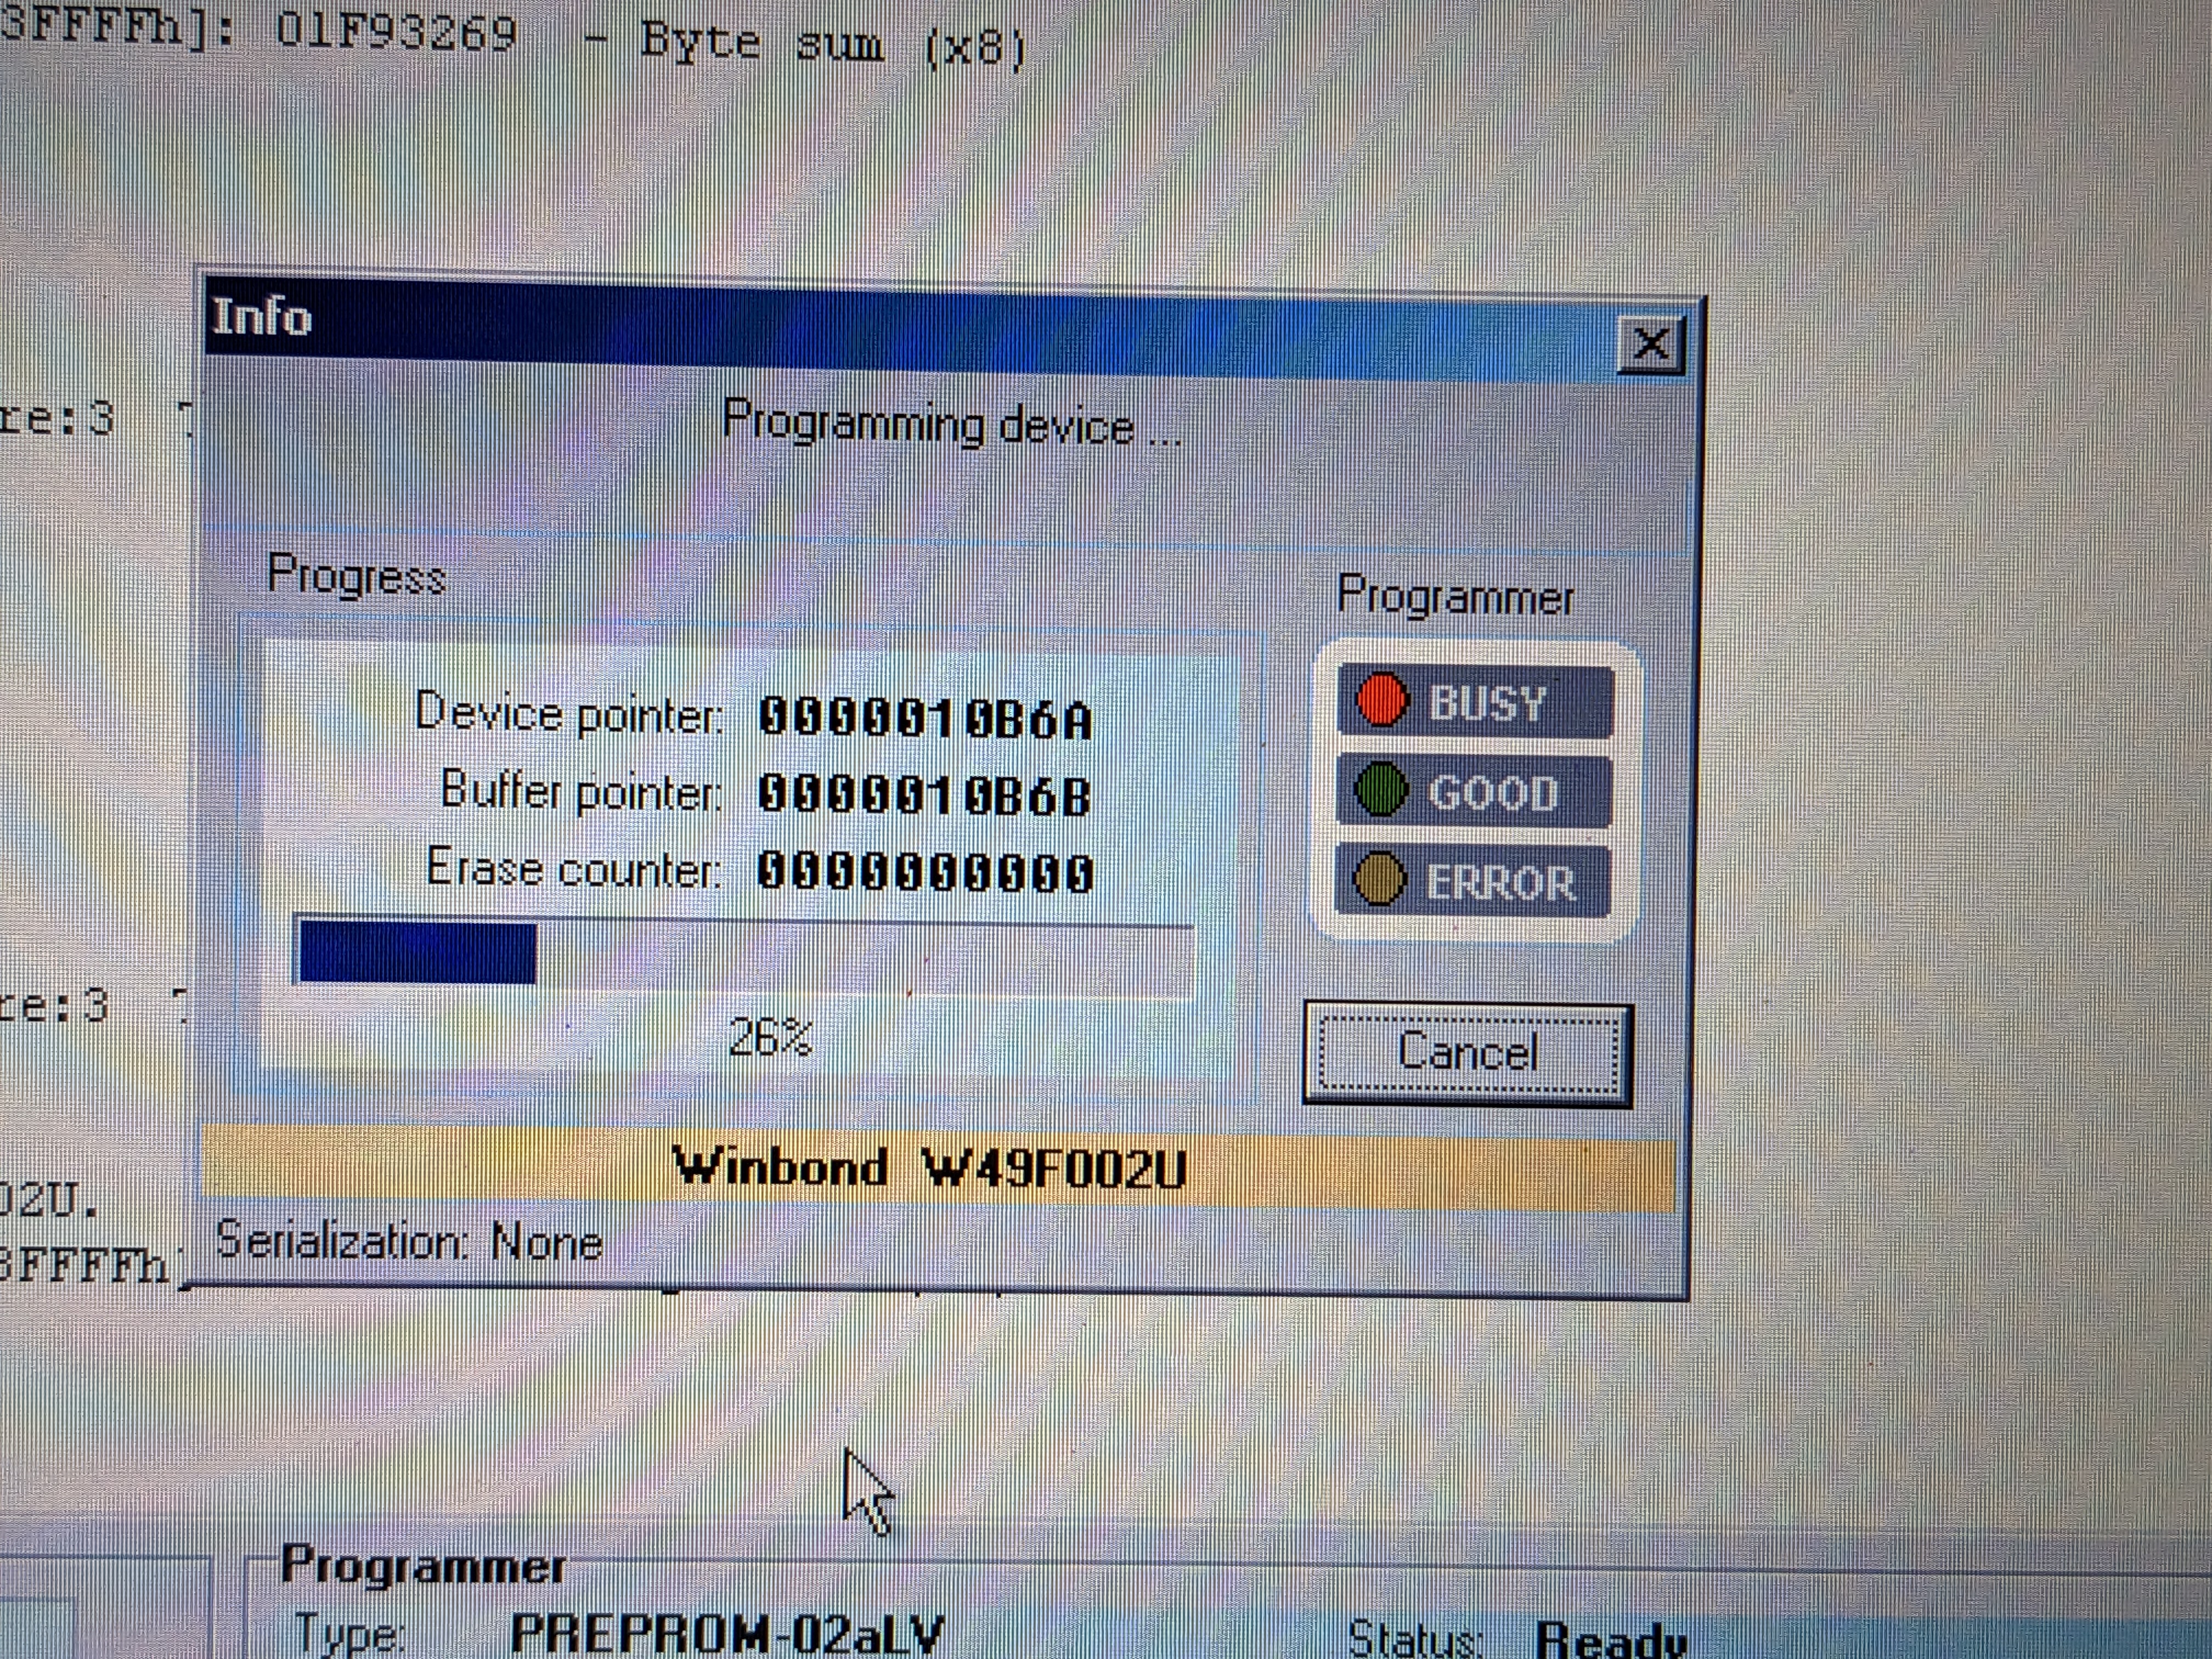
After a few minutes the chip was flashed and verified. So I popped it back in the machine.

Now for the moment of truth… The power button…
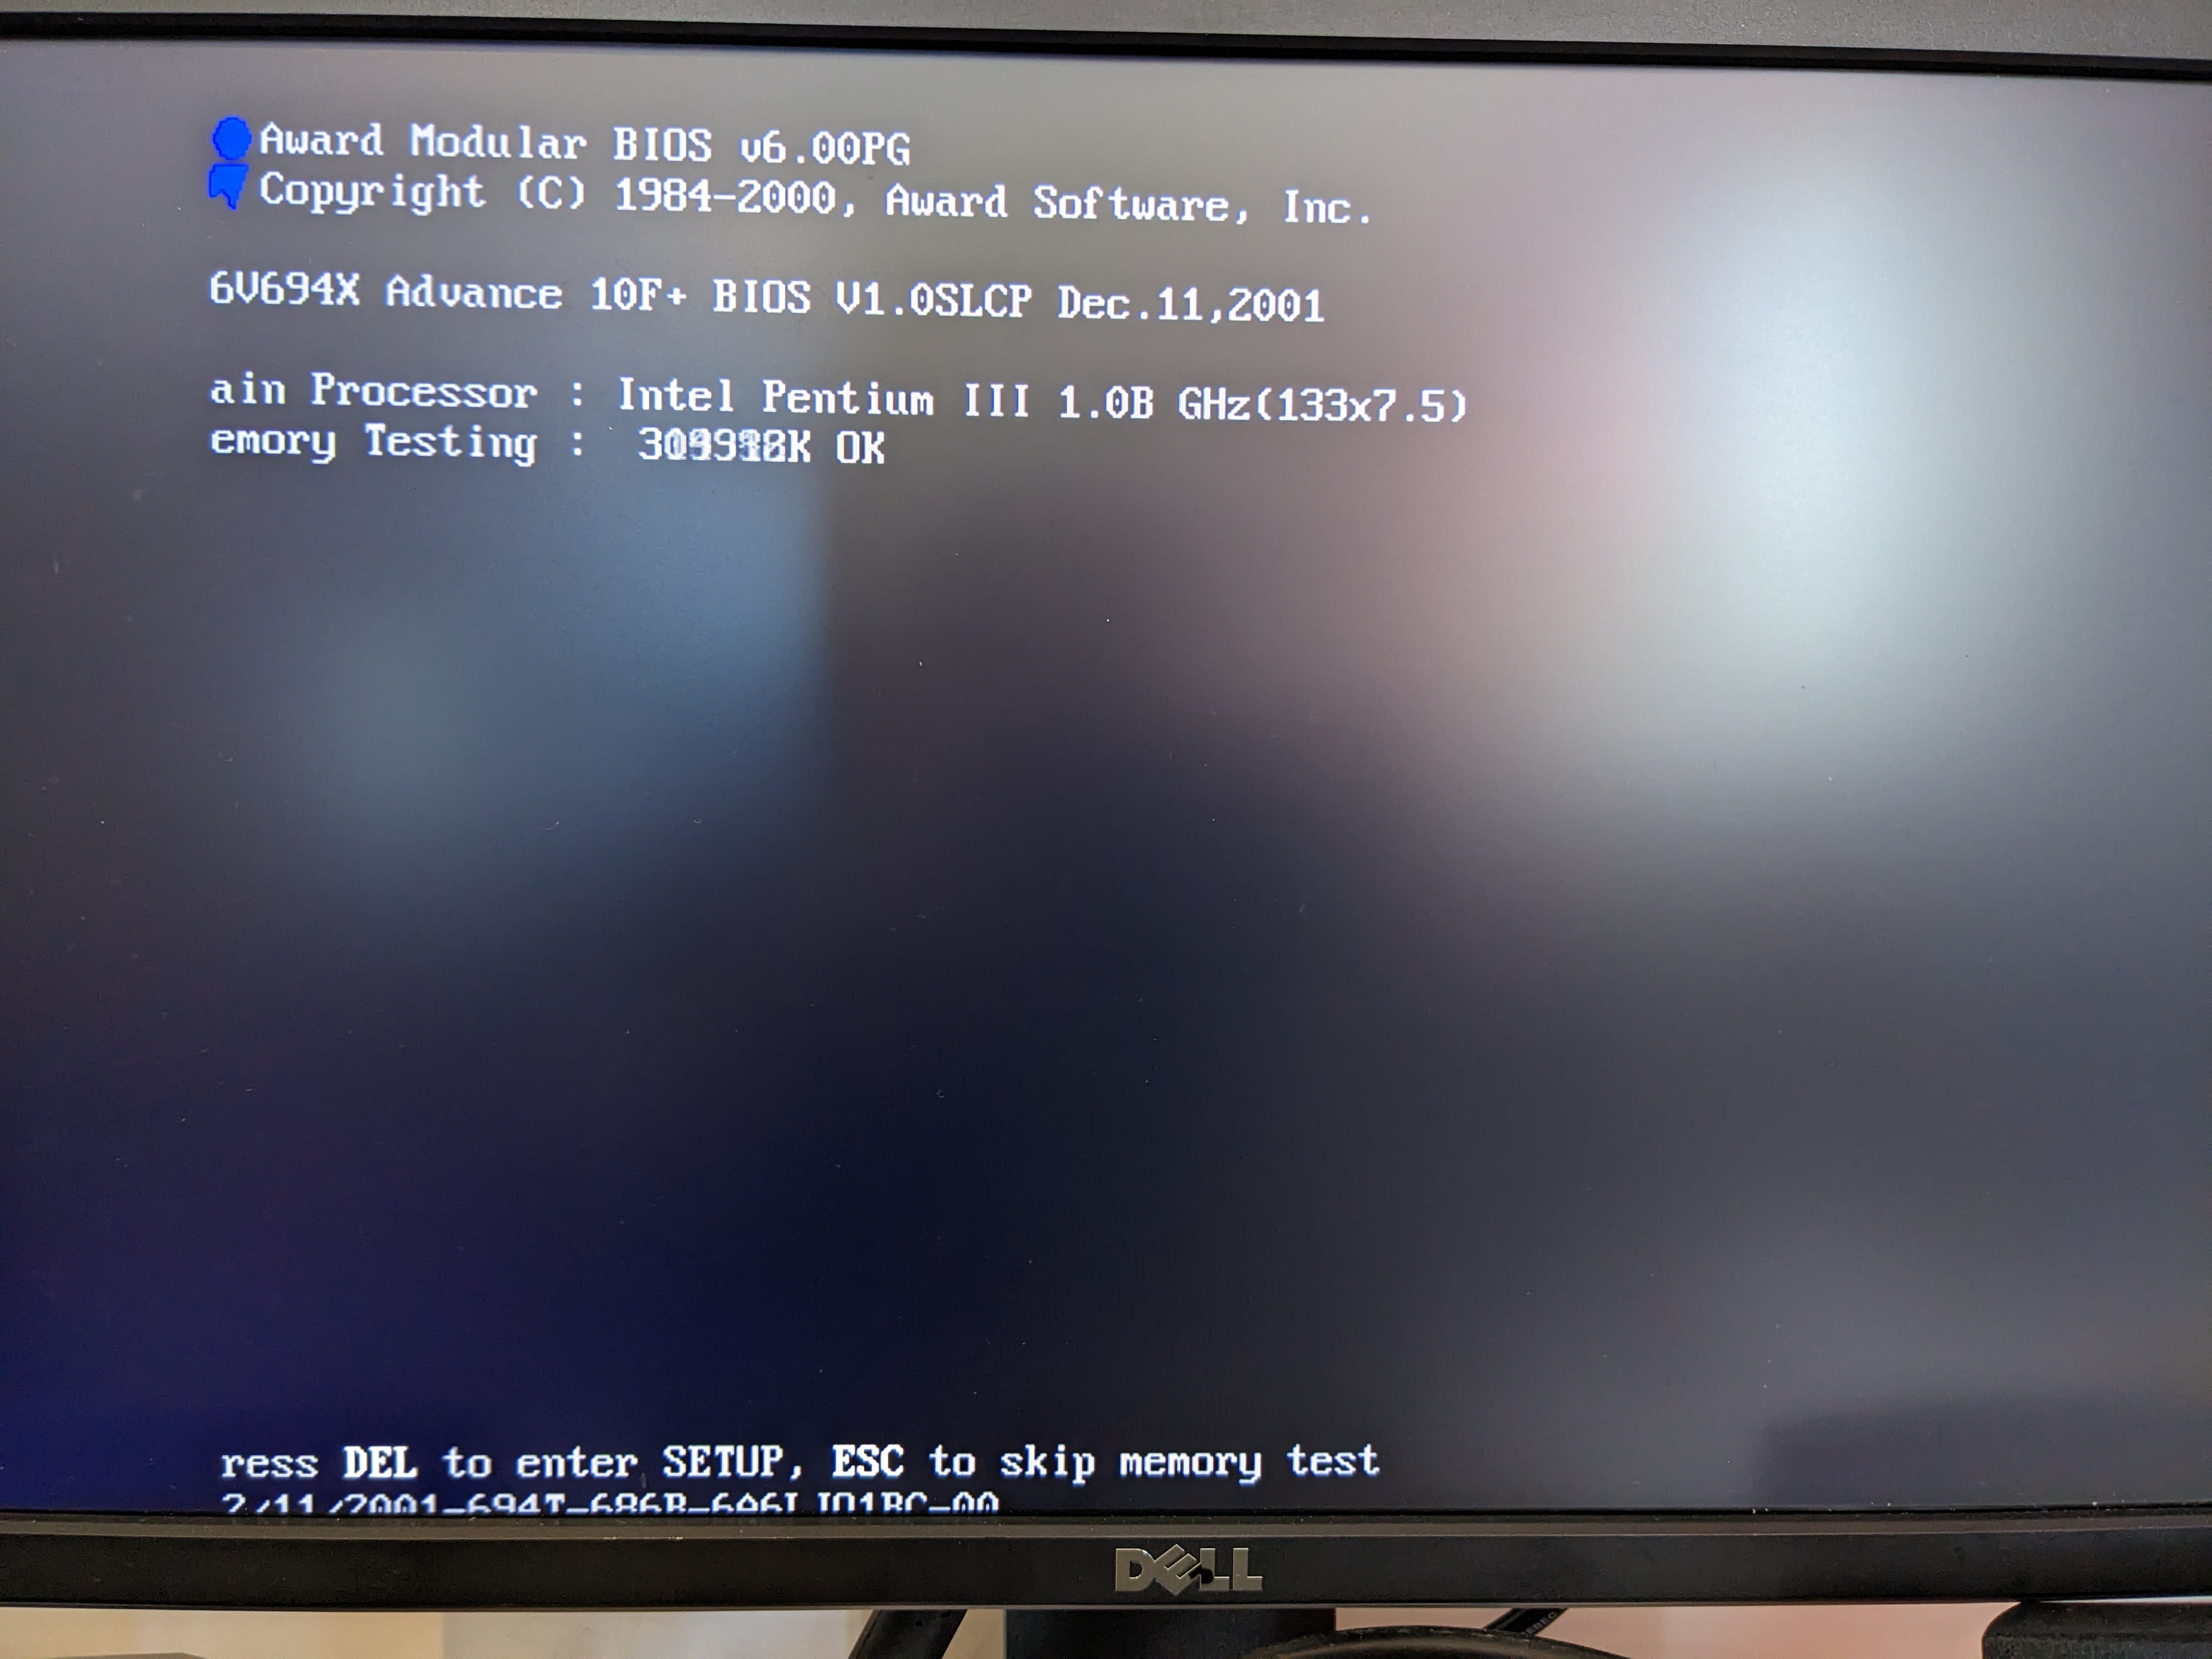
Success! (if you disregard the uncalibrated monitor)
Epilogue (the original problem)
It turns out after further research that there are different SATA -> PATA adapters and some are better than others. My original adapter used a chip by JMicron and that is known to have UDMA issues. There is one manufactured by Startech which uses a Marvell chip and works very well with UDMA (I have since tested it). I recommend if you are going to use this solution to make sure to check that the chip on the converter uses a Marvell chip.
Leave a Reply