
Last time I got as far as the Euro PC showing tons of BIOS errors on the screen, which is a good first step. This time I try to get a little further…
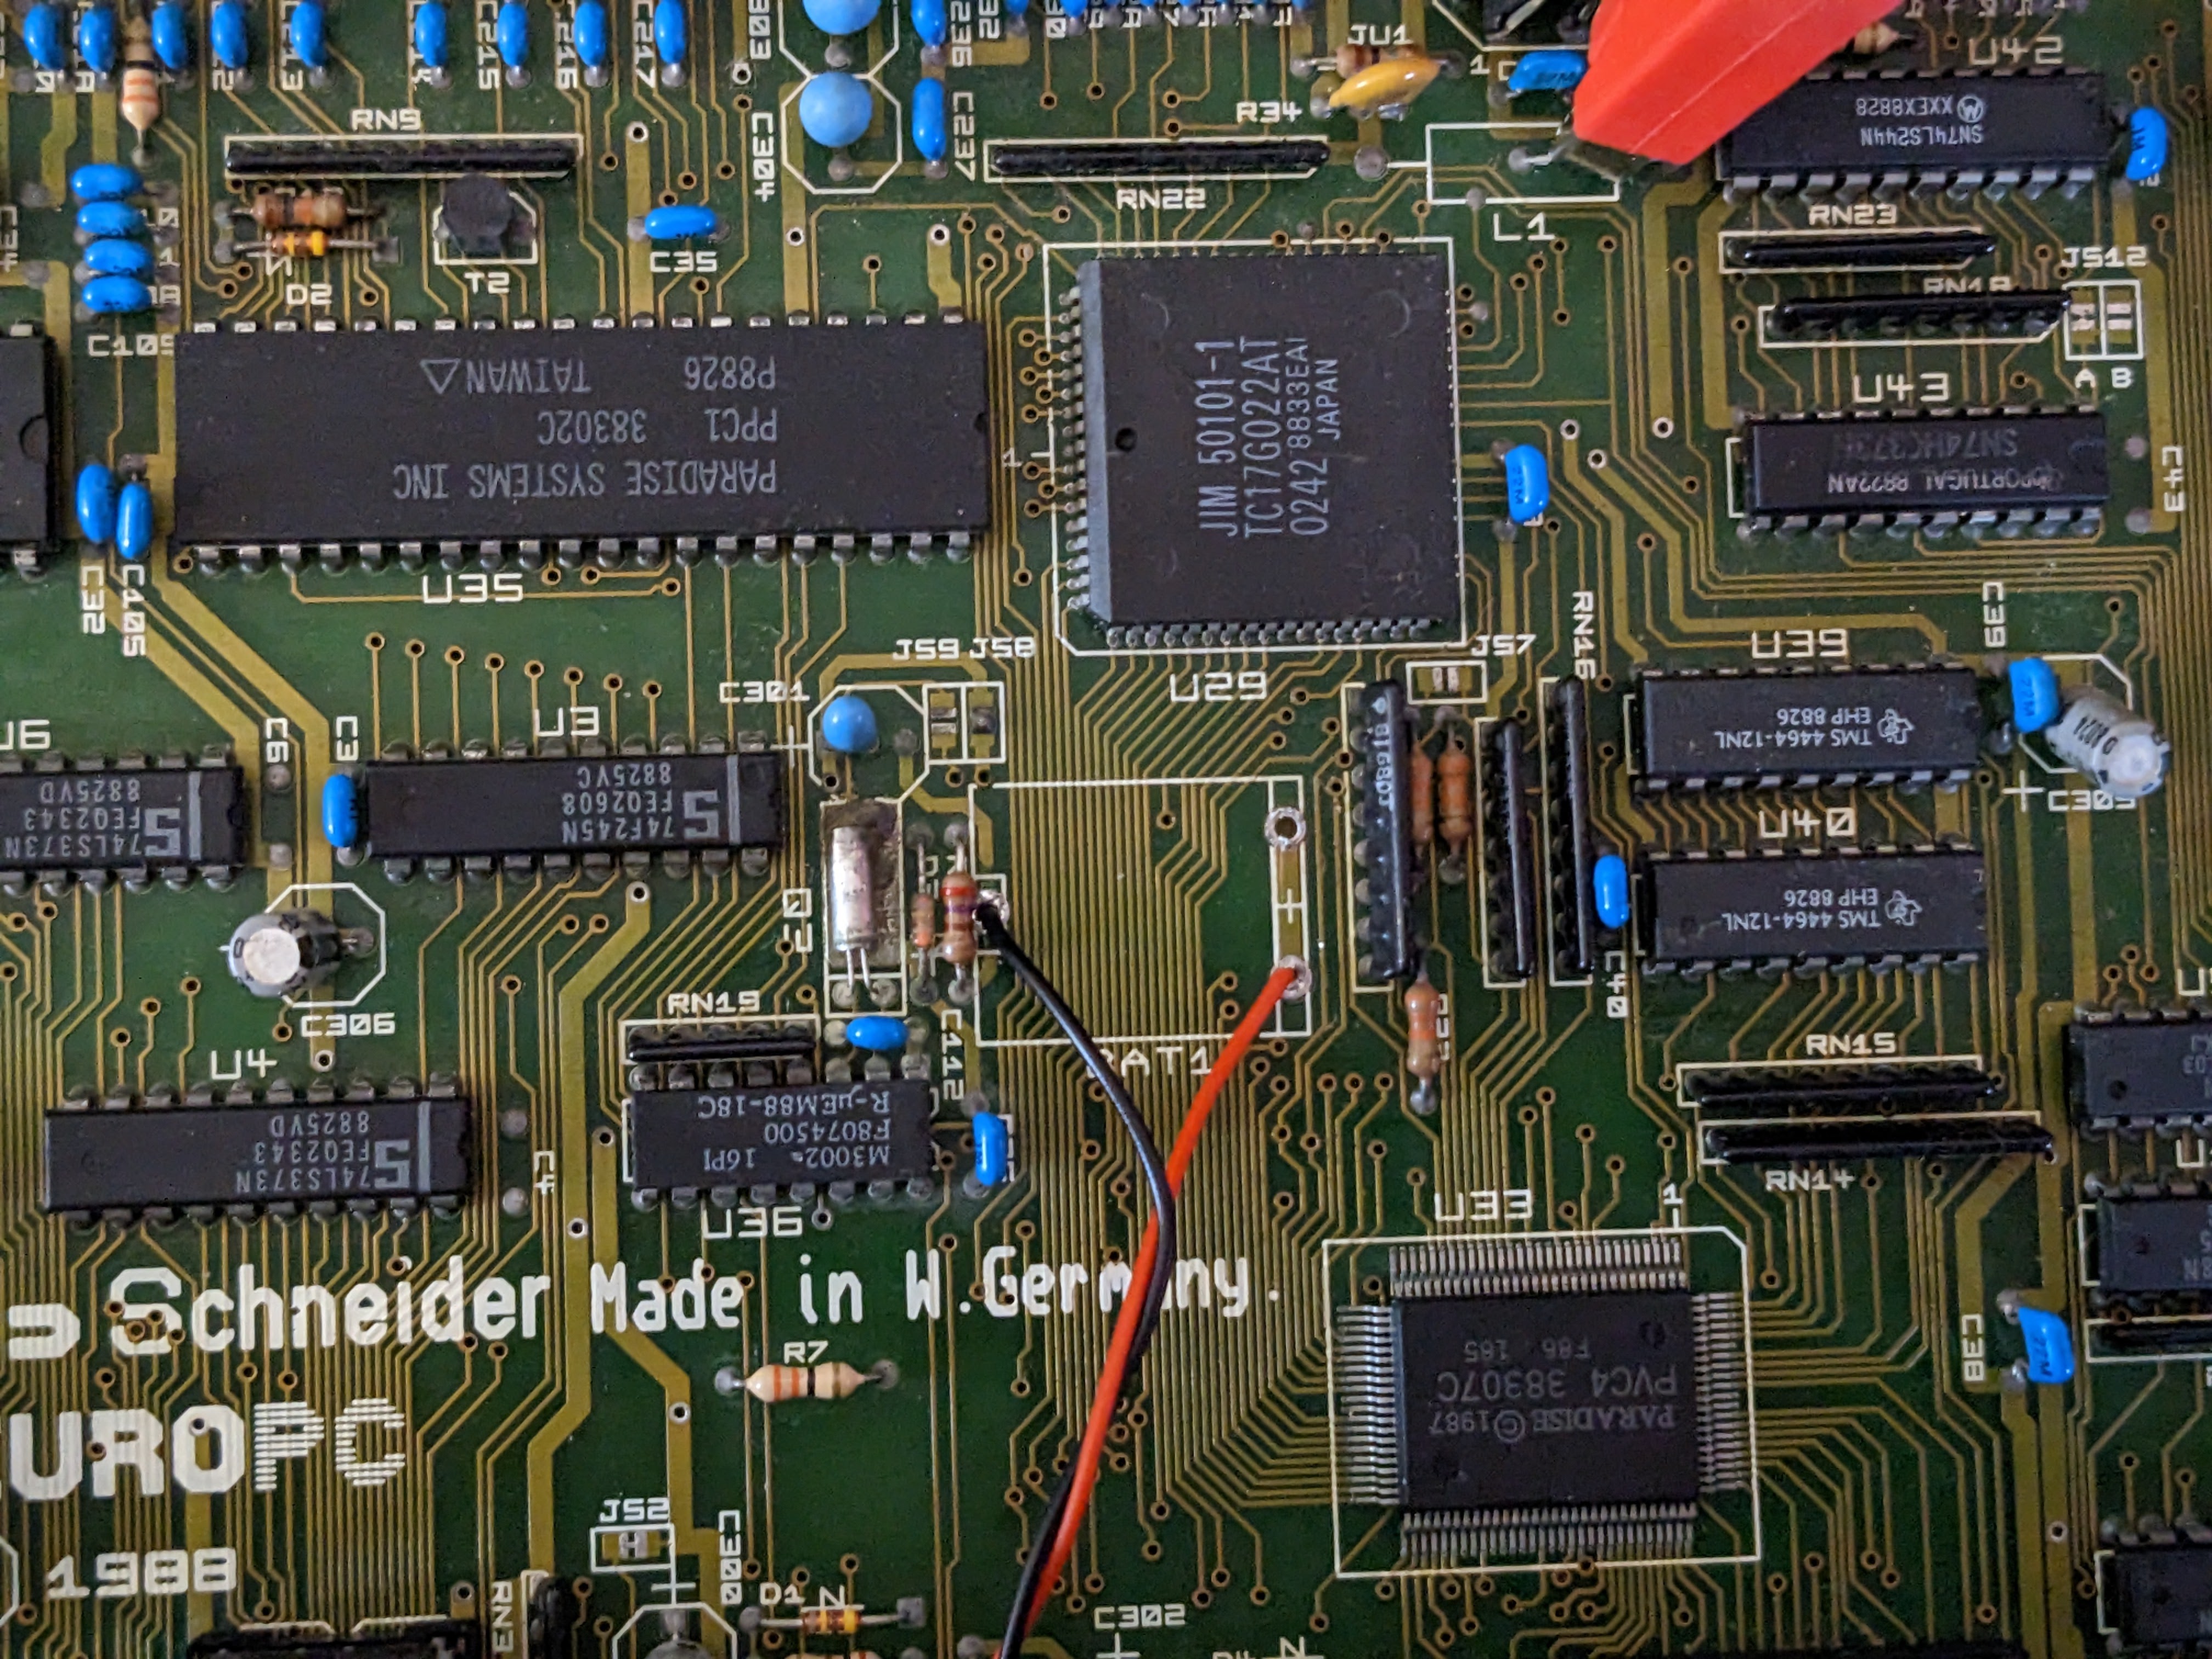
CMOS Battery
I had made an RTC battery module in my previous post, now that we have a booting machine I decided it was a good time to solder it to the motherboard.
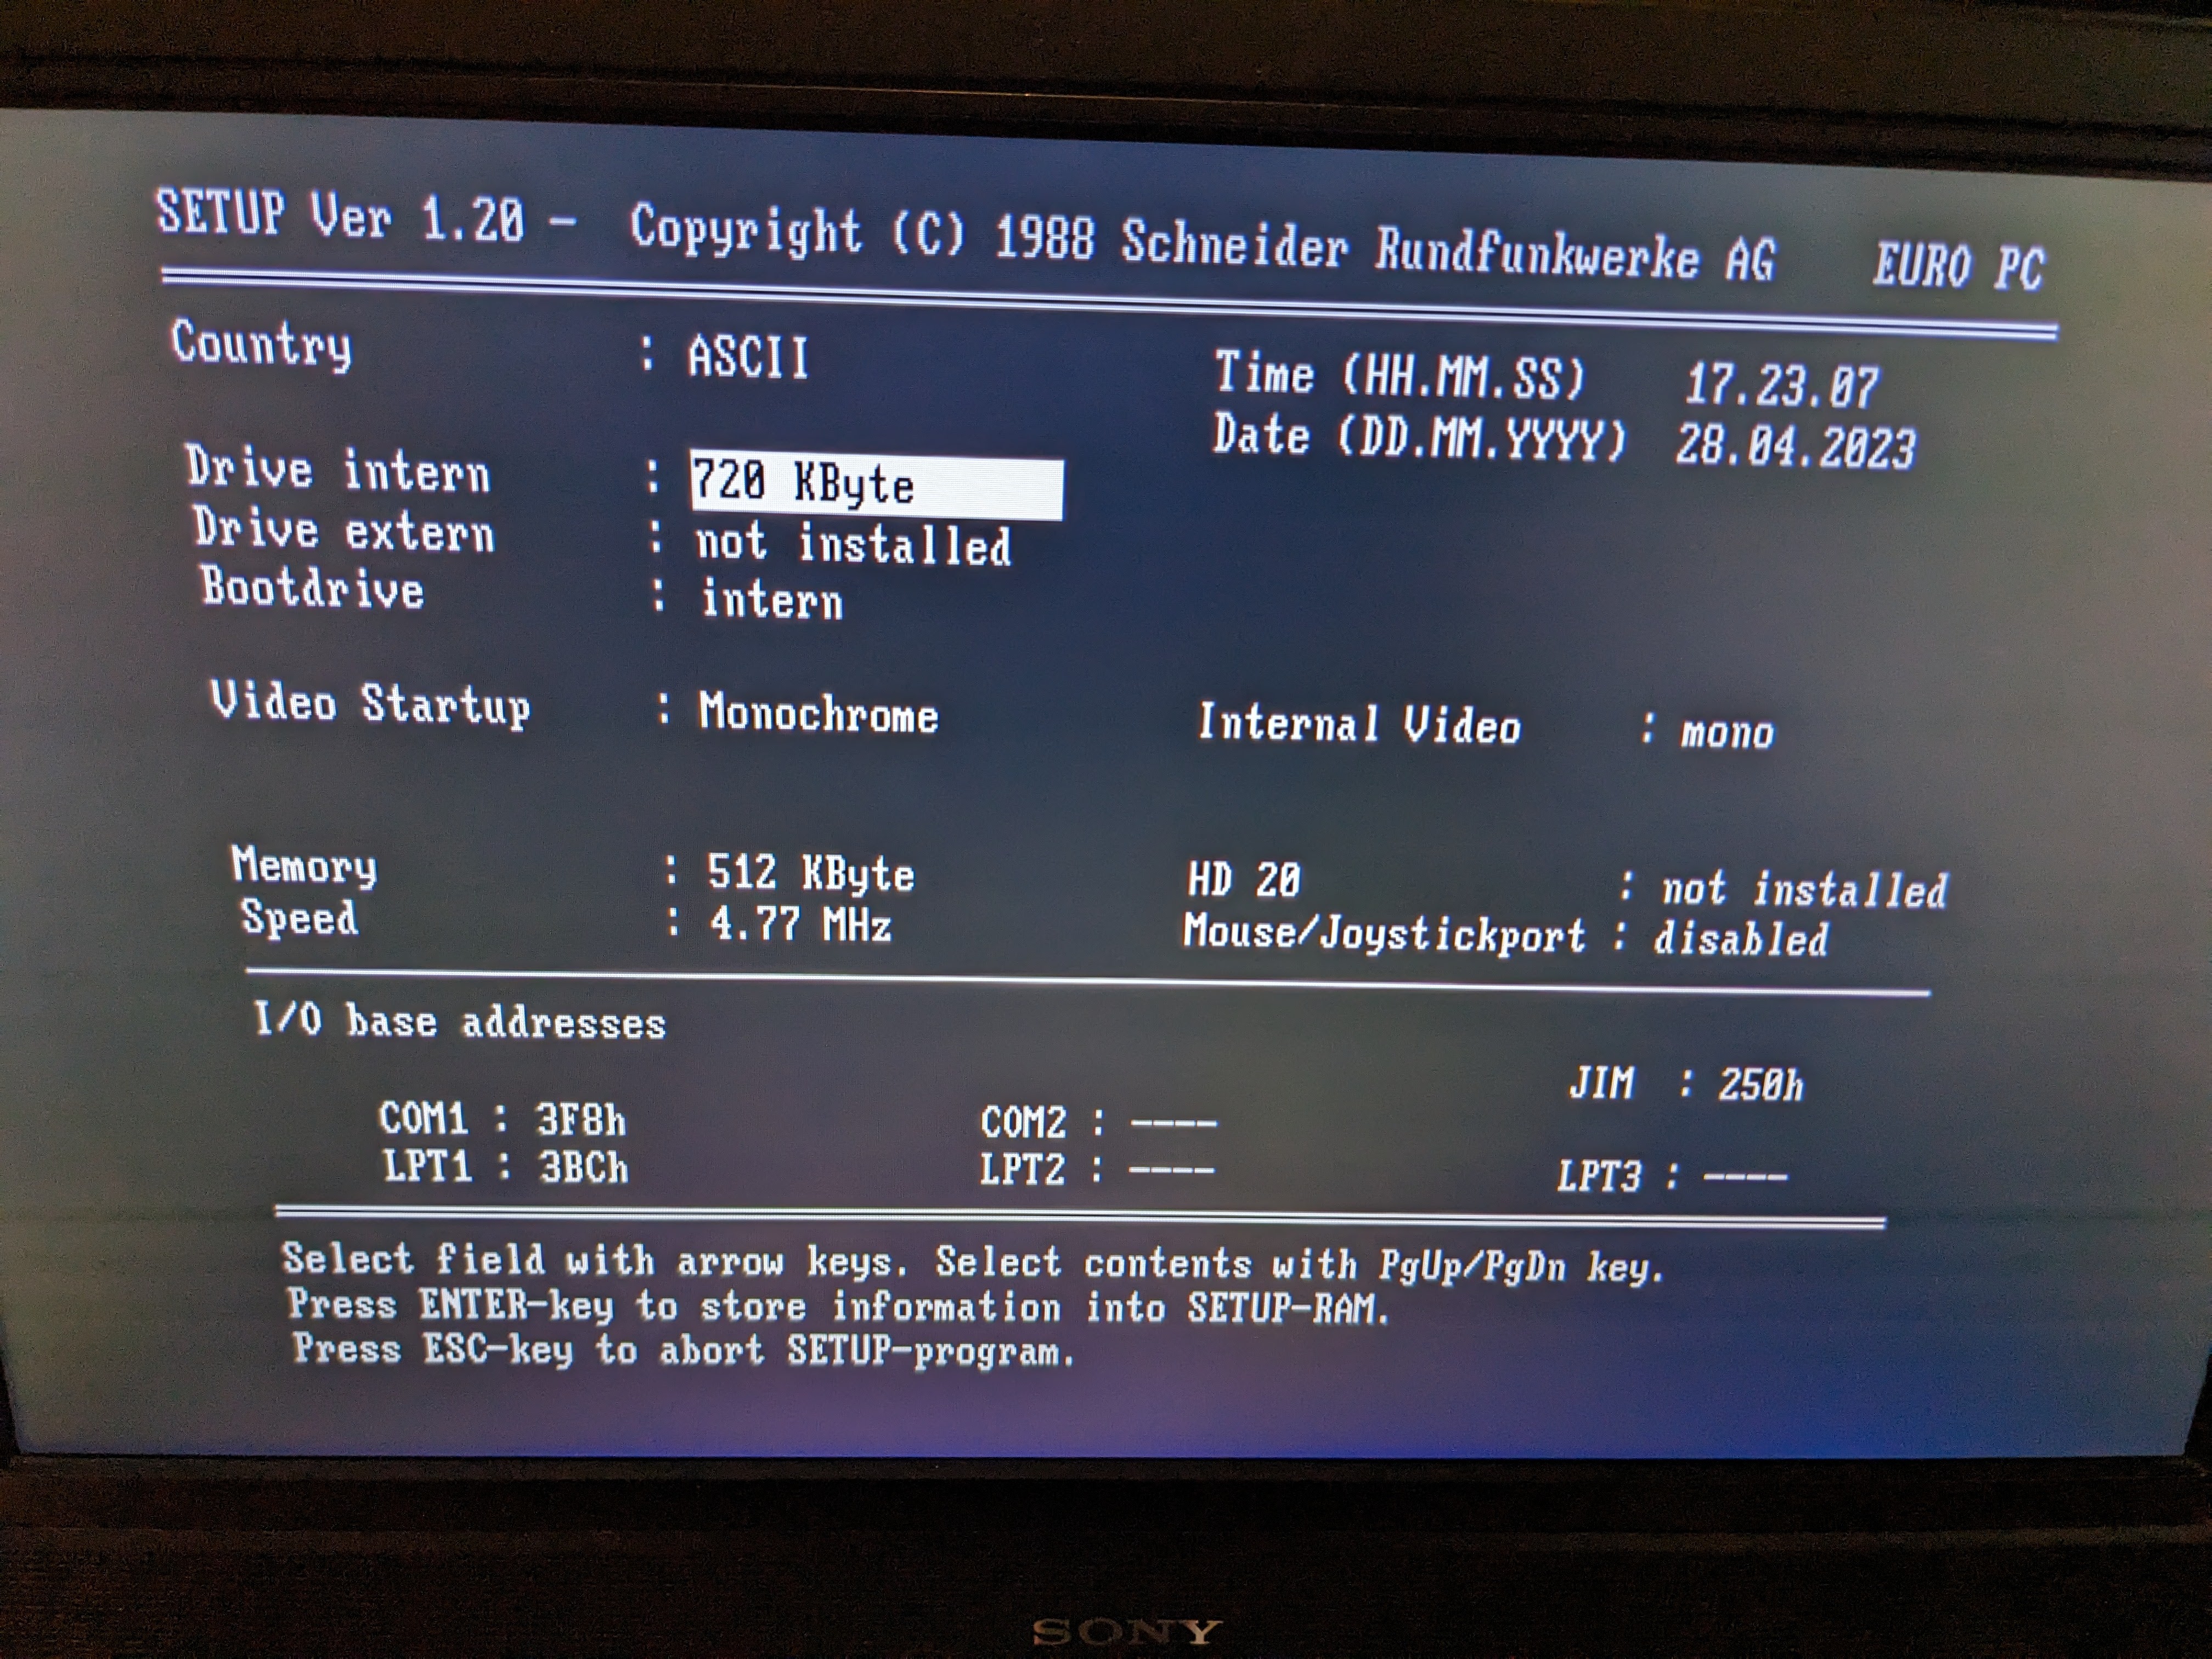
With that out the way I plugged in the keyboard so that I could enter the setup menu and booted into the settings menu. Here everything had “invalid” or bad data. So, I set all the correct settings to boot the system. I’m not sure on the I/O addresses yet, I figured I’d leave those until later on. The good news is the keyboard seems to work for the few keys I needed to do this.

Floppy Disk Boot
Now let’s stick in the boot floppy and save these settings…

Lots of takeaways here:
- The 64KB RAM error in my last post was due to the RAM being misconfigured in the BIOS. That makes sense as Claude (the creator of PiStorm) is this issue with his Euro PC which has a damaged CMOS settings / RTC chip.
- The BIOS thinks a date containing the year 2023 is an error, I guess that makes sense, they probably weren’t expecting it to boot 35 years after it was built. Although I’m impressed it accepted a post-y2k date.
- It couldn’t read my boot disk.
As for the second takeaway. I did a bit of research into this. I believe, based on bad translations of forum posts, that it is because the date check has a bug where it sees the century of “20” as a month. There is a 2.08 version of the BIOS which fixes this bug, I think it might be unofficial, but I have some EPROMs on the way to try it out. I managed to find the BIOS in this archive along with someone else’s image of the boot floppy. The boot floppy is a German version and older than my own one, the setup tool is not as fully featured.
I opened up the floppy drive, cleaned the heads and then cleaned the floppy disk top side a bit as it doesn’t seem to be in the best condition.

I re-greased the worm gear after that photo too. Now lets try again…

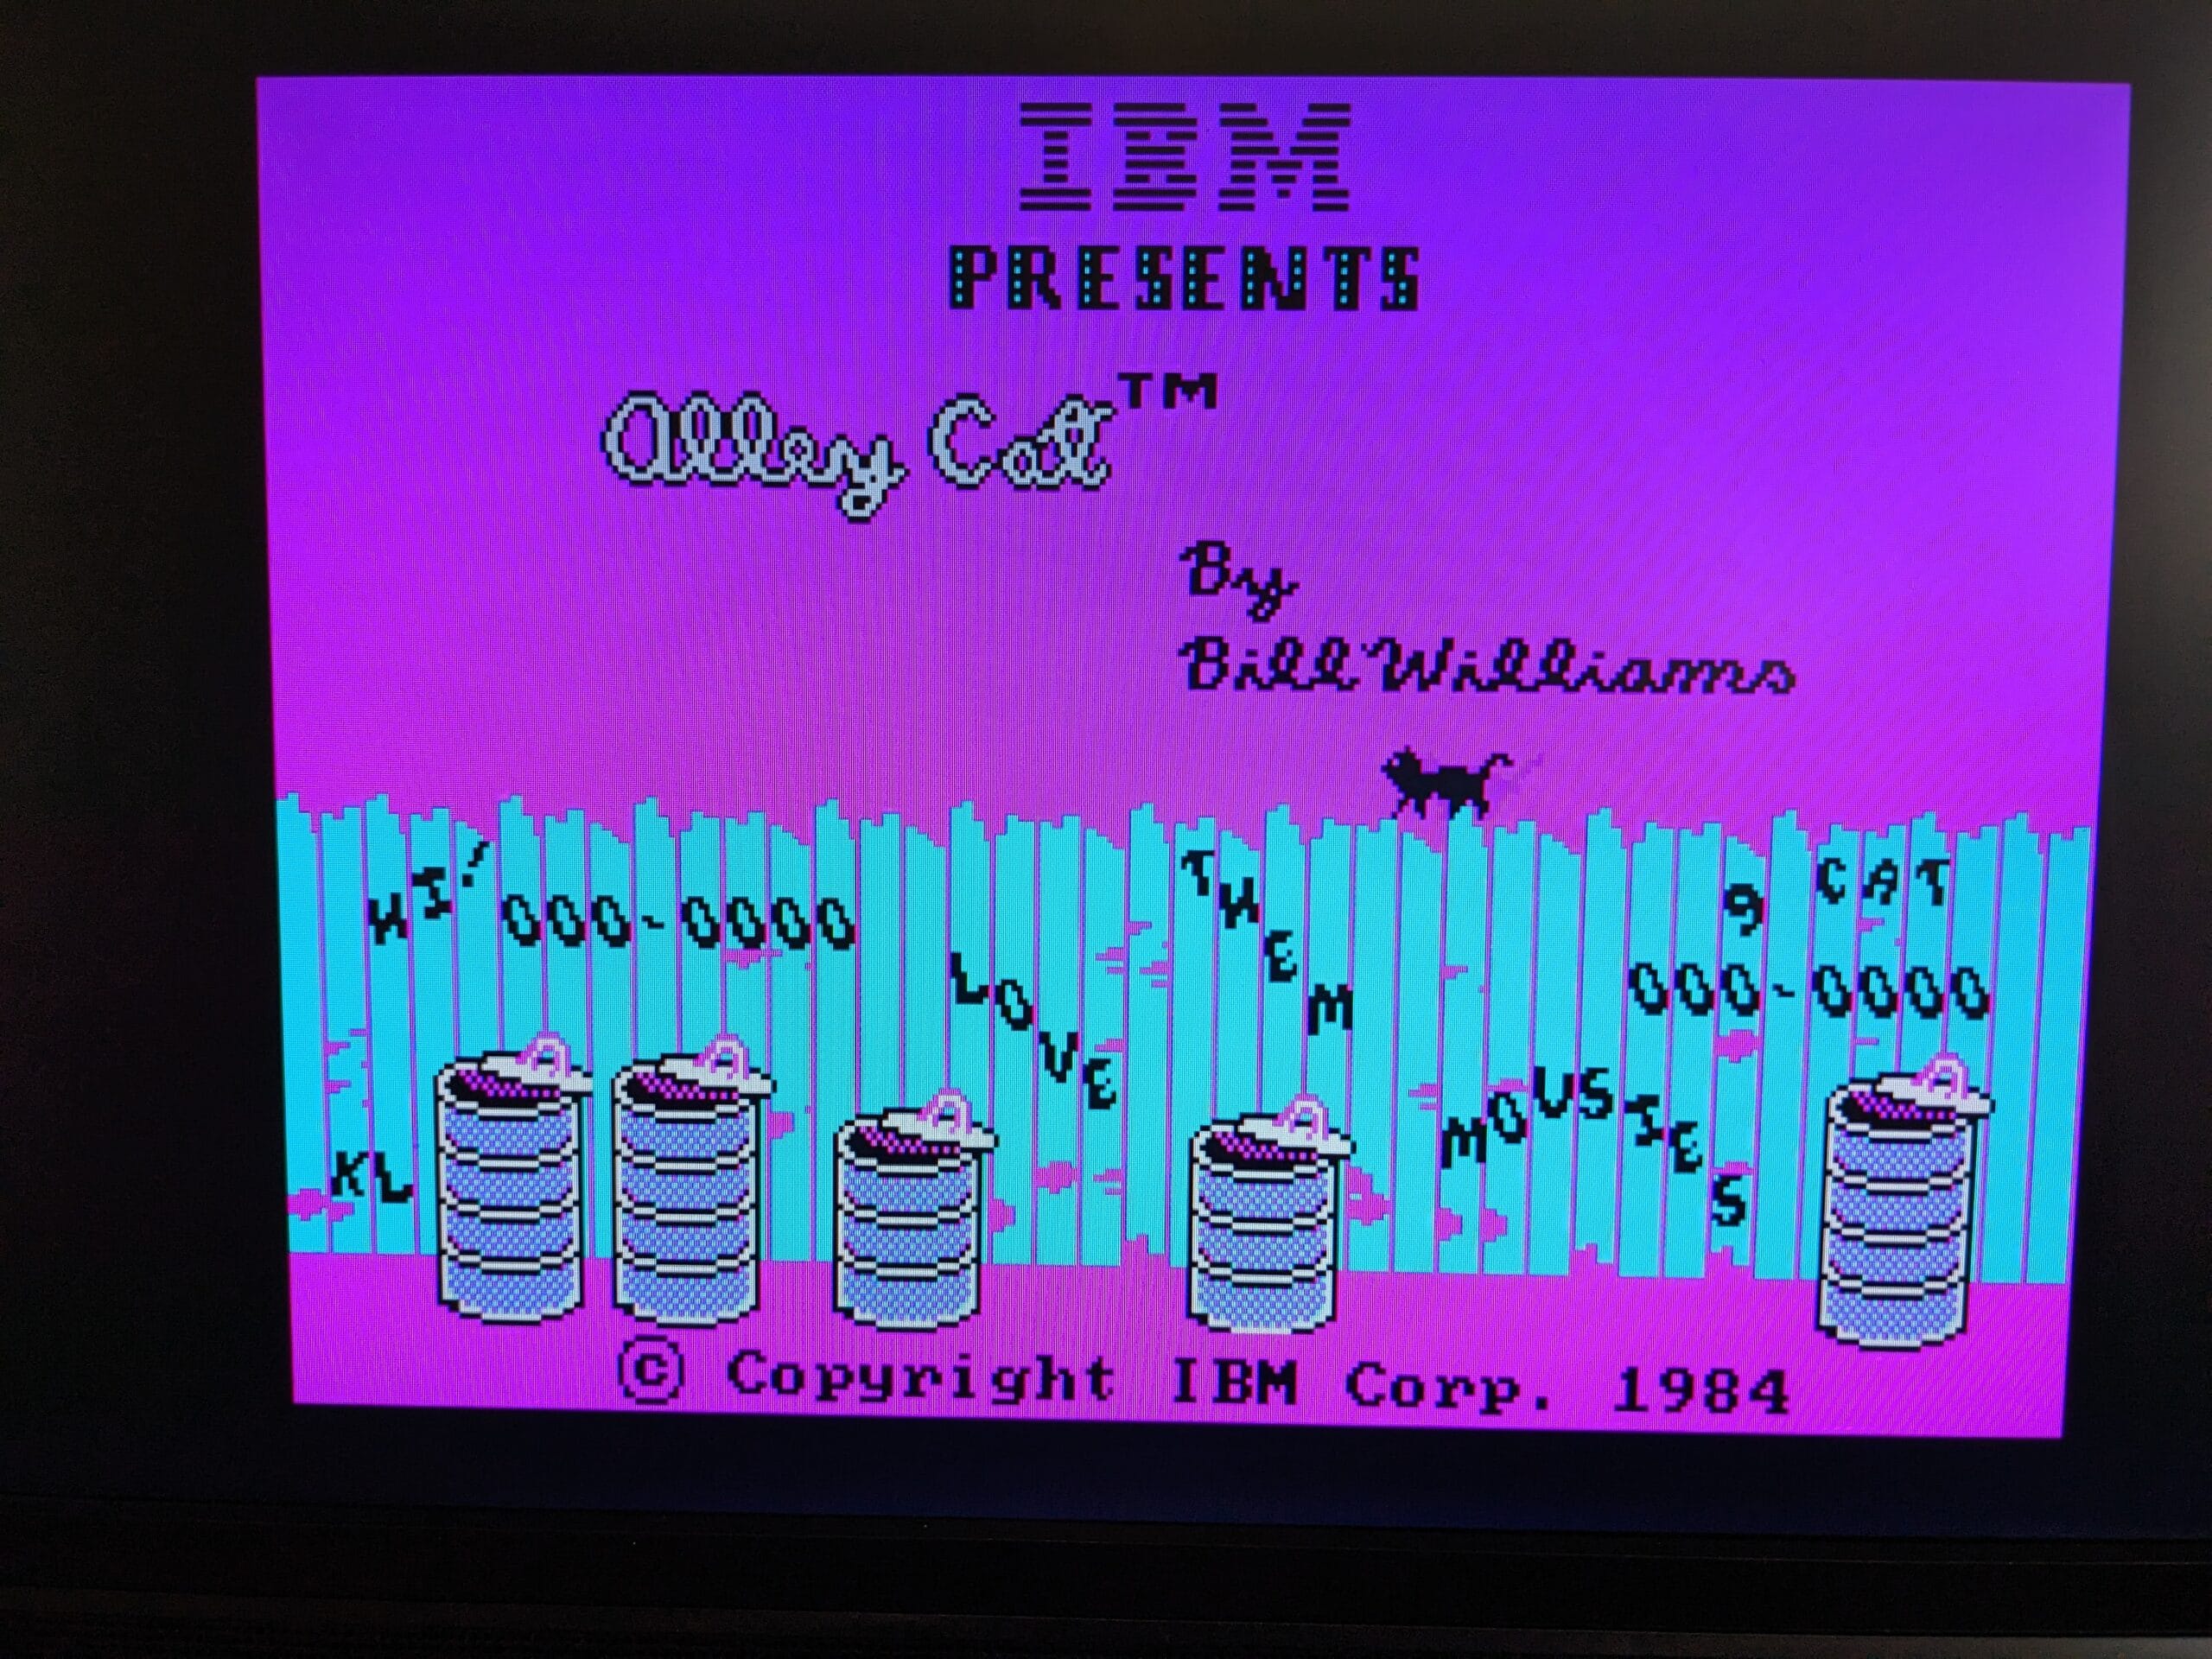
Success! The machine boots to DOS! It still has some disk read errors for the rest of the disk so I made a new one from the disk image and made a disk to put games on. They are new/old stock HD disks converted to DDs, which I know is not the most reliable, but it works for now.

Cleaning
Although the motherboard isn’t looking too bad now, the rest is in quite a state, and I think I might catch some kind of disease from the keyboard if I keep using it as-is. It is time to clean the plastics and under the keys. I pulled the key caps and was surprised to find they are exactly the same as the Mitsumi keys used in the Amiga 500/1200. I suspect the keys were made in the same factory, the font on the keys is the same, just at a slightly different print size.
I bathed the plastics in some water and washing up liquid, giving some slight abrasion with a sponge. I then dried everything and reassembled the machine, the top is loose in the photo below because I don’t want to clip it back together until I’m done with the insides. The vent grills could still do with some slight cleaning with a cotton bud, but this is an order of magnitude better already.

Next up I want to work on a reliable power supply for it and I have a few minor internal (easily reversible) changes I want to make before I close it up. But for now, I’ll leave you with a screenshot of the machine running Alley Cat.

Leave a Reply