
Over the past few weeks, I’ve learned far more than I initially wanted to about the Dell Latitude XP series. I originally purchased a Latitude XP 450C (a 486 DX2 50MHz with a passive matrix display) and ended up making a 4100T (486 DX4 100MHz with a TFT display). This is the journey.
The models
Before I go on, I’ll break down how the model numbers work. Let’s take the model XP 475D for the example:
- XP 4 – This is the model range, I’m guessing it indicates that it is a 486? The Pentium range in a compatible form factor was called the XPi.
- 75 – The CPU speed, the 50MHz was a DX2, the 75MHz and 100MHz were DX4 CPUs
- D – The display technology used out of the following:
- C
- 9.45″ Passive matrix display
- 640×480 256 colour
- 300ms response time
- Western Digital 90C24A2 graphics chip
- CX
- 9.45″ TFT display
- 640×480 65536 colour
- 80ms response time
- Western Digital 90C24A2 graphics chip
- D
- 10.4″ Passive matrix display
- 640×480 65536 colour
- 300ms response time
- Cirrus CL-GD7543
- T
- 10.4″ TFT display
- 640×480 16M colour
- 80ms response time
- Cirrus CL-GD7543
- C
So, the ideal display if you want to play games would be the “T”. It would have been extremely expensive at the time.
The initial laptop

This is the photo from the eBay auction. The Dell Latitude XP 450C, 8MB RAM, 320MB spinning rust hard drive and a passive matrix display. I paid about £80 for it.
What turned up was this laptop and another laptop that was smashed up, a Latitude XP 475D. I quickly determined that the 475D was indeed working. So, I disassembled both and combined them into one laptop. Unfortunately, I didn’t document that process, but it is only part of the story. Here is the result:

I also replaced the hard drive with a 2GB Compact Flash card (the maximum for DOS 6.22), so that I could easily alter the data on my laptop.
Things I’ve learned so far
There were a few things I discovered whilst doing this build:
- The laptop really doesn’t like it if you boot without the trackball connected. It will complain a lot about a keyboard controller failure, drives will randomly fire, and it will not boot. Alternatively, connecting a PS/2 keyboard fixes this.
- Both the Western Digital and Cirrus chips use the same connector for the display, but the displays are not cross-compatible. The backlight works, but that is it.
- I occasionally hit a special internal diagnostics mode whilst testing when the motherboard was out of the machine. I have no clue how I hit that.
What happened next
I found a smashed up XP 4100T on eBay for £17.50. I figured even if it doesn’t work, it would be good for parts. This is what arrived.

The hard drive was missing and there is no RAM upgrade, but… Surprisingly, it booted!
But, there was a problem. The machine was locked with a boot-time password. This is stored in an EPROM, so it doesn’t matter about the state of the battery, I wasn’t going to get it to boot.
Bypassing the password
There are two ways of bypassing the password:
- Pay someone to generate a master password based on the asset tag.
- Physically erase the EPROM.
Of course, I decided option 2 was best. Now, there are a few people who have tried a method that appears to short out the EPROM to erase it. I did not like the idea of this method, and I have a workshop that can work with SMD components. I therefore decided to remove it, erase it and replace it.
After undoing many screws, I got to the motherboard.


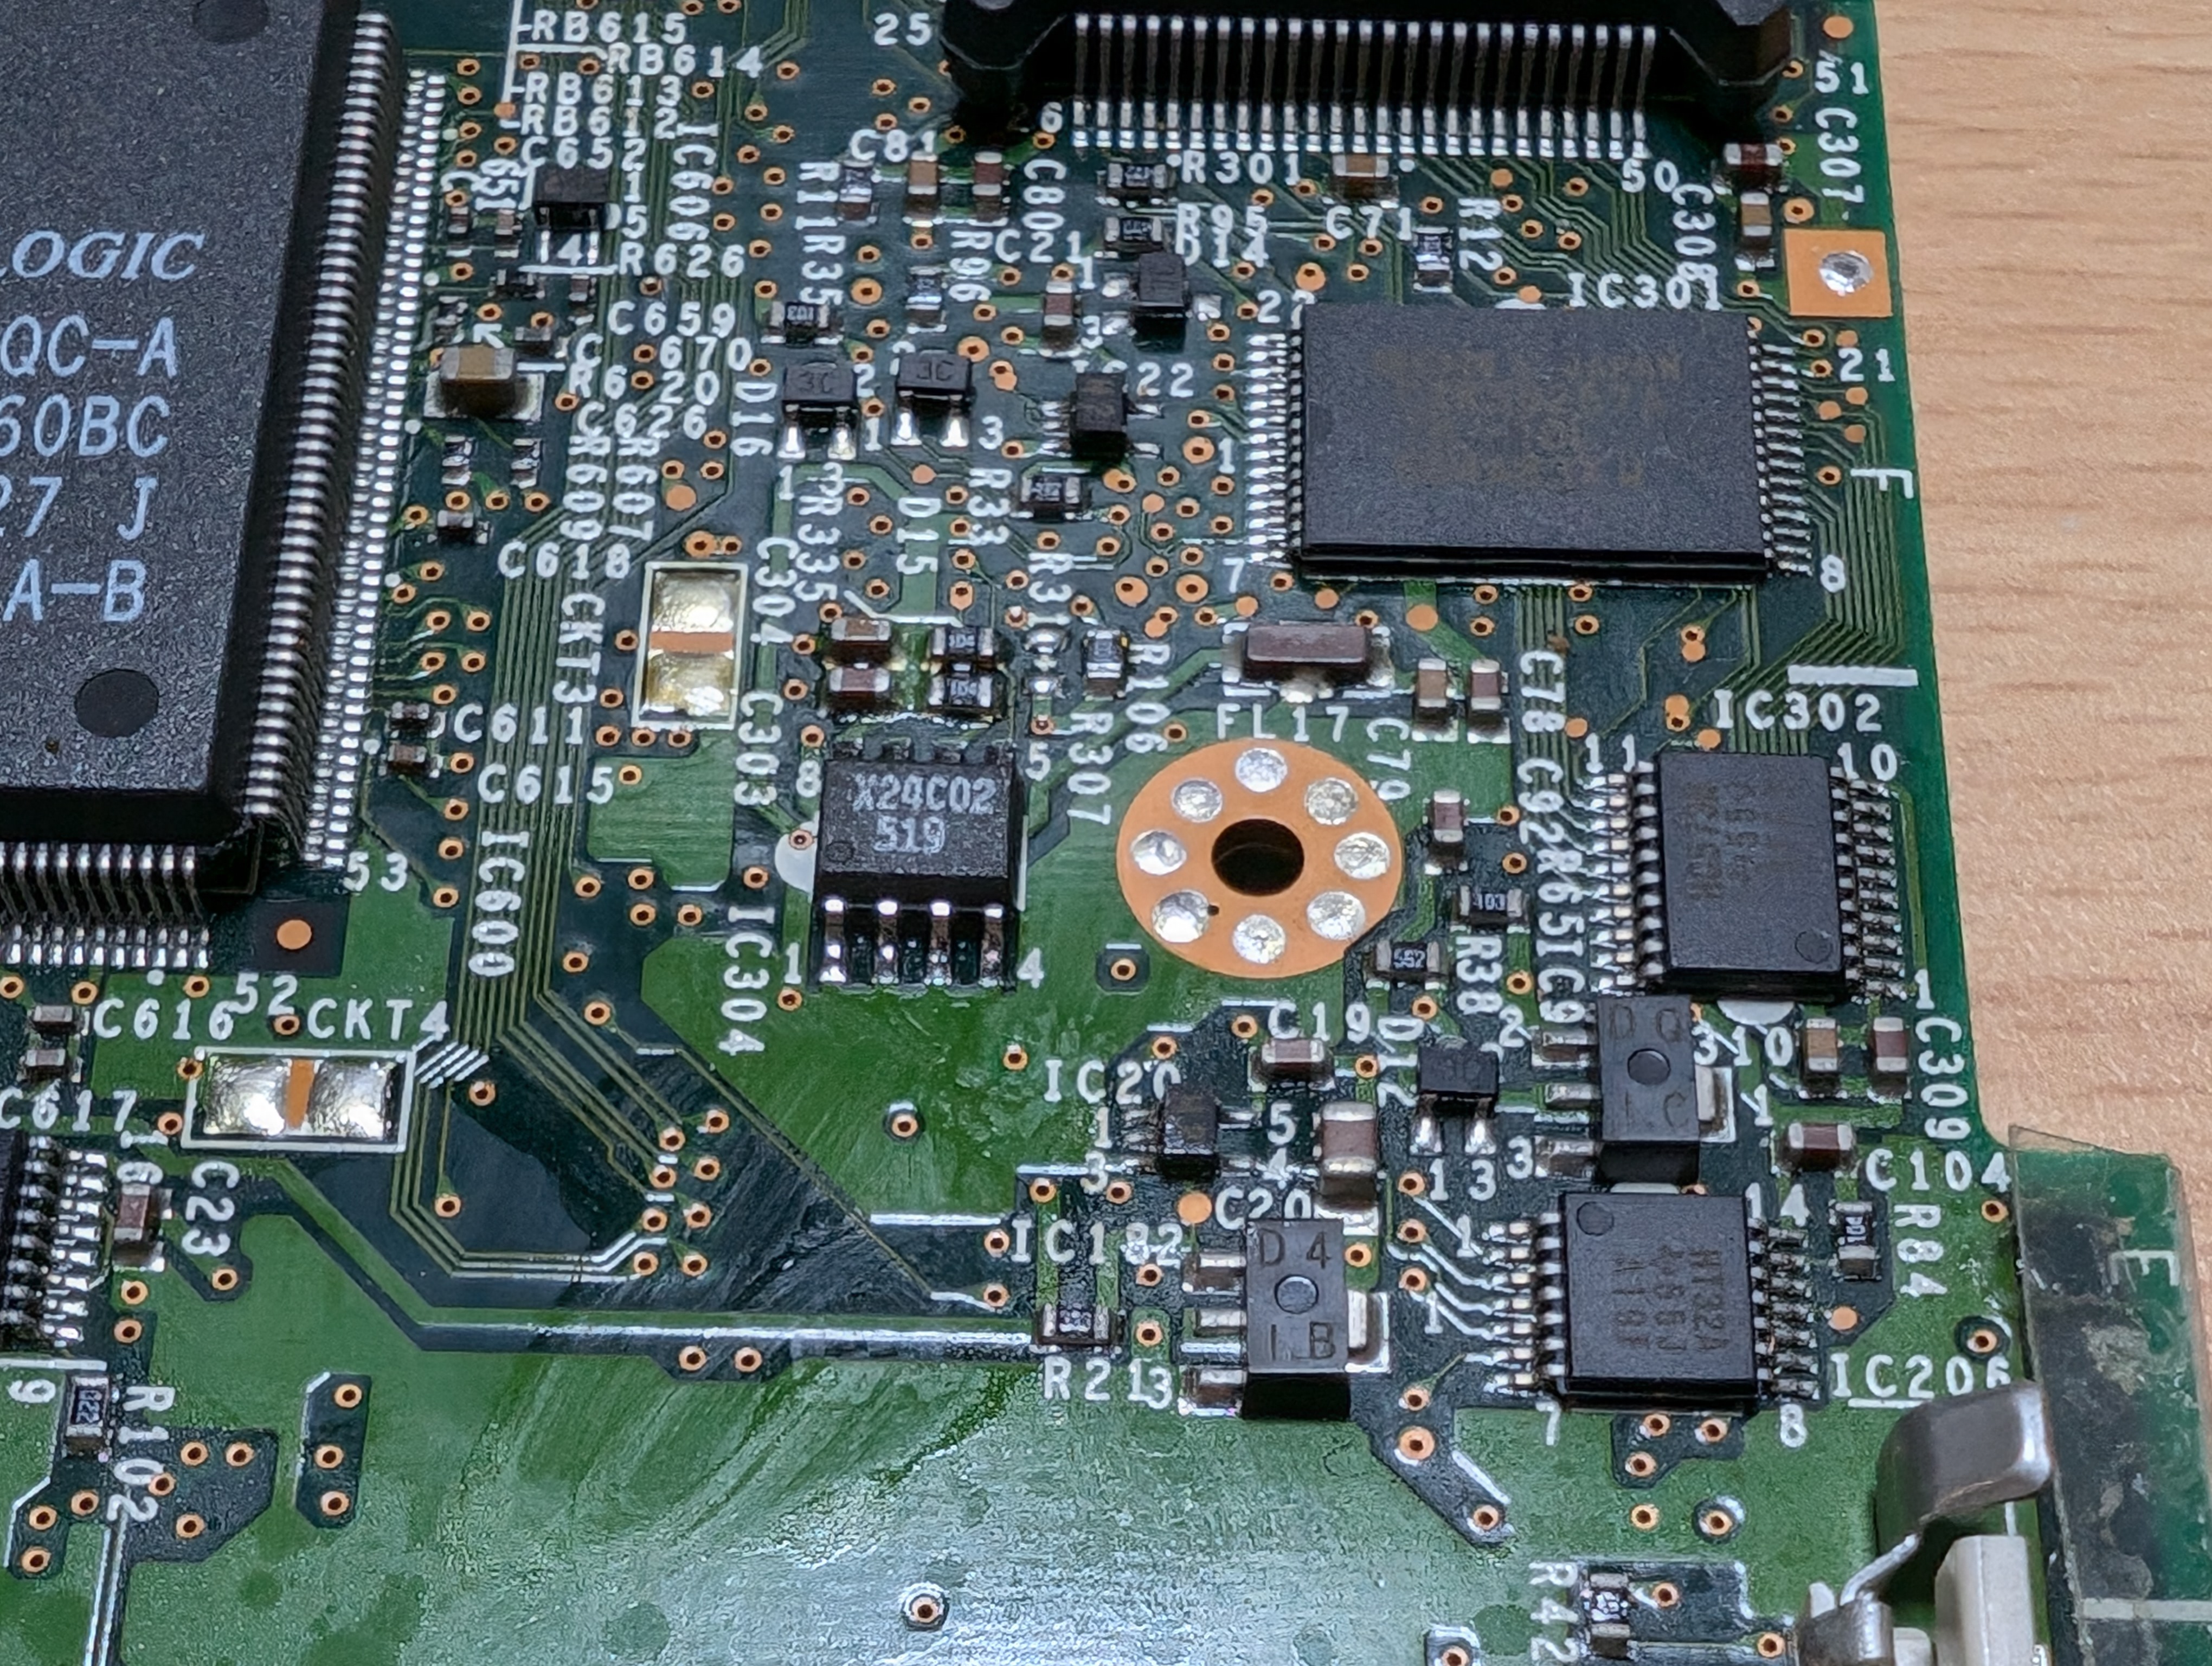
The EPROM is a X24C02, which is located near the bottom of the metal strip on the right side of the motherboard.
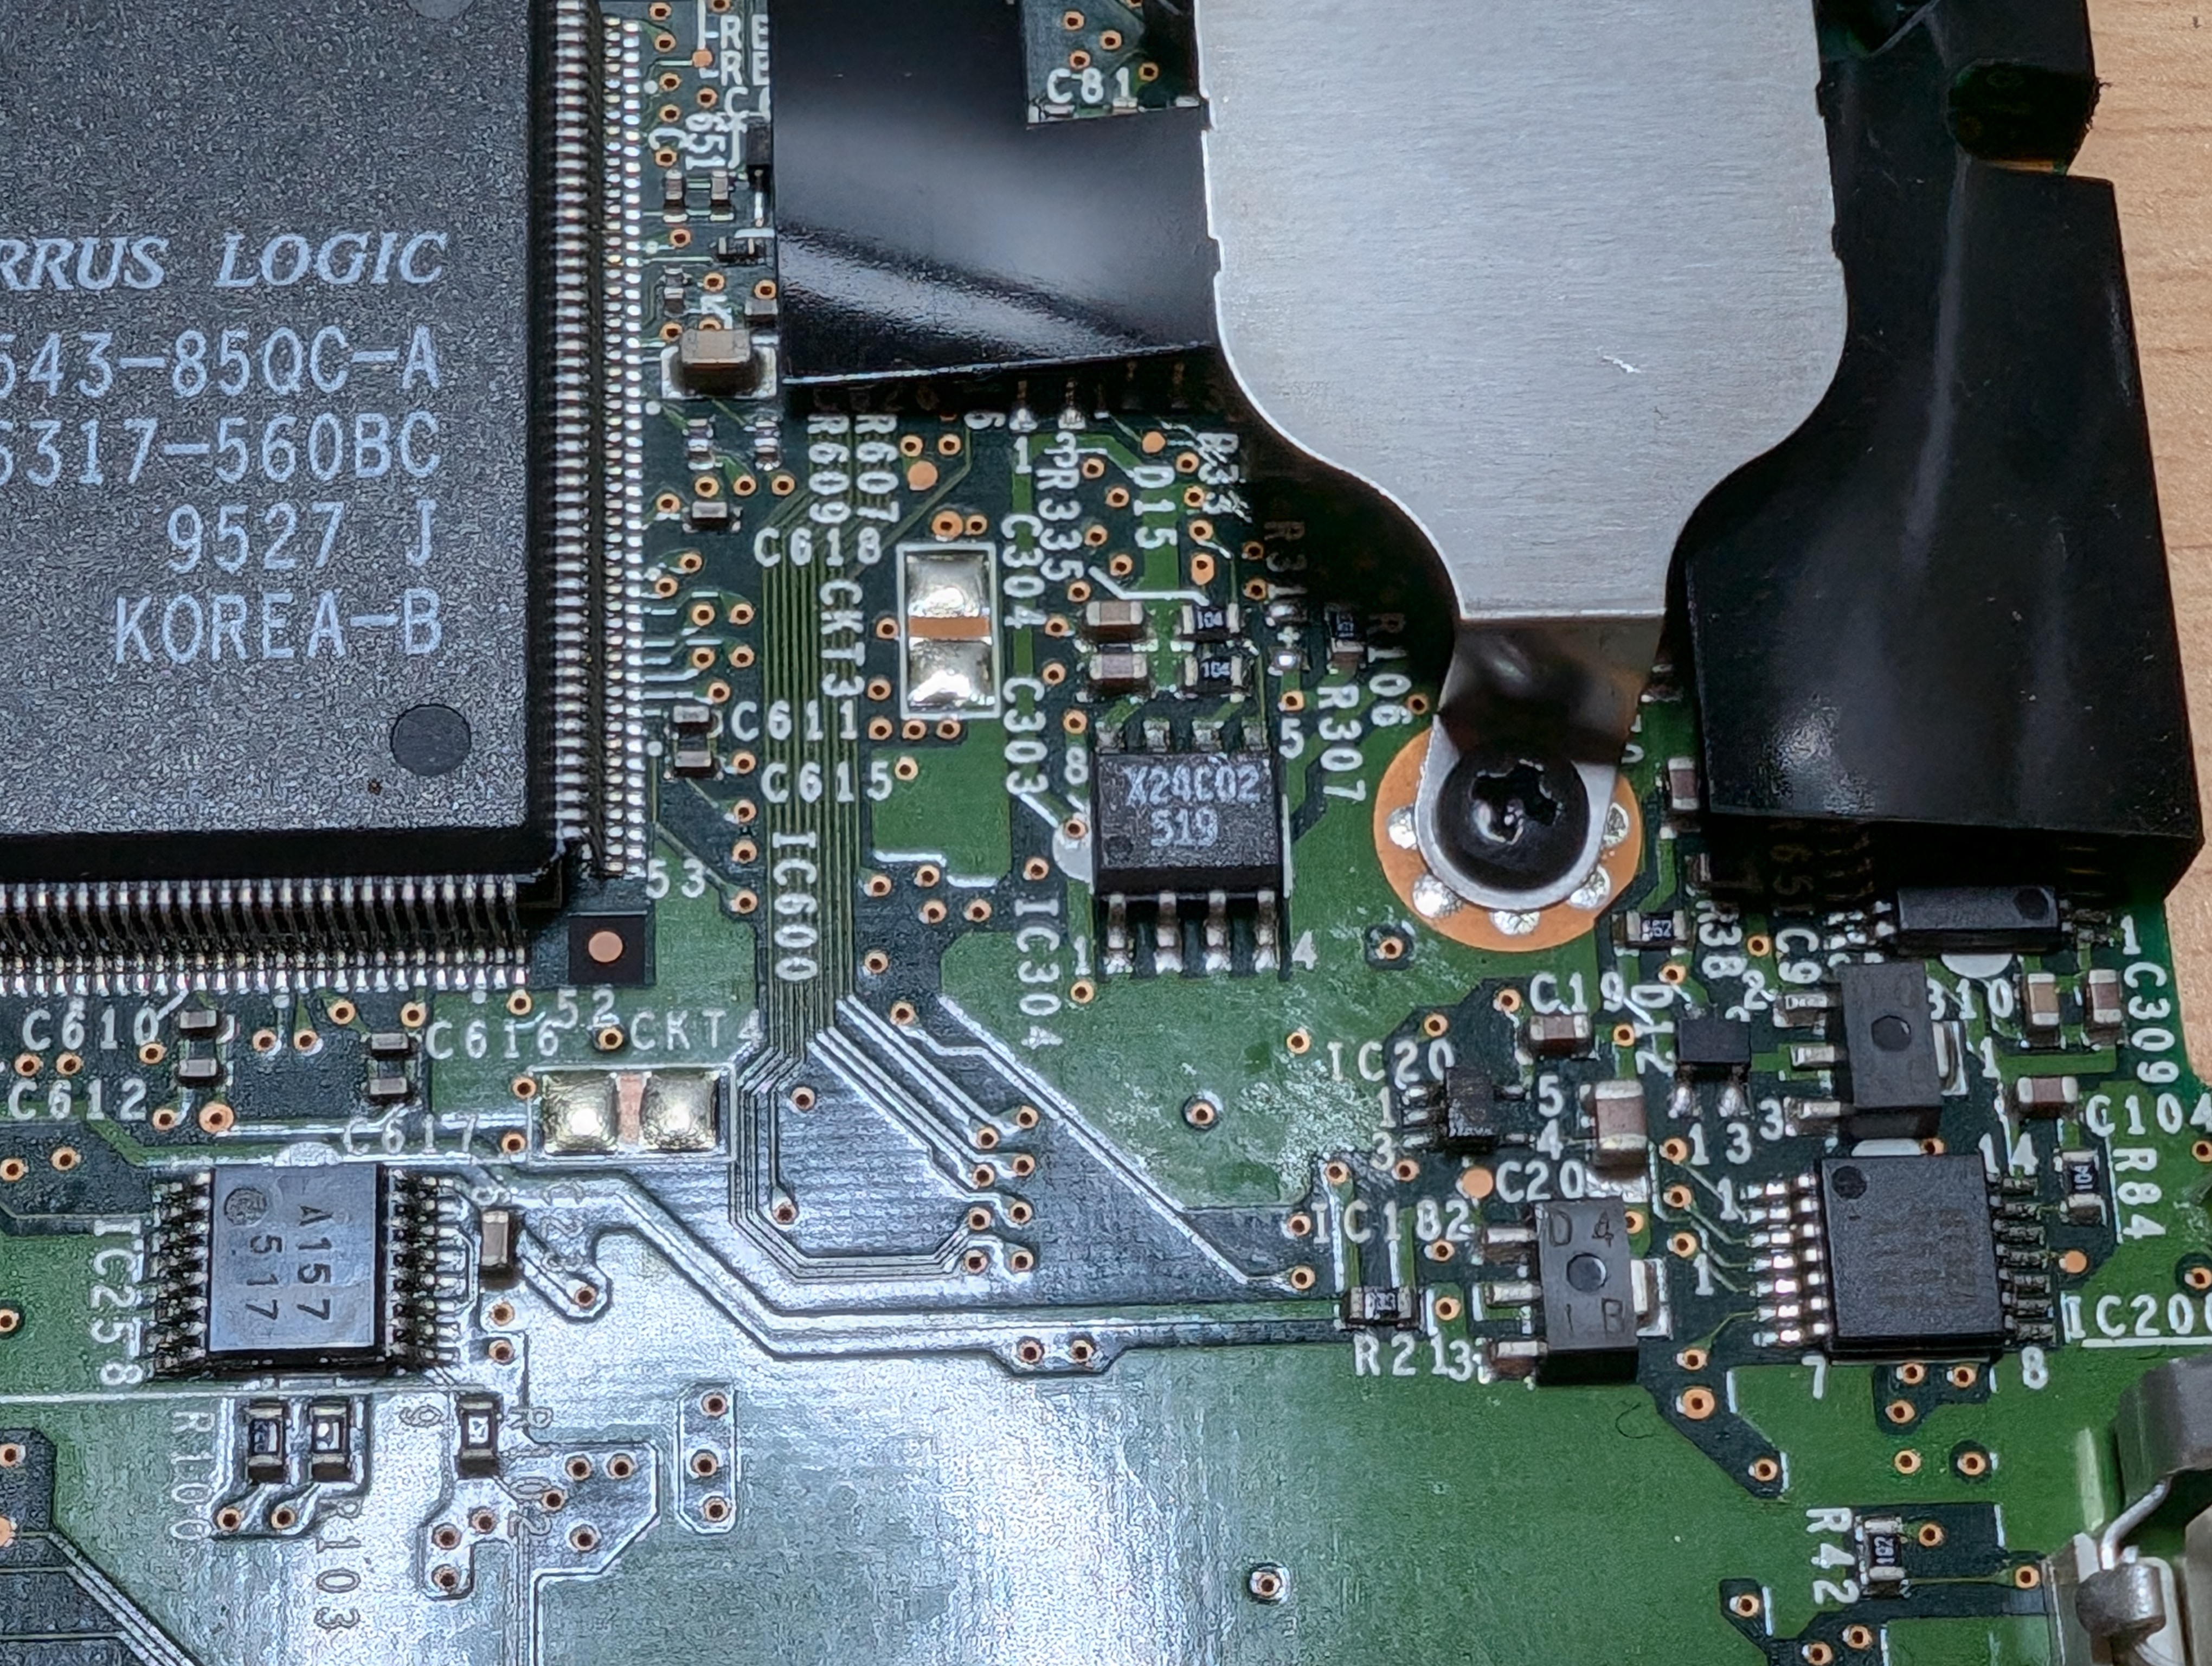
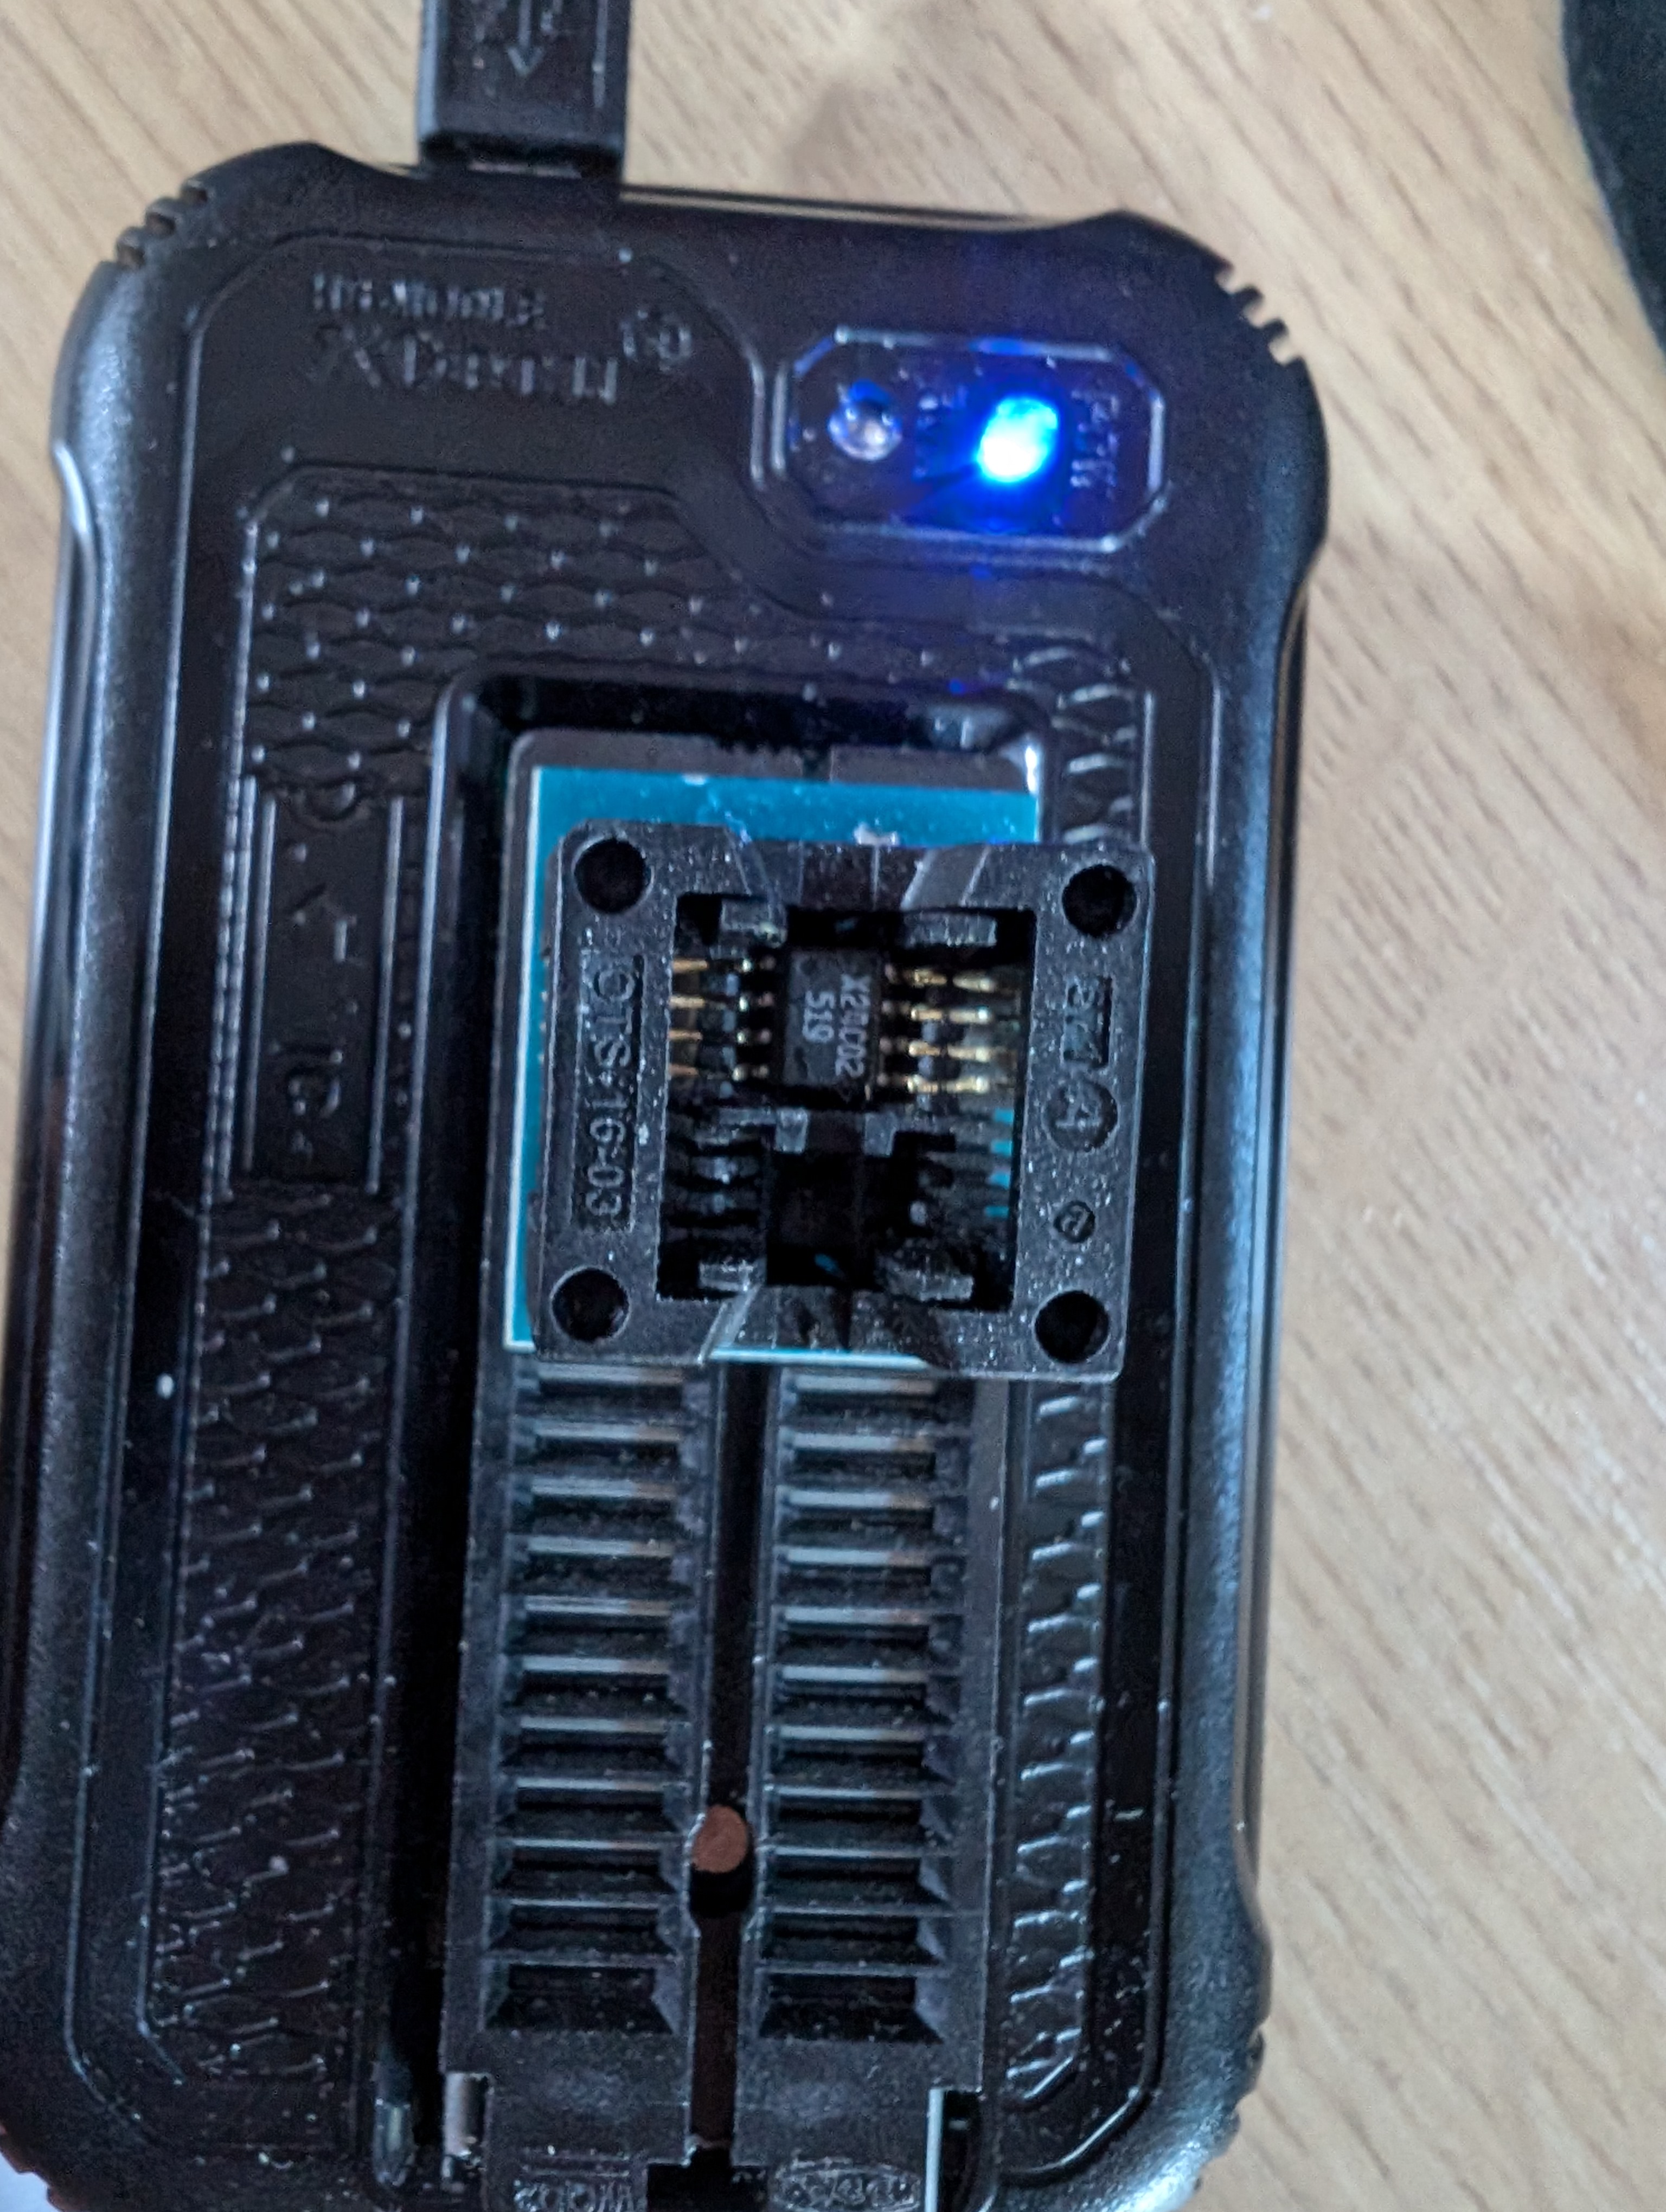
I popped this into an EPROM programmer, backed it up, created a blank file and flashed it back (there is no erase option for this EPROM in the software).


After this, I soldered the chip back into the motherboard.
I then plugged in enough parts to get it to boot, with a Memtest86+ disk in the drive.


A quick note here, make sure you use Memtest86+ 4.00 with 486 machines. A change was made around 4.10 which will cause the machine to reboot immediately.
Anyway, it worked! No password was asked for!
Rebuild time
The rear of the 4100T casing was damaged, it would not hold a display correctly. So, I built the motherboard into the casing of the 475D, which has a tiny crack near the hard drive, but is pretty sturdy.

I could have replaced this strip under the TFT as well with one that doesn’t have this corner broken. But it would have meant a complete disassembly of both displays to swap them. I decided to leave it as-is.

I ended up using:
- Bottom of the 475D
- Top / trackball of the 450C
- Keyboard from the 4100T
- Display & motherboard of the 4100T
- RAM upgrade from the 475D
- Hinge cover and parts from the 450C
- Hard drive caddy from the 450C
Before putting the top and final screws in place, I tested it and configured the BIOS.

All looking good!
Finishing off
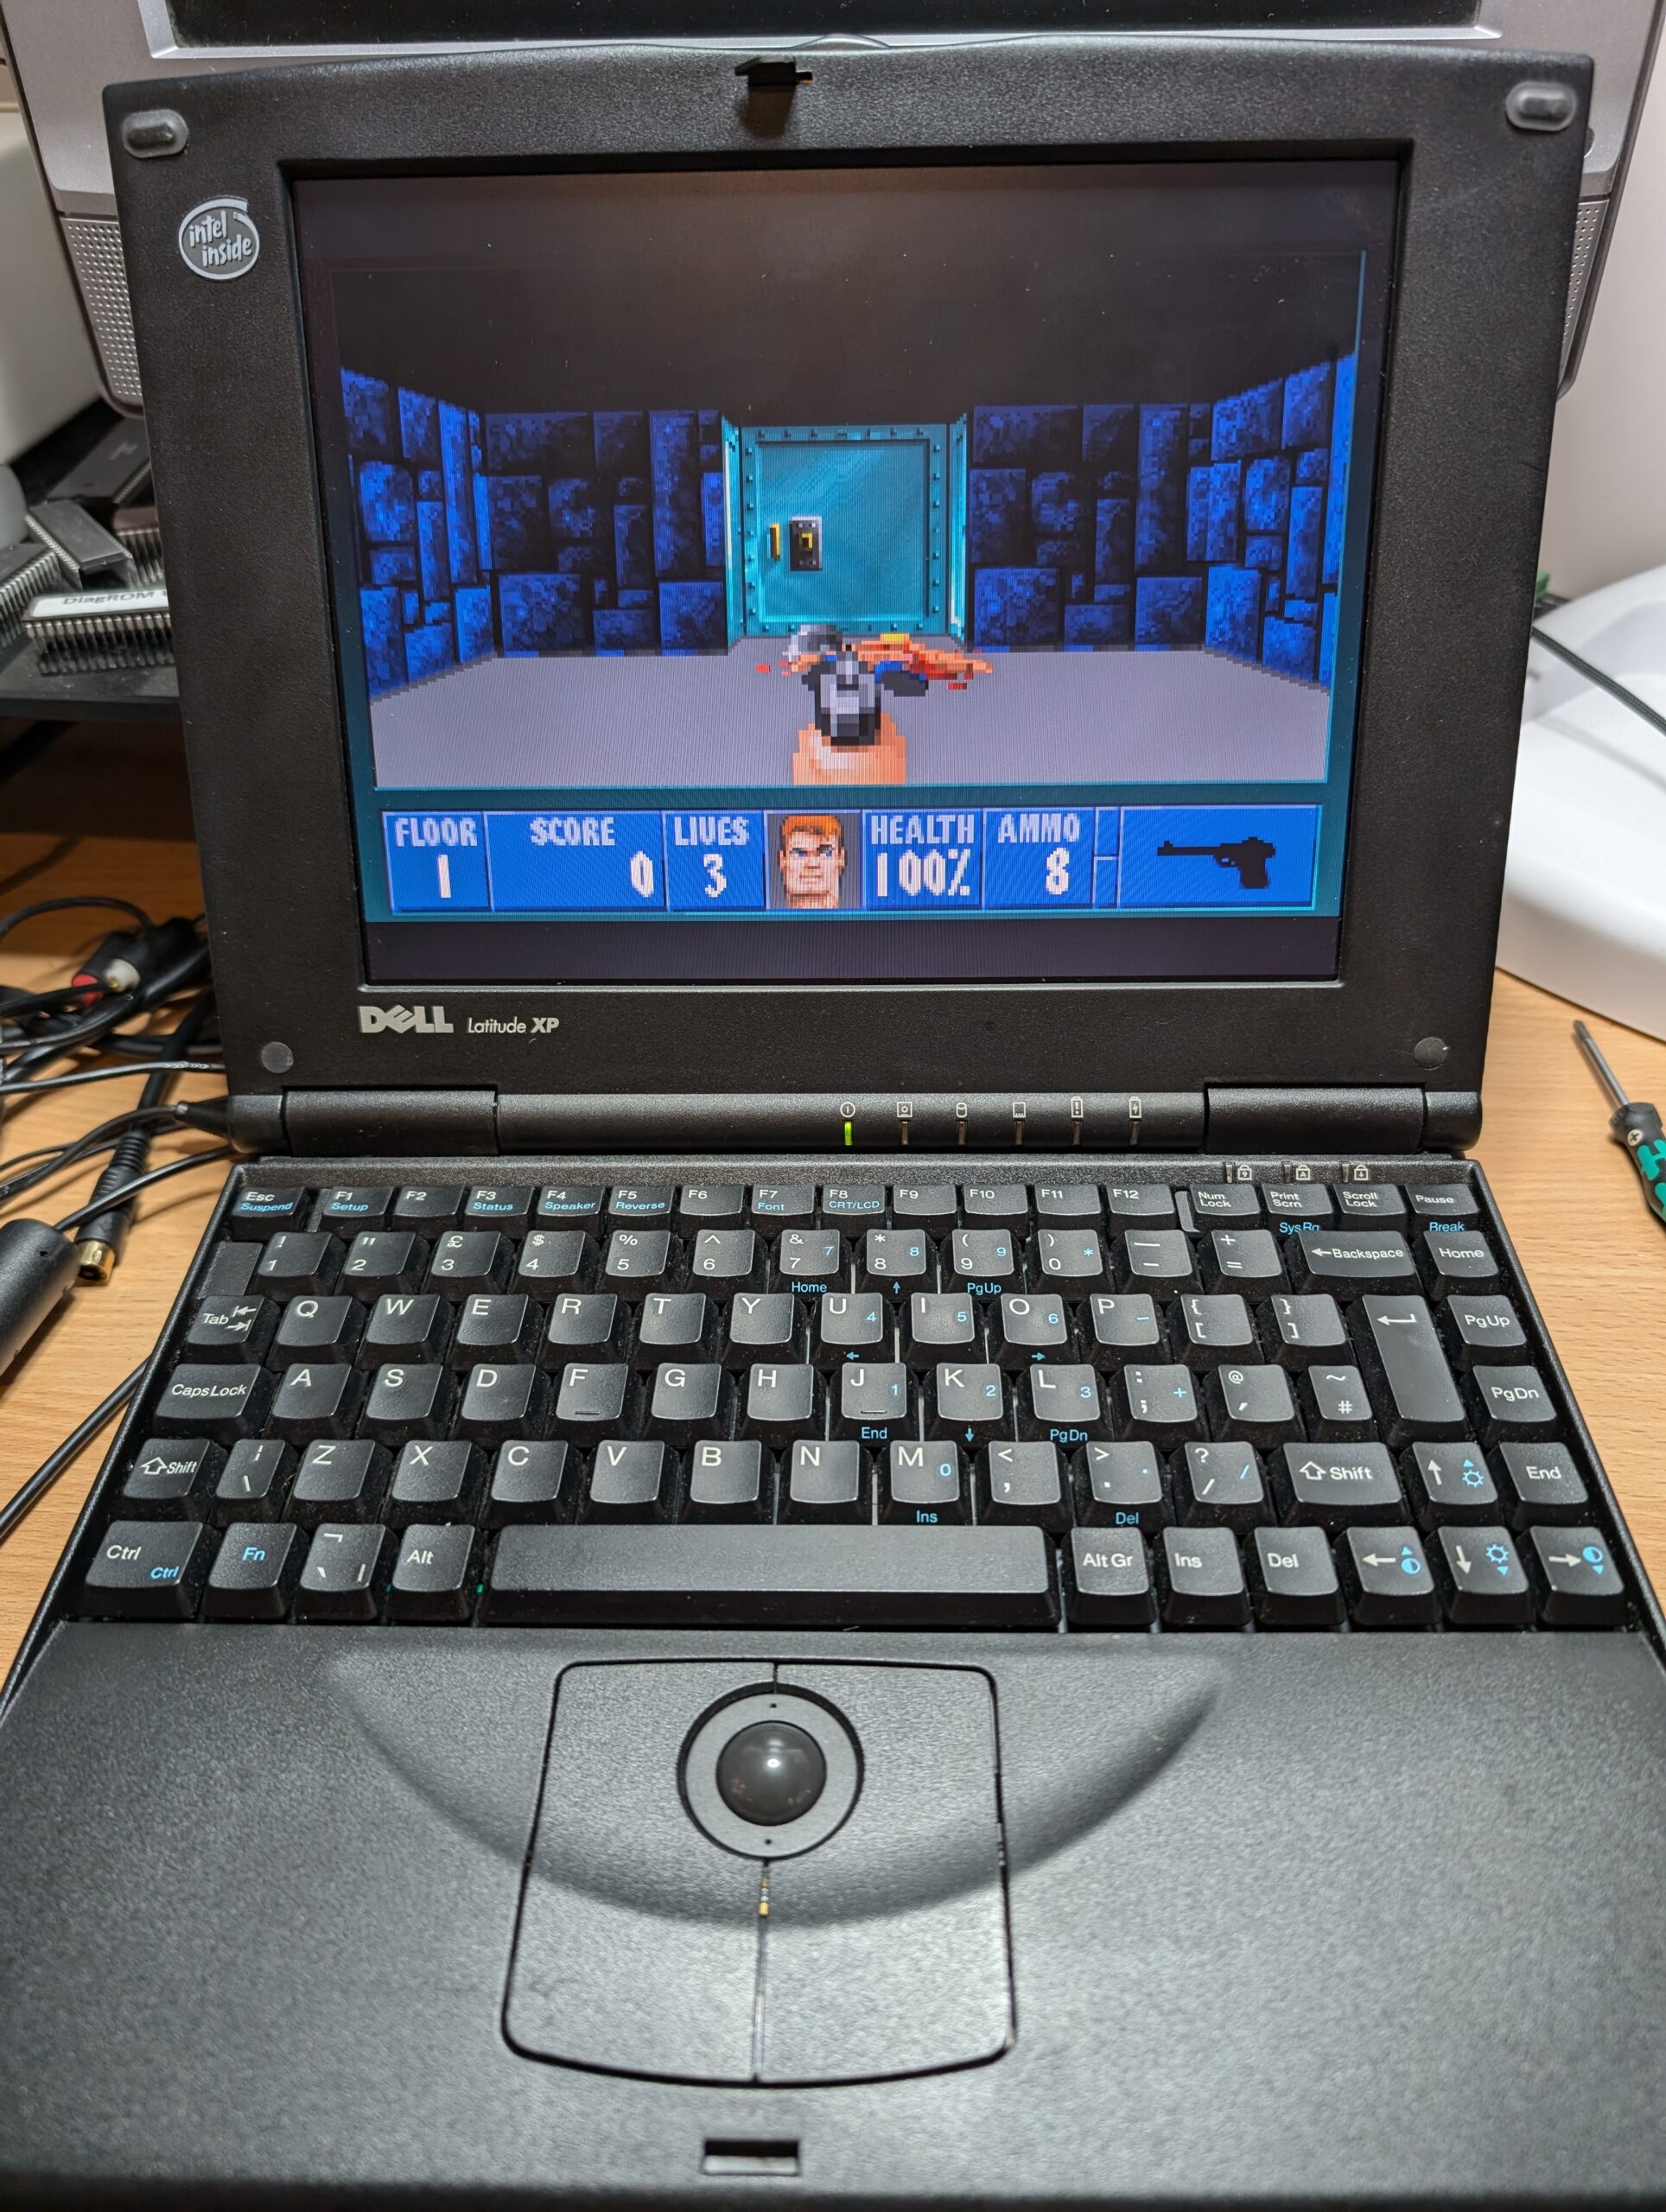
I clipped and screwed the top back into place. Popped in the hard drive caddy and loaded Wolf3D. It is looking much better and no movement blur from the 300ms refresh any more!


This is a before and after with Wolf3D as a comparison.
I might have enough good parts left over to build the 475D too. That is a project for another time.
I have something very cool I want to do with this laptop going forward. I’ll blog about that if I can make it work!
Leave a Reply