

Yesterday I wrote a post on how to wire up and initialise the SSD1351 display with a Raspberry Pi Pico. Today I’m going to delve a little into some routines to display things on the screen. A lot of what I’m covering from here onwards could be easily adapted to work on any graphic display, even a computer.
Getting a Buffer
As discussed in the DMA section of the last post, we are using two buffers. One we are assembling in the CPU whilst the other is being sent to the display via the DMA controller. When we are using the buffers we have a small function to make sure we are grabbing the correct one. The code to do this is as follows:
#define BUFFER_TYPE_DISPLAY 0
#define BUFFER_TYPE_SCROLL 1

// Buffered data to scroll into frame buffer
uint8_t scroll_buffer[HEIGHT * WIDTH * 2] = {0x00};
uint16_t scroll_pos = 0;

static uint8_t *get_buffer(buffer_type type)
{
    // Return the pointer to the current buffer being written to.
    if (type == BUFFER_TYPE_SCROLL)
    {
        return scroll_buffer;
    }
    if (current_buffer == 1)
    {
        return oled_dma_1;
    }
    return oled_dma_2;
}
You’ll notice I have something called a scroll buffer here, which will come into play later. But for now, you can see the current buffer to be edited is being returned.
Displaying an image
In the tools directory of my repository is a combination of a Python and shell script to convert full-colour PNG images to RGB565 header files to be included in the source. These need a minor modification to make them const and to change the variable name before they are put into place.
To display these images we have this function:
typedef struct point_t
{
    uint8_t x;
    uint8_t y;
} point_t;

void ssd1351_load_image(buffer_type type, const uint8_t *img_data, point_t pos, point_t size)
{
    uint8_t *buffer = get_buffer(type);
    uint16_t start_pos = (pos.x * 2) + (pos.y * WIDTH * 2);
    if (size.x == WIDTH)
    {
        memcpy(buffer + start_pos, img_data, WIDTH * size.y * 2);
    }
    else
    {
        for(uint16_t i = 0; i < size.y; i++)
        {
            memcpy(buffer + start_pos + (WIDTH * 2 * i), img_data + (size.x * 2 * i), size.x * 2);
        }
    }
}
As every pixel is two bytes, the position is calculated by the Y position multiplied by the width of the screen, which in turn is multiplied by two. This is then added to the X position which also has to be multiplied by two.
There is a little shortcut here that if the image is the same width as the screen, we can just copy the whole image as-is to the buffer.
Otherwise, we loop over every effective pixel line of the image copying that line over to the desired position on the screen. This means we can effectively have anything up to 128×128 anywhere we want on the screen. There is no safety coded in here, so if something goes out of bounds it will like crash the CPU or at least corrupt something. It also has no concept of what to do if we are drawing something off the right edge of the screen, it will likely wrap it around to the left.
With this basic rendering tool, we can do something like the following:
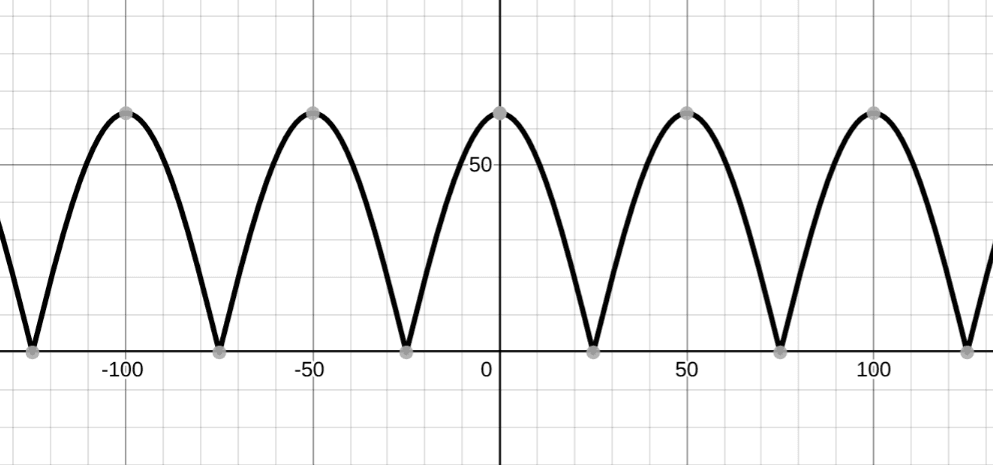
How is this done? Well, I cheated. The ball is made up of 4x 64×64 images and we switch the image used with each frame. On each frame, the X moves by one pixel and a cosine is used to calculate the Y position. We then flip the bottom half of the cosine in a way that will be familiar to anyone who has seen a bridge rectifier before:
The code to do this is as follows:
void ssd1351_clear()
{
    pos_x = 0;
    uint8_t *buffer = get_buffer(BUFFER_TYPE_DISPLAY);
    memset(buffer, 0, sizeof(oled_dma_1));
}

static void boing_ball(int total_frames)
{
    int frame = 0;
    int iter = 0;
    int xpos = 0;
    bool dir = false;
    while(1)
    {
        const char *sprite;
        switch (frame)
        {
            case 0:
                sprite = boing_frame0;
                break;
            case 1:
                sprite = boing_frame1;
                break;
            case 2:
                sprite = boing_frame2;
                break;
            case 3:
                sprite = boing_frame3;
                break;
        }
        int ypos = 64-abs((int)((float)64 * cos((float)iter * 3.6 * M_PI/180.0)));
        ssd1351_clear();
        ssd1351_load_image(BUFFER_TYPE_DISPLAY, sprite, (point_t){xpos, ypos}, (point_t){64, 64});
        ssd1351_refresh();
        sleep_ms(30);
        iter++;
        if (iter == total_frames)
        {
            return;
        }
        if (!dir)
        {
            xpos++;
            if (xpos == 63)
            {
                dir = true;
            }
            frame++;
            if (frame == 4) frame = 0;
        }
        else
        {
            xpos--;
            if (xpos == 0)
            {
                dir = false;
            }
            frame--;
            if (frame == -1) frame = 3;
        }
    }
}
We have a 30ms sleep in there, otherwise, the animation runs way too fast. There is a direction change when the edges are hit to make the X move in the opposite direction as well as rotate the ball images in the opposite direction to give the appearance of the ball rotating the opposite way around.
Fade Effect
I quickly knocked up an effect where you can fade in and out, essentially all this does is lower and raise the contrast of the RGB. It should be noted that even at zero the image is still dimly visible so you could have a screen-off effect at zero or do like I do and transition quickly when at zero and let the brain fill in thinking it has dimmed to fully blank.
void ssd1351_set_contrast(uint8_t value)
{
    uint8_t param[3];
    dma_channel_wait_for_finish_blocking(dma_tx);
    sleep_ms(1);
    param[0] = param[1] = param[2] = value;
    ssd1351_write(SSD_CMD_CONTRASTABC, param, 3);
}

static void fade_out()
{
    for (int16_t i = 255; i >= 0; i--)
    {
        sleep_ms(2);
        ssd1351_set_contrast(i);
    }
}

static void fade_in()
{
    for (uint16_t i = 0; i <= 255; i++)
    {
        sleep_ms(2);
        ssd1351_set_contrast(i);
    }
}
It is worth noting that we wait for the DMA to finish when doing this, otherwise we will be sending commands in the middle of the DMA trying to send data to the display.
You can see this effect in-use in the final video of this post.
Unbuffered Scrolling
There are two types of scrolling I have implemented, the first is a very simple unbuffered scroll routine. This shifts columns of pixels from the left edge and puts them on the right edge:
void ssd1351_scroll_unbuffered(uint8_t amount)
{
    amount *= 2; // 2 bytes per px.
    uint8_t copy[amount];
    uint8_t *buffer = get_buffer(BUFFER_TYPE_DISPLAY);
    for (uint8_t i = 0; i < HEIGHT; i++)
    {
        memcpy(copy, buffer + (WIDTH*2*i), amount);
        memmove(buffer + (WIDTH*2*i), buffer + (WIDTH*2*i) + amount, (WIDTH*2)-amount);
        memcpy(buffer + (WIDTH*2*i) + (WIDTH*2) - amount, copy, amount);
    }
}
So, say we wanted to scroll by 2 pixels, this will create a buffer of 4 bytes, for each row of pixels it will copy the first 4 bytes into the buffer, move that row of data by 4 bytes and then re-append from the temporary buffer on the end. We could conceivably clear the screen with this scrolling routine by removing the memcpy() calls and just using memmove().
Buffered Scrolling
This is why we have the scroll buffer in the first code snippet of this post. Basically, instead of rendering something on the next screen buffer, we render it to the scroll buffer. Then when we are ready we scroll the current contents off the screen whilst scrolling on the contents of the new buffer. This routine has been coded to work in any direction:
void ssd1351_scroll_buffered(uint8_t amount, scroll_direction direction)
{
    uint8_t *buffer = get_buffer(BUFFER_TYPE_DISPLAY);
    if (direction == SCROLL_LEFT)
    {
        amount *= 2; // 2 bytes per px.
        for (uint8_t i = 0; i < HEIGHT; i++)
        {
            memmove(buffer + (WIDTH*2*i), buffer + (WIDTH*2*i) + amount, (WIDTH*2)-amount);
            memcpy(buffer + (WIDTH*2*i) - amount, scroll_buffer + scroll_pos + (WIDTH*2*i), amount);
        }
    }
    else if (direction == SCROLL_RIGHT)
    {
        amount *= 2; // 2 bytes per px.
        for (uint8_t i = 0; i < HEIGHT; i++)
        {
            memmove(buffer + (WIDTH*2*i) + amount, buffer + (WIDTH*2*i), (WIDTH*2)-amount);
            memcpy(buffer + (WIDTH*2*i), scroll_buffer + (WIDTH*2) - scroll_pos + (WIDTH*2*i) - amount, amount);
        }
    }
    else if (direction == SCROLL_UP)
    {
        memmove(buffer, buffer + (WIDTH*2*amount), WIDTH*2*(HEIGHT-amount));
        memcpy(buffer + (WIDTH*2*(HEIGHT-amount)), scroll_buffer + (WIDTH*2*scroll_pos), WIDTH*2*amount);
    }
    else // SCROLL_DOWN
    {
        memmove(buffer + (WIDTH*2*amount), buffer, WIDTH*2*(HEIGHT-amount));
        memcpy(buffer, scroll_buffer + (WIDTH*2*(HEIGHT-scroll_pos-1)), WIDTH*2*amount);
    }

    scroll_pos += amount;
}
You can see here that we are essentially doing some simple memmove() calls to move the current screen buffer contents around, and then a call to memcpy() which will copy the contents from the scroll buffer over. We keep the scroll buffer static during this time to save CPU cycles, which means we need to use the global scroll_pos variable to keep track of the position. This also means the buffer needs to be reset before each use with:
void ssd1351_setup_scroll_buffered()
{
    scroll_pos = 0;
    memset(scroll_buffer, '\0', sizeof(scroll_buffer));
}
You can see in this demo the scroll buffer in use:
Next Time
Now we have image display and scrolling out of the way, I’ll cover rendering fonts.
Leave a Reply