
I mostly edit my Verilog files for basic Xilinx CPLD devices in vim, so it is a pain to launch the entire Xilinx IDE just to compile the thing. After doing a bit of research I managed to figure out how to compile from the command line too.
You need three things to make this method work, the Verilog file, the UCF file and a build script below. The Verilog should be named PROJECT.v and the UCF file PROJECT.ucf (where “PROJECT” is your project name). Here is the script which I save as build.sh:
#!/bin/bash
PROJECT=FLASH_KICKSTART
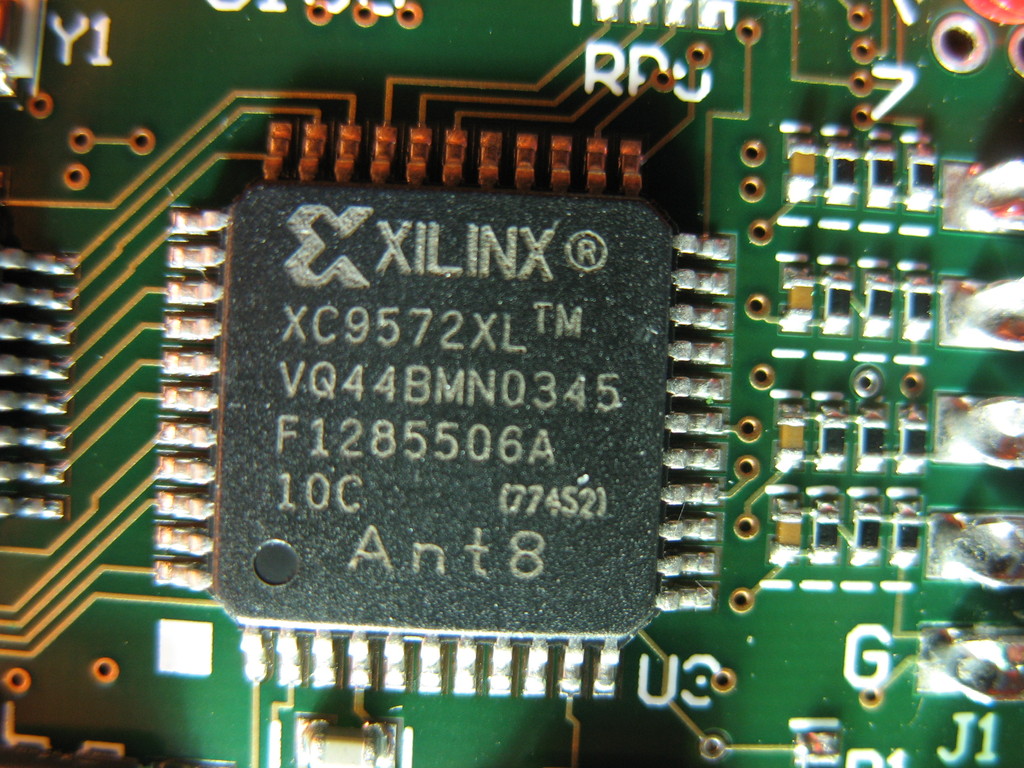
DEVICE=xc9572xl
PART=XC9572XL-10-VQ44
cat <<! >$PROJECT.xst
run
-ifn $PROJECT.v
-ifmt verilog
-ofn $PROJECT.ngc
-p $DEVICE
!
rm -rf xst/work
xst -ifn $PROJECT.xst
RESULT=$?
if [ $RESULT -ne 0 ]; then
exit $RESULT
fi
ngdbuild -uc $PROJECT.ucf $PROJECT.ngc -p $DEVICE
cpldfit -p $PART -ofmt vhdl -optimize speed $PROJECT
hprep6 -s IEEE1149 -n $PROJECT -i $PROJECT
hprep6 -s IEEE1532 -n $PROJECT -i $PROJECT
The last line of this is only useful if you need the .isc file. If you are just flashing the Xilinx IC then you only probably only need the .jed created by the first hprep6.
There are three variables you need to set here:
PROJECTis the name of the project that your files are named after.DEVICEis the device family name, in my case that is “xc9572xl”PARTis the target part number, you can usually find exact names in/opt/Xilinx/14.7/ISE_DS/ISE/and the “chp” files in the directory for the larger device family (in thexc9500xldirectory in my case)
You should then set your PATH environment variable to include the Xilinx binary directory. In my case it is /opt/Xilinx/14.7/ISE_DS/ISE/bin/lin64.
That’s it! Run the script and you will get a lot of console output, so it might be useful to direct to the output to a file if you want to analyse it. Lots of files will be generated including the all important .jed file for your favourite JTAG programmer.


Leave a comment